






Learning how to set up a home recording studio opens up endless creative possibilities. Mastering the art of recording at home enables musicians and producers to capture professional-quality sound in their own space, rivaling that of a professional recording studio. The freedom to record whenever inspiration strikes makes home studios an increasingly popular choice for both beginners and experienced artists.
Building a functional home recording studio requires a computer, a digital audio workstation (DAW), an audio interface, microphones, monitors, and proper acoustic treatment, with costs ranging from $500 to $3000 depending on the quality of the equipment. A basic home studio setup can be achieved with just the essential components, while more advanced setups might include multiple microphones, outboard gear, and comprehensive room treatment.
Creating music in a well-designed home recording space gives artists complete control over their production process. Whether you're recording vocals or instruments, or producing electronic music, having the right equipment and setup lets you achieve professional results without the expense of commercial studio time.
Key Takeaways / TL;DR
- A basic home studio can be set up with minimal equipment and a modest budget. Installing DIY acoustic panels can significantly improve recording quality in a small room.
- Proper acoustic treatment significantly improves recording quality.
- Digital audio workstations and interfaces form the core of modern home recording.

1
Home Recording Studio Setup Fundamentals
Creating a functional home recording studio requires careful consideration of equipment, intended use, and available resources. A strategic approach to studio design, tailored to your specific needs, will yield better results than buying gear impulsively.
Understanding the Basic Components of a Home Studio
A Digital Audio Workstation (DAW) forms the core of any recording setup. This software handles recording, editing, and mixing tasks on your computer.
An audio interface connects microphones and instruments to your computer, converting analog signals to digital data. Quality interfaces ensure clean recordings with minimal latency.
Studio monitors and acoustic treatment are essential for accurate sound reproduction. Unlike consumer speakers, studio monitors provide a flat frequency response for precise mixing.
Essential equipment includes:
- Microphones (dynamic or condenser)
- Cables and stands
- Audio interface
- DAW software
- Studio monitors
- Headphones
Identifying Your Recording Goals and Genre
Different genres demand different recording approaches. Electronic music producers might prioritize a keyboard controller and synthesizers for melodic work. Using a keyboard controller alongside a MIDI controller or pad controller can also streamline beat-making and sample triggering in your home recording studio.
Professional aspirations require higher-quality equipment than hobby recording. Music producers working with clients need reliable gear that meets industry standards.
Consider these factors:
- Primary instruments to record
- Number of simultaneous tracks needed
- Client expectations
- Genre-specific requirements
Determining Your Budget and Space Constraints
Setting up a home studio can cost anywhere from $500 to $10,000+. Investing in essential home studio gear lets you start with basic components and upgrade gradually as your skills develop.
Room size affects equipment choices. Small spaces might require nearfield monitors and creative acoustic solutions. These speakers are specifically designed for the layout of a typical home recording studio.
Budget allocation priorities:
- Computer and DAW
- Audio interface
- Monitoring solution
- Microphones
- Acoustic treatment
Choose a quiet room away from external noise sources. Consider portable acoustic panels for temporary setups in limited spaces.

2
Planning Your Home Recording Studio Setup
A well-planned home studio maximizes your creative potential and recording quality while making efficient use of available space and budget.
Defining Your Recording Needs and Equipment List
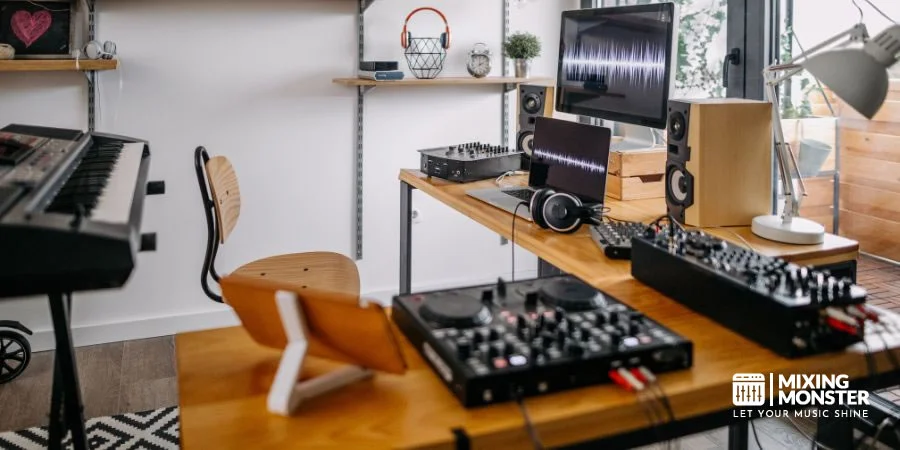
Start with a detailed assessment of your recording goals. Make a list of essential equipment based on your primary recording tasks:
- Audio interface
- Microphones for your instruments
- Studio monitors
- MIDI keyboard
- Computer workstation
- Digital Audio Workstation (DAW)
Setting up a home studio requires careful planning to achieve professional results. Create a realistic budget that allocates more funds to critical components, such as monitors and microphones.
Choosing the Right Room for Your Studio
Select a room with minimal outside noise interference. A spare bedroom makes an ideal home recording space due to its manageable size and existing electrical infrastructure.
Key room considerations:
- Square footage (minimum 100 sq ft)
- Natural light availability
- Power outlet locations
- Distance from noise sources
- Ceiling height (minimum 8 ft)
Avoid rooms with parallel walls if possible, as they create unwanted sound reflections.
Discover Best Audio Gear & Equipment


Creating a Floor Plan and Optimizing Workflow
Design an efficient layout that promotes seamless workflow. Position your recording workstation where you can easily reach all equipment.
If you have the space, you might even designate a separate live room for recording and a control room for mixing. Create designated zones for:
- Recording area
- Mixing position
- Storage solutions
- Cable management
- Equipment racks
Place monitors and listening position in an equilateral triangle formation for optimal sound monitoring. Leave adequate space around equipment for ventilation and maintenance access.
3
Essential Pieces of Equipment for Your Home Recording Studio
A proper home studio setup requires high-quality gear that works together seamlessly to capture professional-level recordings. The right combination of digital and analog equipment forms the foundation of any successful recording space.
Computer and Digital Audio Workstation (DAW) Software
A powerful computer serves as the heart of a home recording studio. Macs and PCs with at least 16GB RAM and multi-core processors handle complex recording tasks effectively. Apple's MacBook Pro models are popular choices due to their stability and performance.
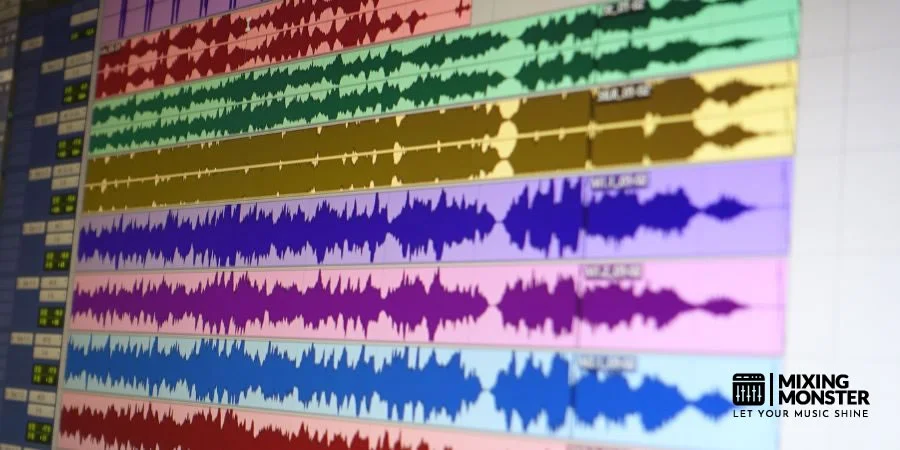
A DAW is crucial software for recording, editing, and mixing audio. For those just starting, GarageBand offers a free, accessible platform. Many beginners choose PreSonus Studio because it offers a seamless workflow between recording and production. Popular options also include:
- Pro Tools - Industry standard for professional studios
- Logic Pro - Mac-exclusive with excellent virtual instruments
- Ableton Live - Ideal for electronic music production
- FL Studio - Popular for beat-making and hip-hop
- Reaper - Budget-friendly option with professional features
- GarageBand - A user-friendly entry point for Mac users recording at home
- Cubase - A versatile choice favored for its advanced MIDI features and composition tools
Audio Interfaces and Preamps
Audio interfaces convert analog signals to digital and provide essential connectivity for microphones and instruments. Quality preamps in the interface boost mic signals cleanly and usually provide phantom power for a condenser microphone.
Popular entry-level options include the Focusrite Scarlett 2i2 or the Audient iD series for their high-quality preamps. The Focusrite Scarlett 2i2 is especially known for its ease of use and reliability. Professionals often opt for a Universal Audio Apollo or Apollo Twin for premium conversion and built-in processing.
Key features to consider:
- Input/output count
- Preamp quality
- Sample rate and bit depth
- Low-latency monitoring
- USB or Thunderbolt connectivity
Your Song Mixed & Mastered By Mixing Monster


Studio Monitors and Headphones
Professional monitoring ensures accurate sound representation. High-quality nearfield monitors, such as the KRK Rokit 5, should sit at ear level in an acoustically treated space. Proper monitor isolation is key to preventing desk vibrations from coloring your sound. Using isolation pads or specialized stands under your speakers helps decouple them from your desk, resulting in clearer audio.
Monitor considerations:
- Active vs. Passive: Active monitors include built-in amplification
- Size: 5-8 inch woofers suit most home studios
- Frequency response: Flat response provides accurate mixing
Quality headphones complement monitors. Choose between:
- Closed-back: Better isolation for recording
- Open-back: More natural sound for mixing
Microphones for Recording Vocals and Instruments
Different recording scenarios require specific microphone types. A condenser microphone is essential for capturing the detailed nuances of vocals. Many producers find that a large-diaphragm condenser mic provides the most professional vocal character.
Conversely, a dynamic microphone is better suited to high-volume sources such as loud amplifiers. Owning a versatile dynamic mic ensures you can capture powerful sounds without distortion.
Recording at home often requires a mix of both types to handle different sound sources. A ribbon microphone offers a warm, vintage character for electric guitars. While delicate, it provides a unique sonic texture for your home recording studio.
The Shure SM57 and Rode NT1 represent industry standards for versatile recording. The Shure SM57 is particularly famous for its performance on snare drums and guitar cabs. Many creators rely on the SM7 for a classic broadcast sound or the SM58 for its legendary durability. Beginners might also consider the Blue Yeti for its simple USB connectivity.
Other popular choices for a condenser microphone include the Audio-Technica AT2020 and the Rode NT1-A. The Audio-Technica AT2020 is a popular budget-friendly condenser microphone. The Rode NT1-A is widely recognized for its exceptionally low noise floor and clear sound.
Essential microphone types:
- Large-diaphragm condensers: Vocal recording
- Dynamic mics: Instruments and loud sources
- Small-diaphragm condensers: Acoustic instruments
Accessories enhance recording quality:
- A pop filter for vocal recording to reduce plosives; using a pop filter is essential for any sensitive condenser microphone
- A reliable mic stand and quality cables. Most engineers prefer a heavy-duty mic stand to prevent expensive microphones from tipping over.
- A boom stand for flexible positioning. A sturdy boom stand is especially useful when recording acoustic guitar or placing overheads.
- A shock mount. Using a shock mount further isolates the microphone from floor vibrations and mechanical noise.

4
Acoustic Treatment for Your Home Studio
Proper acoustic treatment transforms your recording space from an ordinary room into a professional studio environment. Strategic placement of sound absorption and diffusion materials creates an accurate monitoring environment. Popular brands like Auralex offer specialized kits that make it easy to treat a room without professional construction.
Understanding Room Acoustics and Sound Absorption
Sound waves bounce off hard surfaces, creating reflections that distort your perception of audio. These reflections can make mixing decisions difficult and affect recording quality.
Standing waves and room modes occur at specific frequencies based on your room dimensions. These acoustic phenomena artificially boost or cut certain frequencies. You can use Room EQ Wizard to analyze your space and find the best locations for treatment.
Early reflections from walls and ceiling affect stereo imaging and frequency response. The first step is to identify these reflection points using the mirror technique: sit in your mixing position and have someone move a mirror along the walls. Any spot where you can see your monitors needs treatment.
DIY Acoustic Panels and Bass Traps
Bass traps are essential for controlling low-frequency build-up in corners and walls. Build effective bass traps using:
- Rigid fiberglass or mineral wool (4-6 inches thick)
- Wooden frames
- Breathable fabric covering
Create acoustic panels for mid and high frequencies:
- 2-inch thick acoustic insulation
- Simple wooden frame construction
- Mounting brackets for wall placement
Position bass traps in room corners first, as this provides maximum low-frequency absorption. Place acoustic panels at first- and early-reflection points on side walls and the ceiling to improve stereo imaging.
Related Articles
Soundproofing Your Recording Space
True soundproofing requires structural changes to walls, floors, and ceilings. Focus on sealing air gaps around doors and windows with weatherstripping and door sweeps.
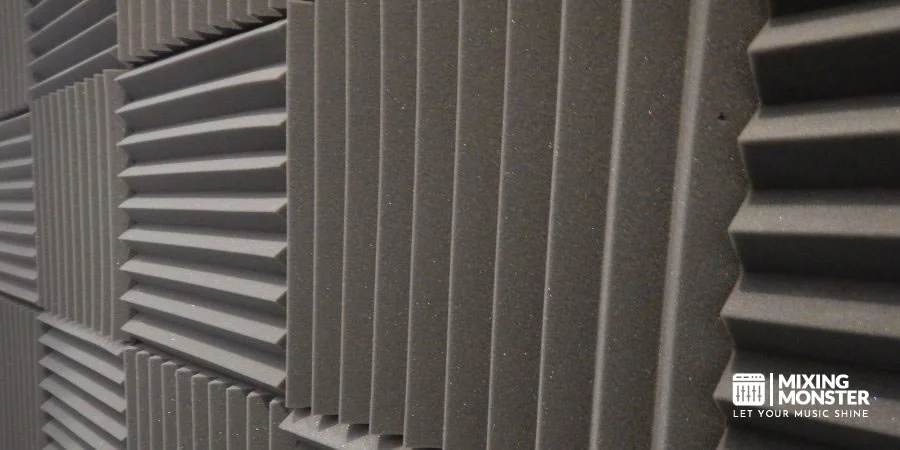
Add mass to walls with mass-loaded vinyl for better sound isolation. You can also use acoustic foam to target specific high-frequency reflections in your room. Improving sound isolation ensures your soundproofing effectively keeps outside noise out of your recordings.
Consider building a room-within-a-room for serious sound isolation:
- Double walls with an air gap
- Floating floor construction
- Isolated ceiling with resilient channels
Use dense materials and avoid rigid connections between inner and outer walls to minimize sound transfer. If space is limited, a portable isolation booth can help reduce noise in vocal recordings.

5
Setting Up Your Recording Gear
A properly set up recording equipment maximizes sound quality and workflow efficiency while creating a comfortable working environment. The strategic placement and connection of gear form the foundation of a functional home studio.
Connecting Your Equipment and Optimizing the Signal Chain
Audio interfaces serve as the central hub for connecting microphones, instruments, and monitors. Use high-quality XLR cables for microphones and TRS cables for line-level connections.
Create a clean signal path and signal chain by organizing cables. Route them away from power sources to prevent interference and label each cable for troubleshooting.
Consider investing in a power conditioner to protect your gear and eliminate noise caused by dirty power sources.
Keep backup cables readily available. A spare XLR or instrument cable can save a session when technical issues arise.
Configuring Your DAW and Audio Settings
Select appropriate buffer sizes based on your recording needs - lower for tracking (128-256 samples) and higher for mixing (512-1024 samples).
Set your digital audio workstation to the correct sample rate and bit depth. Common professional standards are 44.1kHz/24 bit or 48kHz/24 bit.
Configure audio routing within your DAW to match your interface's inputs and outputs. Create templates for common recording scenarios to speed up workflow.
Enable auto-save features and back up sessions to an external hard drive regularly.
Creating an Ergonomic Workspace for Productivity
Position your studio monitor stands to form an equilateral triangle with your listening position. Proper monitor placement is critical for accurate sound reproduction. Monitors should be at ear level for the most balanced frequency response.
Install proper studio lighting to reduce eye strain. Use adjustable desk lamps for detailed work.
Choose an ergonomic chair with good lumbar support and adjustable height. Investing in dedicated studio furniture can help you organize your gear and improve your posture. Your arms should rest comfortably at keyboard level.
Use a studio desk with dedicated spaces for monitors, keyboard, and rack gear. Consider using rack units to organize outboard equipment.
Keep frequently used tools within arm's reach. Store cables, microphones, and accessories in dedicated drawers or shelving units.

6
Recording Techniques and Best Practices
Proper recording techniques form the foundation of professional-quality home recordings. The right approach to capturing audio, combined with careful mixing and editing, can transform a basic home setup into a professional-grade studio. Proper preparation ensures that the final production meets industry standards.
Microphone Placement and Recording Vocals
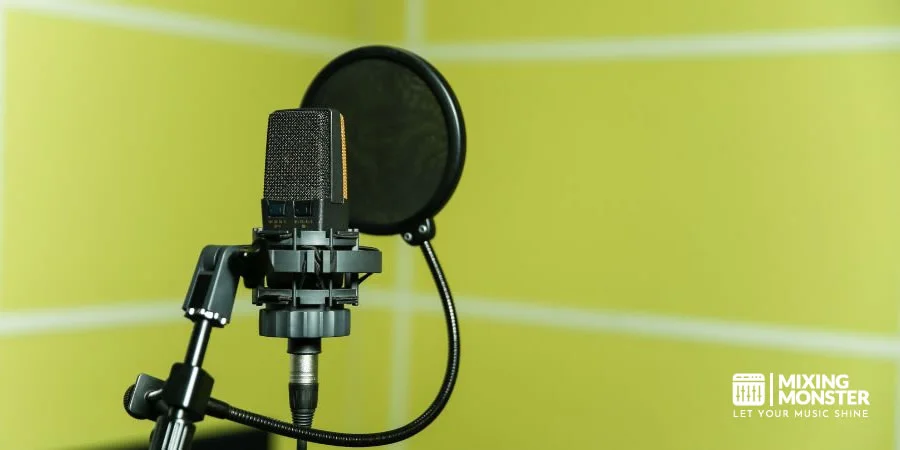
Proper microphone placement is crucial for capturing clear, pristine vocals. Position the microphone 6-8 inches from the singer's mouth at a slight upward angle to reduce plosives.
Use a pop filter between the vocalist and the microphone to minimize unwanted breath sounds and harsh consonants. A high-quality pop filter ensures that vocal tracks remain clean and professional.
Room treatment makes a significant difference. Hang acoustic panels or blankets to reduce reflections, and record in the center of the room away from walls.
Monitor recording levels carefully. Keep input levels between -18 dB and -12 dB to avoid clipping while maintaining a strong signal-to-noise ratio. Proper gain staging ensures your signal chain remains clean.
Recording Instruments in Your Home Studio
Different instruments require specific techniques for optimal sound capture. For acoustic guitars, position the microphone 6-12 inches from where the neck meets the body.
Bass guitars benefit from both direct input (DI) recording and microphone placement on the amp. This provides flexibility during mixing.
Recording drums requires multiple microphones to capture the full dynamic range of the kit. When recording drums, start by setting the kick drum and snare positions. Use a dynamic microphone on the snare and a condenser microphone for overheads.
Editing and Mixing Tips for Polished Tracks
Quality plugins enhance your mixing capabilities. Start with essential tools like EQ, a compressor, and reverb.
Apply high-pass filters and subtle equalization to remove unnecessary low frequencies from non-bass instruments. This creates space in the mix for bass and kick drum. You should also use noise reduction to clean up any tracks with unwanted background hiss.
Use compression carefully - start with a 3:1 ratio and adjust the threshold until you achieve 3-6dB of gain reduction on the loudest parts.
Create depth in your mix by setting different reverb levels for each instrument group. Keep bass elements relatively dry while adding more space to background elements.

7
Upgrading and Expanding Your Home Studio
Strategic upgrades to your recording setup can dramatically improve sound quality and creative possibilities. Professional-grade equipment, proper acoustic treatment, and expanded monitoring options form the foundation of a high-performing studio space.
Identifying Areas for Improvement in Your Setup
Start with acoustic treatment basics, such as bass traps and foam panels, to control problematic frequencies. These elements are crucial for accurate monitoring and professional results.
Room dimensions and speaker placement significantly impact recording quality. A properly treated space reduces unwanted reflections and standing waves.
Consider upgrading the monitoring capabilities to include multiple speaker options. Adding reference monitors helps verify mixes across different playback systems.
Key Areas to Evaluate:
- Acoustic treatment and room response
- Monitor positioning and listening position
- Cable quality and signal routing
- Computer processing power
- Interface I/O capacity
Investing in High-Quality Equipment and Software
Professional home studios require essential equipment upgrades beyond entry-level gear. You might consider adding a 500 series rack to your signal chain for specialized analog processing. A 500 series rack allows you to integrate various high-end preamps and compressors into a compact space. Quality preamps and converters make a noticeable difference in recording clarity.
Microphone selection should expand to cover different recording scenarios. Dynamic, condenser, and ribbon mics each serve specific purposes.
Priority Investments:
- High-end audio interface
- Professional studio monitors
- Quality microphone collection
- Reliable backup systems
- Professional DAW plugins
Exploring Advanced Recording Techniques and Genres
Experiment with different microphone techniques for various instruments. Multi-mic setups can capture fuller, more detailed recordings.
Learn specialized recording approaches for specific genres. Each style may require different equipment configurations and processing chains.
Develop proficiency in advanced processing techniques such as parallel compression and mid-side recording. These methods expand creative possibilities and improve production quality.
Advanced Techniques to Master:
- Room mic placement
- Stereo recording methods
- Multi-track drum recording
- Guitar amp mic positioning
- Vocal chain optimization
8
Key Takeaways for Setting Up a Home Recording Studio
Setting up a home studio requires careful planning and investment in essential equipment.
The foundation starts with selecting a quiet room and applying basic acoustic treatment. Using DIY acoustic panels and bass traps can effectively manage sound reflections. Strategic placement of these panels helps achieve a more professional sound.
Essential Equipment List:
- Computer with DAW software
- Audio interface
- Quality microphones
- Studio monitors
- Professional headphones
- Microphone stands
- XLR cables
- Pop shields
Creating an ergonomic workspace helps prevent physical strain during long recording sessions. The desk setup should accommodate all equipment while maintaining proper monitor placement.
A basic home recording studio setup can start around $500, with costs varying based on equipment quality and specific needs.
Room acoustics play a crucial role in recording quality. Strategic placement of furniture and acoustic treatment materials can significantly improve sound capture.
Regular equipment maintenance and proper cable management ensure reliable operation and extend gear lifespan.
Happy home recording!

Frequently Asked Questions
1
How can I set up a home recording studio on a budget?
Making a home studio recording can be done for under $300 with careful planning and prioritizing essential equipment.
Start with basic acoustic treatment using household items like blankets and furniture placement to control sound reflections.
Consider purchasing used equipment from reputable sellers to maximize your budget while maintaining quality standards.
2
What essential equipment is required to start a home recording studio?
A basic home recording setup requires a computer, a digital audio workstation (DAW) program, an audio interface, studio headphones, and at least one high-quality microphone.
Choose equipment that matches your specific recording needs, whether vocal recording, instrument tracking, or both.
3
Which software is best for beginner home recording studio enthusiasts?
GarageBand offers a free entry point for Mac users, while Audacity provides a free option for both Windows and Mac.
Reaper and Studio One Artist provide affordable paid options with professional features and intuitive interfaces for beginners.
4
What are some creative ideas for designing a home recording studio space?
Select a quiet room away from external noise sources and consider installing bass traps in corners to improve acoustics.
Use existing furniture strategically to break up sound reflections and create distinct recording and mixing zones.
5
How can I achieve professional audio quality in my home recordings?
Avoid poor acoustics and inadequate equipment, which can significantly impact recording quality.
Maintain consistent microphone placement and gain staging throughout recording sessions.
Keep cables organized and away from power sources to minimize interference and noise.
6
How much should I expect to invest when building a basic home recording studio?
Entry-level studio setups typically range from $500 to $1,500 for essential equipment, including an interface, a microphone, headphones, and basic acoustic treatment.
Quality USB microphones start around $100, while audio interfaces range from $100 to $300 for beginner-friendly options.
DAW software costs range from free options to $300 for professional versions, with many offering reduced-price home-user editions.
Related Articles
