


Understanding music production fundamentals can dramatically improve your sound quality and help you create professional tracks even with modest equipment.
Music production involves multiple interconnected stages, including composition, recording, editing, mixing, and mastering. A music producer oversees this entire life cycle of a piece, making creative decisions while managing technical aspects to achieve the desired sound. The music production process relies on a systematic approach to ensure every sonic element has its place in the final arrangement.
Modern producers typically work with Digital Audio Workstations (DAWs) that provide powerful tools for manipulating audio and MIDI data, alongside virtual instruments and effects processors that expand creative possibilities.
Developing your skills in music production opens doors to expressing your unique musical voice while building valuable technical expertise. Whether you're aiming to produce tracks for yourself or others, the journey involves continuous learning about sound design, arrangement techniques, and audio engineering principles.
With dedication and practice, you can create and record easily using today's accessible technology, transforming your musical ideas into finished products that connect with listeners.
Key Takeaways / TL;DR
- Music production encompasses the complete process from composition to final mastering, requiring both creative and technical skills.
- Starting with basic equipment and a Digital Audio Workstation allows beginners to create professional-sounding music without expensive studio gear.
- Developing your unique production style while mastering fundamental mixing techniques helps your music stand out in today's competitive landscape.

1
Understanding Music Production Fundamentals
Music production combines technical and creative skills to transform musical ideas into polished recordings. The process has evolved dramatically with technology, yet still centers on fundamental components that serve different genres in unique ways.
What Exactly Is Music Production?
Music production encompasses the entire process of creating recorded music, from initial concept to final master. Many beginners start producing music by experimenting with simple beats or melodies in a home studio. It involves essential skills and tools that transform raw musical ideas into finished products.
A music producer guides this journey, making critical, creative, and technical decisions. They balance artistic vision with practical execution, shaping the sound at every stage.
Production involves capturing performances, manipulating audio, and enhancing sonic qualities to achieve desired emotional impacts. It requires both technical expertise and musical sensibility.
Modern producers often handle multiple roles: composer, arranger, engineer, and sometimes performer—creating cohesive musical works that connect with listeners.
The Evolution of Music Production Technology
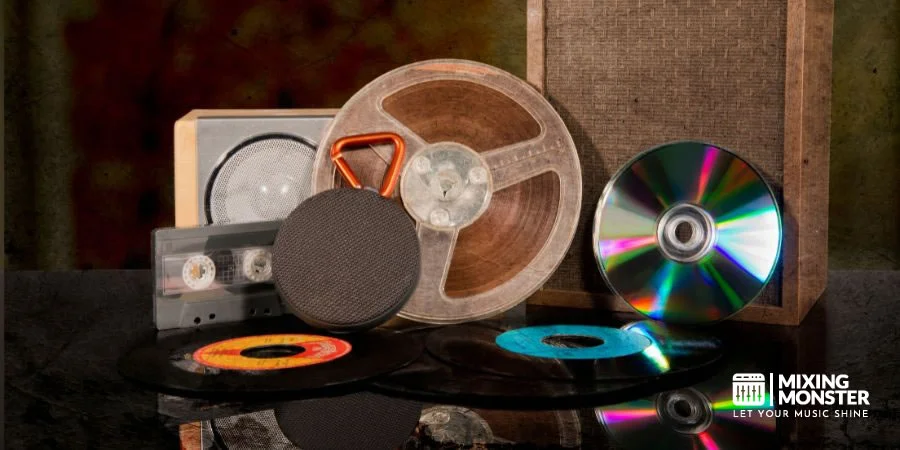
The history of music production spans from primitive mechanical recording devices to today's sophisticated digital workstations. Early production relied on capturing live performances in single takes, with minimal audio editing. Learning how to produce music today offers far more flexibility than in the early days of tape.
The introduction of magnetic tape in the 1940s revolutionized the field, allowing for multitrack recording and overdubbing. This separation of instrumental elements created new creative possibilities.
Digital technology transformed production again in the 1980s with samplers, MIDI, and early digital audio workstations (DAWs). These innovations democratized music creation, making professional-quality production accessible outside major studios.
Today's cloud-based collaboration tools and AI-assisted production continue this evolution, enabling producers to work across geographical boundaries with unprecedented efficiency and creative freedom.
Key Components of the Production Process
The music production process typically follows these essential stages, culminating in the post-production phase where the final polish is applied:
- Pre-production: Focus on songwriting, developing musical ideas, arranging songs, and planning recording sessions
- Recording: The stage of recording music where you capture instrumental and vocal performances
- Editing: Refining performances, correcting timing and pitch issues
- Mixing: Balancing track elements and adding effects
- Mastering: Finalizing audio for distribution across platforms
Comprehensive music production requires understanding technical aspects like signal flow, acoustics, and digital audio fundamentals. It also demands familiarity with core compositional elements, including harmony, melody, and rhythm.
Equipment choices—from microphones to monitoring systems—significantly impact results. However, a producer's ear and decision-making skills ultimately determine success.
Different Genres and Their Production Characteristics
Each musical genre has developed distinctive production approaches that help define its sound. Hip-hop production often centers on sample manipulation, drum programming, and bass-heavy mixes that complement vocal performances.
Electronic dance music emphasizes synthesized sounds, precise rhythmic programming, and carefully crafted dynamic changes to create dancefloor energy. Its production typically involves extensive automation and sound design.
Rock production traditionally focuses on capturing band performances, often valuing authentic instrumental tones over heavily processed sounds. However, modern rock frequently blends these approaches with digital techniques.
Jazz and classical recordings typically prioritize natural acoustic spaces and minimal processing, aiming to preserve performance nuances. These genres demand specialized microphone techniques and careful consideration of room acoustics.

2
Essential Music Production Equipment for Beginners
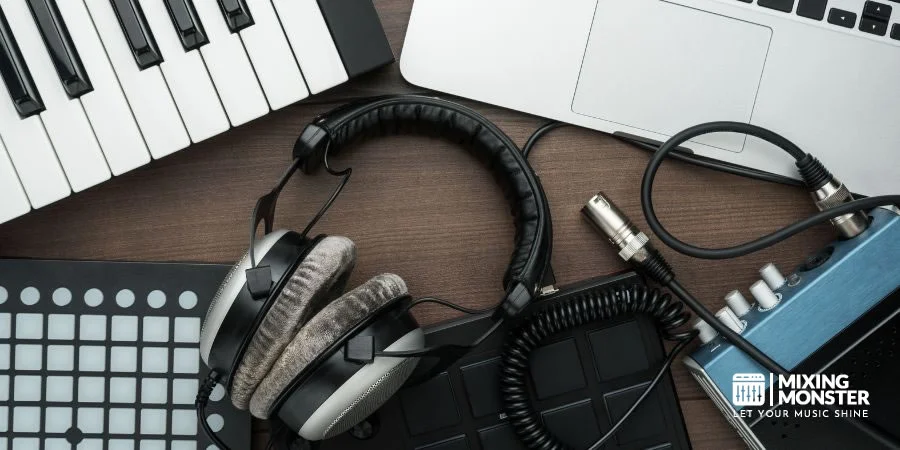
Setting up a home studio requires specific equipment to achieve professional-quality recordings. The right tools can significantly impact your sound quality and workflow efficiency, even with limited space or budget.
Budget-Friendly DAW Options
A Digital Audio Workstation (DAW) is the software heart of your production setup. For beginners, several affordable options offer professional capabilities without breaking the bank.
Free/Low-Cost DAWs:
- GarageBand (Free for Mac users) - Perfect entry point with intuitive interface
- Reaper ($60 license) - Powerful features with generous evaluation period
- Cakewalk by BandLab (Free) - Full-featured DAW with professional capabilities
Mid-Range Options:
- Ableton Live Intro ($99) - Excellent for electronic music and live performance
- FL Studio Fruity Edition ($99) - Popular for beat-making with lifetime updates
When selecting a DAW, consider your music style and workflow preferences. Many offer free trials, allowing you to test compatibility before purchasing.
Selecting Your First Audio Interface
An audio interface connects your instruments and microphones to your computer, converting analog signals to digital data your DAW can process.
Key Considerations:
- I/O Count: How many inputs/outputs do you need
- Preamp Quality: Affects recording clarity
- Connectivity: USB, Thunderbolt, or PCIe
- Sample Rate: Higher rates capture more detail
The Focusrite Scarlett series offers excellent value for beginners, with the 2i2 model providing two inputs for simultaneous recording. The PreSonus AudioBox USB and Behringer UMC202HD are also reliable budget options under $150.
Look for interfaces with 48V phantom power for condenser microphones and direct monitoring for zero-latency recording. Most interfaces provide a dedicated guitar input and a line input for external hardware synths or preamps.
Discover Best Audio Gear & Equipment


Microphone Types and Recommendations
Microphones capture your sound source and greatly influence recording quality. Understanding the two main types helps in making informed choices.
Dynamic Microphones:
- More durable and affordable
- Handle high sound pressure levels
- Ideal for loud sources (drums, guitar amps)
- Less sensitive to background noise
- Top pick: Shure SM57/SM58 ($99) - Industry standards
Condenser Microphones:
- Greater sensitivity and detail
- Require phantom power
- Better for vocals and acoustic instruments
- Capture more room ambiance
- Budget recommendation: Audio-Technica AT2020 ($99)
For beginners recording vocals and acoustic instruments, a large-diaphragm condenser microphone offers versatility. Achieving professional results when recording vocals requires a quiet environment and proper microphone placement. The Rode NT1 offers excellent sound quality for around $269. Don't forget to use a pop filter to prevent plosive sounds from ruining your vocal takes.
Headphones vs. Monitors for Critical Listening
Both headphones and studio monitors serve critical roles in production, but each has distinct advantages for beginners.
Studio Headphones:
- Closed-back models (Audio-Technica ATH-M50x, $149) isolate sound for recording
- Open-back designs (Sennheiser HD600, $300+) offer more accurate frequency response for mixing
- More affordable entry point than quality monitors
- No room acoustics concerns
- Ideal for apartment settings or night work
Studio Monitors:
- Provide more accurate stereo imaging and spatial awareness
- Essential for final mixing decisions
- Entry-level options: JBL 305P MkII or PreSonus Eris E5 (around $300/pair)
- Require acoustic treatment for optimal performance
For beginners, quality headphones make a practical first investment. Add monitors later as your skills and budget grow.
3
Mastering Your Digital Audio Workstation
A Digital Audio Workstation (DAW) forms the core of modern music production. It serves as the command center for recording, audio editing, mixing, and mastering. You will also spend significant time learning how to use software instruments and various audio effects.
Choosing the right music production software is a personal decision based on your preferred workflow. Learning to navigate and utilize your DAW effectively will significantly impact your workflow efficiency and the quality of your final productions.
Navigating DAW Interfaces and Workflows
Most DAWs share similar fundamental components despite their visual differences. The main workspace typically includes a timeline/arrangement view, mixer section, and browser for accessing instruments and effects.
Popular DAWs like FL Studio, Logic Pro, and Ableton Live each offer unique workflows but operate on similar principles. Begin by customizing your workspace layout to suit your production style.
Keyboard shortcuts dramatically increase efficiency. Take time to learn the most common shortcuts for functions you use frequently, such as copy/paste, zoom, and playback controls.
Organized project templates can save substantial setup time. Create templates with pre-routed tracks, favorite instruments, and effects chains to jumpstart your creative process.
Essential DAW Components:
- Transport controls (play, record, stop)
- Track view and timeline
- Mixer section
- Browser/media library
- Piano roll/MIDI editor
Recording Audio and MIDI Basics
Performing a clean audio recording requires proper input setup. Select the correct audio interface inputs in your DAW's preferences and set appropriate gain levels to avoid distortion or noise. You must also configure your audio drivers to ensure the software communicates correctly with your hardware.
For vocal or instrument recording, create a new audio track and arm it for recording by clicking the record-enable button. When recording vocals, monitor input levels to keep the signal clean and free of clipping. If you experience lag while playing, reducing your buffer size in the settings can lower latency, though it increases CPU usage.
MIDI recording works differently, capturing performance data rather than sound. Connect your MIDI controller to your computer and select the appropriate virtual instrument on your MIDI track.
Quantization helps align MIDI notes to a rhythmic grid, which is useful for correcting timing issues. Apply it judiciously to maintain human feelings while fixing obvious errors.
Loop recording enables multiple takes within a defined section. This technique allows performers to layer parts or attempt difficult sections repeatedly without stopping the creative flow.
Your Song Mixed & Mastered By Mixing Monster


Understanding Track Arrangement and Structure
Effective song structure follows established patterns like intro, verse, chorus, bridge, and outro. Use your DAW's timeline markers to label these sections for easier navigation clearly.
Color-coding related tracks creates visual organization. Group drums, bass, harmony, and lead elements with consistent colors to quickly identify track functions.
Proper track naming prevents confusion in complex projects. Develop a systematic naming convention that clearly identifies each element's purpose.
Folder tracks (or track groups) help manage large projects. Bundle related tracks together to reduce visual clutter and enable simultaneous processing of similar elements.
Arrangement experimentation becomes easier with effective copying, cutting, and duplicating of sections. Test different song structures by rearranging sections before committing to a final arrangement.
Automation and Creative Effects Processing
Automation brings dynamic movement to productions by controlling parameters over time. Most DAWs offer multiple automation modes: write (records parameter changes in real-time), read (plays back recorded automation), and various editing options.
Volume automation creates natural dynamics within a track. Rather than applying compression alone, automate volume changes for more musical transitions between sections.
Filter sweeps and effect transitions benefit from automation curves. Create smooth or dramatic parameter changes by adjusting curve shapes between automation points.
Creative effects processing transforms ordinary sounds into unique elements—experiment with unusual effect chains, like distorting into reverb or pitch-shifting into delays.
Mastering your signature sound involves developing consistent processing techniques. While flexibility is important, recognizable processing approaches help establish your artistic identity across multiple productions.

4
Sound Design and Synthesis Explained
Understanding how to create and manipulate sounds forms the backbone of modern music production. Synthesis allows producers to craft unique sonic signatures that define their work, while thoughtful sound design transforms ordinary productions into extraordinary ones.
Synthesizer Types and Architecture
Synthesizers come in several fundamental types, each with distinct approaches to sound generation. Subtractive synthesis starts with harmonically rich waveforms (like saw, square, and triangle) and filters out unwanted frequencies. Additive synthesis builds sounds by combining sine waves of different frequencies. FM (frequency modulation) uses one oscillator to modulate another, creating complex timbres.
Most synthesizers share common architectural elements:
- Oscillators: Generate the raw waveforms
- Filters: Shape the tonal character by removing frequencies
- Envelopes: Control how sounds evolve (attack, decay, sustain, release)
- LFOs: Create rhythmic modulation of parameters
Virtual instruments have made synthesis more accessible than ever, with software emulations of classic hardware offering unprecedented flexibility. A MIDI keyboard controller connected to your DAW provides hands-on interaction with these instruments, enabling expressive performance.
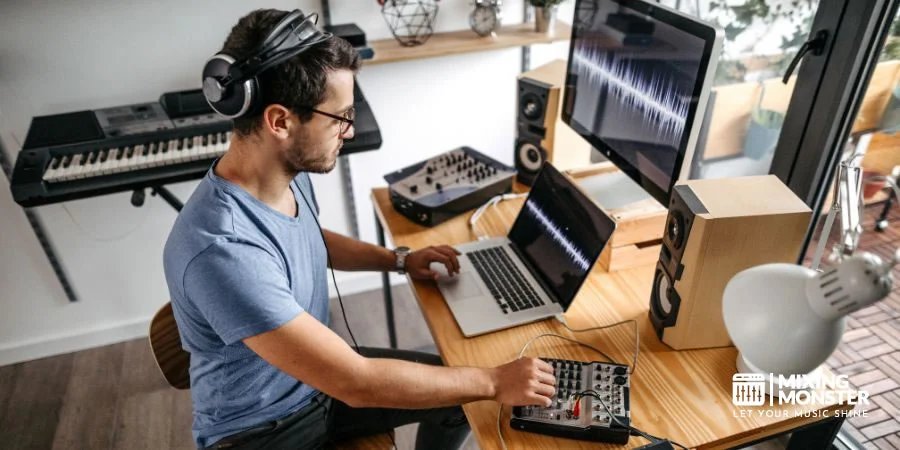
Creating Custom Drum Sounds
Crafting unique drum sounds gives productions a distinctive character that can't be achieved with standard sample packs. Kick drums can be synthesized using a sine wave with a pitch-modulated envelope, with distortion or layered noise added for texture.
For snares, combine white noise with tonal elements, such as triangle waves. Hi-hats and cymbals use high-pass filtered noise with carefully tuned envelope settings to control decay times.
Sound design for percussion often benefits from these techniques:
- Frequency-specific processing (EQ, compression)
- Transient shaping to control attack characteristics
- Room simulation through reverb and delay
Many producers maintain libraries of custom drum sounds created through synthesis and processing. These personalized elements help establish a signature sound that stands out from productions relying solely on common loops or presets.
Related Articles


Effective Sound Layering Techniques
Layering involves combining multiple sounds to create a complex, rich result that exceeds what any single sound could achieve. For leads, consider layering a bright, cutting synth with a warmer pad to create depth while maintaining presence.
Bass sounds benefit from layering sub-frequency fundamentals with midrange harmonics. This creates full-spectrum presence while maintaining mix clarity. When layering, pay careful attention to phase relationships between sounds to avoid cancellation.
Some effective approaches include:
- Frequency splitting: Assigning different layers to specific frequency ranges
- Dynamic splitting: Using different sounds for attack and sustain portions
- Stereo field assignment: Positioning layers differently in the stereo field
Each layer should serve a purpose rather than simply adding more sounds. A focused approach to layering yields professionally polished results that maintain clarity even in dense arrangements.
Using Sampling and Sample Libraries
Sampling involves recording and repurposing existing sounds, offering endless creative possibilities. Modern producers leverage expansive sample libraries that span orchestral instruments to esoteric field recordings.
When working with samples, consider these approaches:
- Manipulating playback speed/direction to create new textures
- Applying granular processing to break samples into micro-fragments
- Using transient detection to slice and rearrange rhythmic material
Sample libraries provide shortcuts to professional sound quality, especially for instruments difficult to synthesize realistically. However, processing samples with your personal touch helps avoid the generic quality of untreated library sounds.
Loops function as building blocks that can be manipulated, chopped, and processed. The most effective producers don't simply arrange loops and samples, but transform them through creative processing techniques that make these elements uniquely their own.

5
Mixing Techniques for Professional Sound
Creating a professional sound requires mastering several key techniques that work together to produce clarity, depth, and balance. Professional mixing and mastering are the two final pillars that transform a rough demo into a radio-ready hit. These techniques form the foundation of professional mixes that stand out in today's competitive music landscape.
EQ and Frequency Management Essentials
Effective EQ is the cornerstone of professional mixing. Mastering equalization means starting with corrective EQ to remove problematic frequencies before applying additive EQ to enhance desirable characteristics.
The high-pass filter is essential for removing unnecessary low-end rumble from most tracks except bass and kick drums. Typically, vocals can be high-passed around 80-100Hz, while guitars might be cut below 60-80Hz.
Mid-range frequencies (250 Hz-2kHz) often require careful attention, as they can cause muddiness when multiple instruments compete in this range. Creating small, targeted cuts in this range can dramatically improve clarity.
For a professional sound, avoid boosting wide frequency ranges. Instead, make narrow boosts (1-2dB) to enhance specific characteristics and wider cuts (3-4dB) to remove problems. This approach maintains a more natural sound while achieving clarity.
Key EQ Strategies:
- Cut first, boost second
- Use high-pass filters liberally
- Identify masking between instruments
- Solo instruments briefly for precision, but always make final decisions in context
Dynamic Processing with Compression
Compression controls dynamic range and adds character to your mix. Different compression settings serve different purposes in professional audio mixing.
For vocals, start with a moderate ratio (3:1 to 4:1) with a threshold that catches peaks to even out performance dynamics. Fast attack settings (1-10ms) control transients, while release times (50-300ms) should match the tempo of the music.
Bass instruments often benefit from parallel compression—blending a heavily compressed signal with the original to maintain transient punch while achieving a consistent level.
Drums might require different approaches: gentle compression on overheads for cohesion and more aggressive settings on individual close-miked drums for impact and control.
Compression Parameters Guide:
|
Element |
Typical Ratio |
Attack |
Release |
Notes |
|
Vocals |
3:1 - 4:1 |
5-10ms |
50-150ms |
Aim for consistent level |
|
Bass |
4:1 - 8:1 |
10-40ms |
80-200ms |
Maintain sustain |
|
Drums |
4:1 - 10:1 |
1-30ms |
50-250ms |
Varies by drum type |
|
Mix Bus |
1.5:1 - 2:1 |
30ms+ |
Auto/Program |
Gentle glue compression |
Creating Depth with Reverb and Delay
Reverb and delay create the sense of space and dimension that separates amateur from professional mixes. Rather than using a single reverb, professionals create depth by establishing distinct spatial zones.
Create front-to-back depth by using shorter reverb times (0.8-1.2s) for elements meant to sound close and longer times (2s+) for background elements. Pre-delay settings (20-80ms) help preserve clarity while maintaining space.
Delay can be more effective than reverb for maintaining clarity. Quarter-, eighth-, or dotted-eighth delays synced to the tempo create rhythmic interest without clouding the mix.
For efficient CPU usage and consistent spatial characteristics, set up 2-3 reverb sends with different characteristics:
- Short room/plate (0.8-1.2s) for drums and percussion
- Medium hall/chamber (1.5-2.5s) for vocals and melodic elements
- Long ambient space (3s+) for special effects and transitions
Always high-pass reverb returns around 200-300Hz to prevent low-frequency buildup that can make mixes sound muddy and unprofessional.
Stereo Imaging and Mix Placement
Professional mixes utilize the full stereo image to create width, separation, and interest. Strategic placement of elements creates clarity even in dense arrangements.
Bass-heavy elements like kick drums, bass guitars, and sub-synths should generally remain centered to maintain mix stability. Mid-range elements can be panned to various positions, creating a balanced spread across the stereo field.
Doubling techniques enhance width without compromising mono compatibility. Recording the same part twice and panning each version left and right creates natural width. Alternatively, subtle pitch or timing variations between channels can expand perceived width.
- Low-frequency elements (below 150Hz): centered
- Drums: slight to moderate panning (hi-hats 30-50%, overheads wide)
- Guitars/keyboards: moderate to wide panning (40-80%)
- Backing vocals: widely panned with the lead centered
- Effects: can be panned extremely wide for dramatic impact
Remember that professional mixes maintain mono compatibility. Check mixes regularly in mono to ensure important elements don't disappear when summed.

6
Mastering Your Tracks for Release
Mastering represents the final crucial step in music production, bridging the gap between a finished mix and a polished, commercially viable release. This process enhances sonic consistency, optimizes loudness, and ensures your tracks translate well across all playback systems.
Preparing Your Mix for Mastering
Begin by creating adequate headroom in your mix, typically aiming for peaks around 6dB to -3 dB. Remove unnecessary low-end rumble below 30Hz and check for unwanted resonances that might become problematic during mastering.
Export your mix at the highest possible quality—24-bit WAV files at the same sample rate as your project (preferably 44.1kHz or higher). Never normalize your exports, as this limits the mastering engineer's flexibility.
Create a reference folder containing commercial tracks that represent your desired sonic outcome. These references provide valuable benchmarks for tonal balance, dynamics, and stereo imaging.
Perform mix checks on multiple speaker systems before finalizing. What sounds balanced in your studio might reveal issues with consumer speakers or headphones.
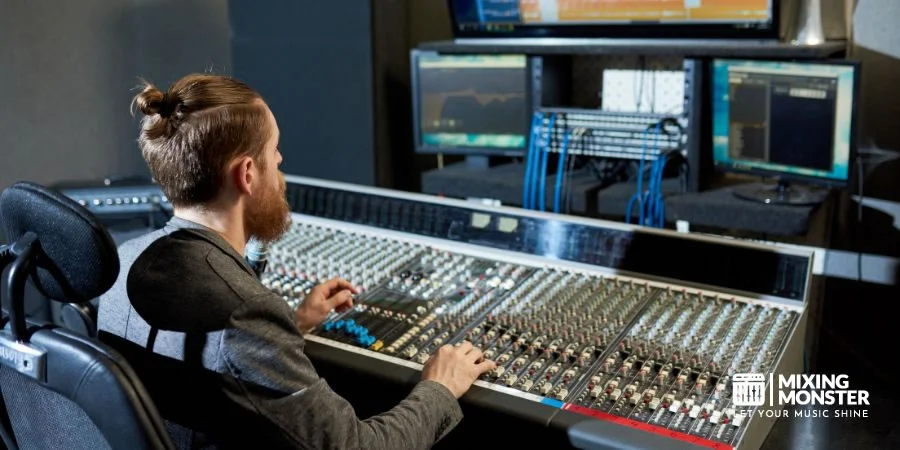
Essential Mastering Chain Setup
A standard mastering chain typically includes:
- EQ - For subtle tonal adjustments (±2dB maximum)
- Compression - Light glue compression with a 1.5:1 to 2:1 ratio
- Stereo enhancement - Subtle width adjustments without causing phase issues
- Multiband compression - Targeted dynamic control for specific frequency bands
- Limiting - Using a limiter is the final stage for achieving commercial loudness
Begin with EQ to address frequency imbalances. Focus on making surgical cuts rather than dramatic boosts. Most professional mastering involves modest adjustments rather than drastic changes.
Digital mastering tools like iZotope Ozone offer comprehensive all-in-one solutions for beginners, while professionals might use specialized analog or digital processors for each stage.
Loudness Standards for Different Platforms
Platform-specific loudness targets have become essential knowledge for modern mastering engineers:
| Platform | Integrated LUFS | True Peak Maximum |
| Spotify | -14 LUFS | -1.0 dB TP |
| Apple Music | -16 LUFS | -1.0 dB TP |
| YouTube | -14 LUFS | -1.0 dB TP |
| CD | No standard (often -9 to -12 LUFS) | -0.3 dB TP |
Always prioritize dynamic range over absolute loudness. Streaming platforms apply normalization algorithms that reduce overly compressed tracks, potentially introducing artifacts.
Consider creating separate masters for different release formats when necessary. Vinyl requires special consideration for bass content and stereo image, while club tracks may benefit from a louder master with greater low-end emphasis.
DIY vs. Professional Mastering Services
While learning to master your own tracks provides valuable skills and creative control, professional mastering offers fresh ears, specialized equipment, and years of experience. For critical releases, hiring a professional mastering engineer can make a significant difference.
Budget options range from $20-50 per track for emerging engineers to $100-300+ for established professionals. The investment often pays off in improved sound quality and market competitiveness.
If self-mastering, take extended breaks before the mastering phase to approach your mix with fresh ears. Consider using comprehensive mastering courses to develop proper techniques rather than relying on presets.
For those on a tight budget, automated mastering services offer a quick way to prepare tracks for social media. While they lack the nuanced touch of a human ear, they provide a consistent baseline for demo releases.
A middle-ground approach involves doing preliminary mastering yourself, then sending it to a professional for finalization. This hybrid workflow leverages both your creative vision and professional expertise while potentially reducing costs.

7
Music Production Workflow Optimization
Optimizing your music production workflow directly impacts your creative output and project completion rate. Streamlined processes allow you to focus on the creative aspects rather than getting lost in technical details or disorganization.
Developing Efficient Project Templates
Creating comprehensive project templates saves significant time when starting new productions. Begin by establishing a default template with your commonly used tracks, routing, and effects chains already in place.
Include dedicated buses for drums, vocals, and instruments with basic processing chains pre-loaded. This eliminates repetitive setup tasks for each new project.
Pre-configure your monitoring and recording settings to match your usual workflow. Many producers find that color-coding tracks helps navigate complex projects more efficiently.
Set up default automation lanes for frequently used parameters and establish consistent naming conventions. This organization pays dividends when projects grow in complexity or when returning to work-in-progress after breaks.
Organizing Sample Libraries and Presets
A well-organized sample library becomes an invaluable creative resource. Categorize samples by instrument type, genre, and characteristics (bright, dark, aggressive, etc.) rather than just by pack name.
Regularly curate custom presets for your favorite plugins to create a personal sound palette. This collection of go-to sounds can spark creativity during production sessions.
Consider using dedicated sample management software to efficiently tag and search your library. Many producers report that practicing sound design specifically for creating presets enhances both workflow and creativity.
Implement a consistent naming convention for all custom presets to make them easier to search for. Include descriptive terms that will make sense to you months later.
Creative Block-Breaking Techniques
When creativity stalls, having established techniques to overcome blocks proves essential. Try the "sketches first" approach—create rough drafts before refining to maintain creative momentum.
Set time limits for specific production tasks to avoid perfectionism paralysis. Many producers find that 25-minute focused sessions followed by short breaks maximize productivity.
Switch between different aspects of production when stuck—move from arrangement to sound design or mixing. This mental context switching often reveals fresh perspectives.
Experiment with deliberate limitations, such as using only three plugins or completing a track in one day. Constraints often fuel creativity by forcing innovative solutions within boundaries.
Establishing Productive Studio Habits
Consistent studio sessions, even brief ones, yield better results than sporadic marathon sessions. Schedule regular production time and treat it with the same commitment you give to any professional appointment.
Create a pre-session routine that signals to your brain it's time to create. This might include studio setup steps, listening to reference tracks, or a brief meditation.
Practicing specific production techniques during dedicated learning sessions, separate from actual projects, accelerates skill development. Try exercises like recreating your favorite tracks or designing specific sounds.
Document your processes and discoveries in a production journal. This resource becomes increasingly valuable as you develop your unique workflow and creative approaches.
8
Building Your Production Style and Brand
Developing a distinctive production style and establishing a recognizable brand are crucial elements for success in today's competitive music industry. Your unique sound and professional image will help you stand out from other producers and attract the right audience and collaborators.

Finding Your Unique Sound Signature
Creating a recognizable production style requires experimentation and self-reflection. Start by analyzing producers you admire, but don't simply copy them. Instead, identify specific elements that resonate with you.
Experiment with unique processing chains, distinctive sample selection, or particular instrument combinations. Many successful producers are known for specific sonic characteristics—whether it's Metro Boomin's dark 808s or Timbaland's innovative rhythms.
Consider these approaches to develop your signature sound:
- Limit yourself to specific tools or instruments
- Create custom sample libraries that only you have access to
- Develop consistent mixing techniques that become recognizable
- Experiment with unconventional recording methods
Your production style should ultimately reflect your authentic musical perspective. When writing new compositions, knowing your track's key signature helps you choose the right samples and tune your drums. Understanding your target audience and defining your unique selling proposition are essential steps in this process.
Collaboration Strategies for Growth
Strategic collaborations can significantly accelerate your growth as a producer. Working with vocalists, other producers, or instrumentalists exposes you to new techniques and expands your network.
Start by identifying potential collaborators whose styles complement yours. Local musicians, online communities, and music schools are excellent places to find partners. Tools like Discord, Splice, and specialized producer forums facilitate remote collaborations.
When approaching potential collaborators:
- Have a professional portfolio ready
- Be clear about what you bring to the table
- Start with small projects before committing to larger ones
- Establish clear terms regarding credits and royalties
Networking at industry events and producer meetups can lead to valuable connections. Many successful producers attribute their breakthroughs to forming groups or partnering with MCs who later became successful.
Distributing and Promoting Your Music
Effective distribution and promotion require strategic planning across multiple platforms. Select distribution services that match your needs—DistroKid, TuneCore, and CD Baby offer different features at varying price points.
Develop a consistent social media presence focusing on platforms where your target audience spends time. Instagram and TikTok excel for visual content, while SoundCloud and YouTube remain essential for music discovery.
Consider these promotional strategies:
- Create beat tapes or producer compilations
- Develop relationships with playlist curators
- Participate in producer challenges and competitions
- Create educational content showcasing your techniques
Building your brand as an emerging artist involves crafting a cohesive visual identity across all platforms. This includes consistent profile images, color schemes, and logo design that reflect your musical aesthetic.
Copyright Protection for Producers
Protecting your intellectual property is essential in the digital music landscape. Register your works with your country's copyright office for maximum legal protection. In the US, this means submitting to the Copyright Office, while other countries have equivalent institutions.
Understand these key copyright concepts:
- Sound recording copyright: Protects the specific recording
- Composition copyright: Protects the musical arrangement and structure
- Sample clearance: Required when using portions of other recordings
- Split sheets: Documents detailing ownership percentages
Implement technical safeguards such as audio watermarking and proper metadata. Always use contracts when collaborating, even with friends, to avoid future ownership disputes.
When selling beats online, be explicit about the license terms. Differentiate between exclusive rights (sold once) and non-exclusive rights (sold multiple times at lower prices). Creating high-quality content that showcases your talent and style remains the foundation of your production brand.
9
Key Takeaways for Music Production Beginners
Start with the essentials. You don't need expensive equipment to begin your music production journey. A basic digital audio workstation (DAW), headphones, and a computer can be sufficient for learning the fundamentals. It is a practical way to get started with music production without overcomplicating your setup.
Learn your DAW inside out. Your digital audio workstation is your primary tool. Spend time exploring its features and understanding how to navigate through it efficiently before moving on to complex techniques.
Study songs you enjoy. Analyzing tracks you love helps develop your ear and understanding of production techniques. Listen for patterns in intensity, energy, and structure to inform your own compositions.
Master these fundamental skills:
- Basic music theory (scales, chords, rhythm)
- Recording techniques
- Arrangement principles
- Mixing fundamentals
- Simple mastering concepts
Practice regularly. Consistency is key in developing production skills. Even 30 minutes daily will yield better results than occasional marathon sessions.
Join a community. Connect with other producers online or locally to share knowledge, get feedback, and stay motivated. Music production can sometimes feel isolating.
Finish projects. Complete tracks, even if they're not perfect. The process of finishing music teaches valuable lessons that starting dozens of projects doesn't.
Develop your ear. Train yourself to identify frequencies, effects, and instruments. Critical listening skills are essential for effective mixing and production.
Be patient with the learning curve. Music production combines technical and creative skills that take time to develop. Focus on improvement rather than perfection.
Happy producing!

Frequently Asked Questions
1
What software do professionals use for music production?
Professional music producers typically use Digital Audio Workstations (DAWs) such as Ableton Live, Logic Pro, FL Studio, Pro Tools, and Cubase. These tools are the industry standard for professional mixing and mastering. Each DAW offers unique workflows and capabilities that suit different production styles and genres.
These programs provide comprehensive tools for recording, editing, mixing, and mastering music. Many professionals also utilize specialized plugins for effects processing, virtual instruments, and sound design.
The choice of software often depends on personal preference and specific project requirements. Some producers use multiple DAWs to leverage the strengths of each platform for different aspects of production.
2
How can one start a career in music production, and what job opportunities are available?
Starting a career in music production typically involves building a portfolio of work while developing technical skills and industry connections. Many producers begin by creating their own music or collaborating with local artists to gain experience.
Job opportunities include roles as music producers who oversee the creation and recording of songs, mixing engineers, mastering engineers, sound designers, and studio technicians. The gaming and film industries also offer positions for music producers and sound designers.
Networking remains essential in this field, with many opportunities arising through personal connections. Building an online presence and showcasing work on platforms like SoundCloud, Bandcamp, and YouTube can help attract clients.
3
What are the best courses for learning music production skills?
Comprehensive music production courses are available at institutions such as Berklee College of Music, Point Blank Music School, and Abbey Road Institute. These programs offer structured learning paths that cover the technical and creative aspects of production.
Online platforms such as Pyramind offer mentored programs with professional producers like Jaytech addressing common production questions. These courses often include feedback on student work and industry insights.
Free and affordable options include YouTube tutorials, Coursera courses, and specialized platforms like Masterclass, which features lessons from renowned producers and artists.
4
Which apps are recommended for mobile music production?
GarageBand (iOS) is the most accessible entry point to mobile music production, offering intuitive interfaces and professional-quality sounds and effects. For more advanced users, FL Studio Mobile and Cubasis provide robust functionality on both iOS and Android.
BandLab and Caustic offer free alternatives with impressive capabilities for beat-making and arrangement. These apps support a range of MIDI controllers and audio interfaces to expand functionality.
Mobile production apps now support sophisticated workflows, including sampling, synthesis, and arrangement, enabling high-quality production without a computer.
5
Are there reputable online platforms offering music production training?
Several reputable platforms offer high-quality online music production training. Websites like Composer Class provide structured learning experiences addressing common production questions and techniques.
Platforms like Udemy, LinkedIn Learning, and SkillShare host courses taught by industry professionals. Many of these courses offer certificates upon completion and cover topics from basic production to advanced techniques.
Producer-led platforms such as Andrew Huang's "Monthly" and others. methodology provides specialized training focused on specific genres or production approaches with direct feedback from established artists.
6
How can beginners approach music production without incurring high costs?
Beginners can start with free DAWs like Cakewalk by BandLab, GarageBand (Mac), or LMMS. These programs offer core functionality for recording, arranging, and mixing music without any financial investment.
Free plugins and sample packs are widely available online, with companies like Spitfire Audio, Native Instruments, and iZotope offering quality free instruments and effects. Communities like Reddit's music production forum provide advice on practice techniques and affordable equipment.
Learning through free YouTube tutorials and experimenting with existing tools yields better results than continually purchasing new equipment. Consistent practice with limited tools often produces better results than having expensive gear without the skills to use it effectively.
You Might Also Be Interested In