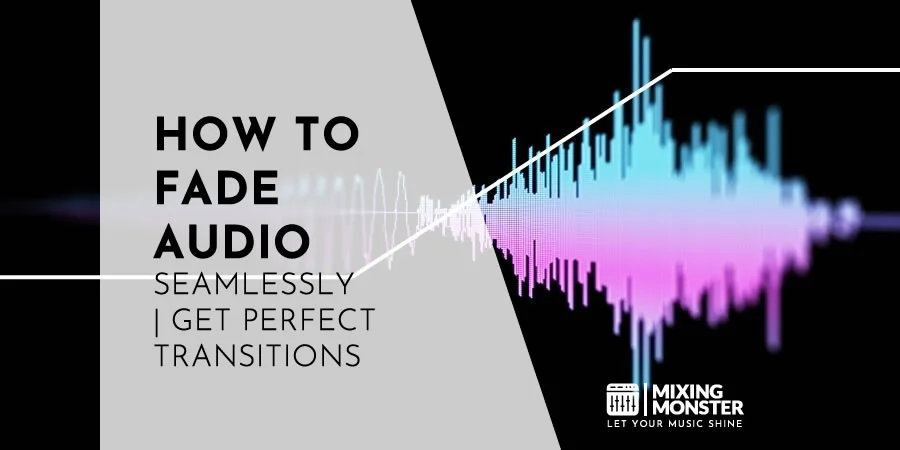



Learning to fade audio can turn any audio file into something polished, coherent, and professional. Whether you're working in a home studio or using professional audio editing software, you need to know how to handle fades. This applies to music tracks, podcast episodes, and video projects alike.
To fade audio, select the part of your track where you want the volume to rise or fall, then add a fade-in at the start to bring the sound up from silence, or a fade-out at the end to gently lower it back down. Crossfades blend overlapped content to smooth out rough edits.
Proper fade-in and fade-out technique is a core part of audio editing. Most digital audio workstations and online tools come with built-in fade options. You get control over the fade curve, the timing, and how strong you want it. The process is really just tweaking the amplitude envelope over time. You can pick from linear, logarithmic, or exponential curves, depending on your vibe. Fades remove those awkward, abrupt starts and stops between sections.
This guide covers everything from simple fade tricks to more advanced techniques across different editing platforms. You'll see what makes each fade type unique, find out when to use certain fade curves, and get a heads-up on common mistakes that can tank your audio quality. You'll also find plenty of practical examples for music, podcasts, and video editing, plus tips for transitions that sound natural and don't pull you out of the moment.
Key Takeaways / TL;DR
- Fading audio means gradually bringing volume up or down to smooth out transitions between segments
- Different fade curves—linear, logarithmic, exponential—each have their own uses and effects
- Good fades line up with the rhythm and timing of your audio, making everything feel more professional
1
How To Fade Audio – Concepts And Overview
Audio fading is all about gradually tweaking volume levels to make transitions between segments feel smooth. If you know how to fade audio and when to apply a fade-in and fade-out, you can fix technical issues and make the whole thing sound much better.
What Does It Mean To Fade Audio?
Fading audio is just the art of raising or lowering volume over a set period of time. You're basically shaping the amplitude of a signal so transitions don't feel jarring or awkward.
A fade eases the volume up or down so audio comes in or goes out smoothly. You need to nail the timing and how much you ramp things up or down to keep things sounding good. Most DAWs let you actually see the fade curve, which is handy. Even a basic online audio cutter usually gives you a visual to help dial in the effect you want.
You can make a fade last just a few milliseconds or stretch it out for several seconds—totally depends on what you're working on. Short fades are punchy; long ones are subtle and almost invisible. Editors choose fade lengths based on the content, genre, and the emotional punch they want.
Fade In Vs Fade Out Vs Crossfade Explained
A fade-in brings volume up from nothing at the start of a clip. It's a nice way to build anticipation and lets listeners settle in without a sudden blast of sound.
Fade-outs do the opposite—volume drops from full to silence at the end. A fade-out is a good way to wrap things up naturally and can help hide any weird noise at the end of a clip. This subtle fade-out keeps your track from ending too abruptly.
A crossfade overlaps two tracks and blends them. This technique is perfect when you need to crossfade tracks in a podcast intro to set the right mood. A well-executed crossfade effect makes the transition feel seamless and professional.
Each fade type has its spot in production: fade-ins for intros, fade-outs for endings, and crossfades for keeping things flowing between clips.
Why Audio Fades Matter In Professional Productions
Fades are what set pro productions apart from amateur ones. Without them, you get harsh transitions, clicks, pops, and sudden changes that sound off.
Fades help you steer the listener's attention—like letting background music support dialogue without fighting it. Volume moves, as this can even mess with emotions, in a good way.
Editors use fades to keep the energy and pacing steady—whether it's a music track, a podcast, or a movie soundtrack. If you can make smooth transitions, you're showing off both technical skills and a bit of artistry.
For radio, streaming, or TV, fades aren't just nice—they're often required to meet industry standards. If you want your work to sound legit on big platforms, you've got to use them.
Common Audio Problems Fades Can Fix
Fades remove clicks and pops that show up when clips start or end too abruptly. If you use a splitter and don't smooth out the edges, you'll hear those artifacts. Knowing how to fade audio helps fix that by easing into silence.
Background noise gets less obvious if you use fades smartly. A fade-in covers the jump from silence to the noise floor. Applying a studio fade-out can also help a track end more naturally without technical noise.
When you're syncing audio with video or other tracks, fades help hide timing mismatches. Crossfades blend overlapped content so any rough edits don't stick out. This is clutch for live recordings or when you can't get a perfect cut.
Volume differences between takes or recordings? Fades can smooth those out. You'll get a more even listening experience, even if your source material is all over the place.

2
The Purpose Of Fading Audio In Audio Engineering
Fading isn't just about style—it's both a technical fix and a creative tool. It helps you dodge unwanted artifacts and shapes how people experience your sound. These techniques solve editing headaches and let you craft the vibe you want.
Creating Smooth Transitions Between Clips
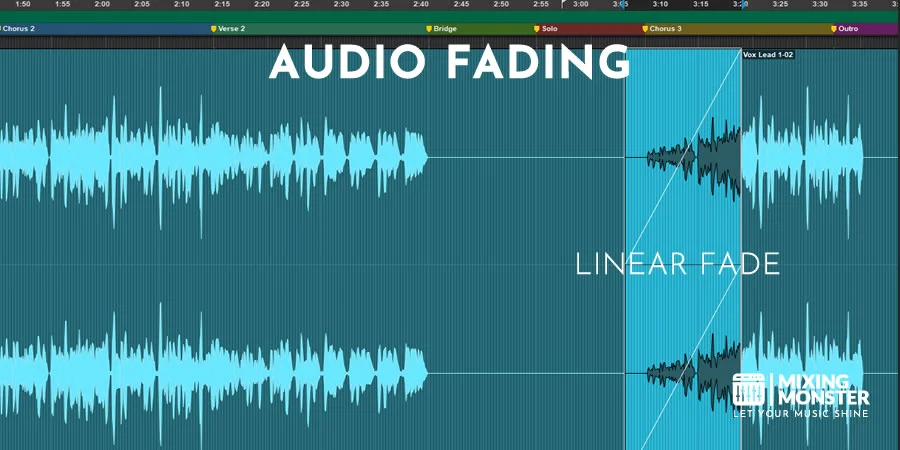
Audio fades make joining separate recordings feel natural. If you butt two clips together without one, you get obvious jumps. It is often better to crossfade clips to bridge the gap so you don't hear the seam.
Crossfades overlap two segments, fading one out as the other comes in. This is especially useful when you're piecing together different takes or performances. The overlap can be super quick—just 5 to 50 milliseconds for invisible edits—but you can go longer for creative transitions.
Linear crossfades work for most jobs. Equal-power crossfades are better if you want to keep things sounding equally loud during the transition, which is great for music and long notes. The type you pick affects how natural your transition feels.
Enhancing Emotional Impact And Listener Experience
Fades help shape your listeners' emotional journey. A slow fade-in builds anticipation and eases people into the track. Fade-outs provide closure without feeling abrupt or cold.
Producers use fades to spotlight or downplay elements. Fading up a vocal can pull focus to the lyrics, while fading out background parts makes room for solos or key moments. It's all about guiding the ear.
The length of your fade changes the mood. Quick fades (under a second) can feel punchy or dramatic. Long fades—several seconds—create a dreamy, reflective vibe. Film sound designers love this trick to match the visuals' mood.
Discover Best Audio Gear & Equipment


Eliminating Clicks, Pops, And Abrupt Cuts
Editing digital audio can cause clicks and pops if you cut waveforms at the wrong spot. Fades smooth out those changes by dropping the volume to silence right before a cut. Even a tiny fade—just 5 or 10 milliseconds—can wipe out those artifacts.
Short fade-ins and fade-outs help with stuff like breathing noises, mouth clicks, or mic bumps in vocals. Instead of chopping them out and making it sound weird, you can fade them away so it feels more natural. It's way less hassle than trying to clean everything up with plugins.
Background noise is another pain point. When you need silence between lines or musical phrases, fading out the audio removes the noise floor. Just cutting to digital silence can sound too harsh and artificial, so fading is a much smoother fix.
Maintaining Loudness Consistency And Balance
Keeping volume levels steady across a project means using fades wisely. If your tracks are all over the place, fades help even things out—no need to squash everything with compression.
Automation and audio envelopes let you adjust volume on the fly. Engineers might duck background music for dialogue, or slowly ramp up intensity during a big moment. Fades keep everything balanced so nothing fights for attention.
For podcasts and broadcast, consistent loudness is non-negotiable. Fades prevent sudden level jumps between segments, ads, or different sources. If you match your fade curves to the content, you'll get smooth transitions while keeping the natural dynamics intact.
3
When To Fade Audio In Music, Video, And Podcasts
Timing your fades right can turn raw audio into something that feels finished and engaging. If you know where fades make the most difference, you can use them intentionally instead of slapping them on everywhere.
Fading Audio At The Beginning And End Of Tracks
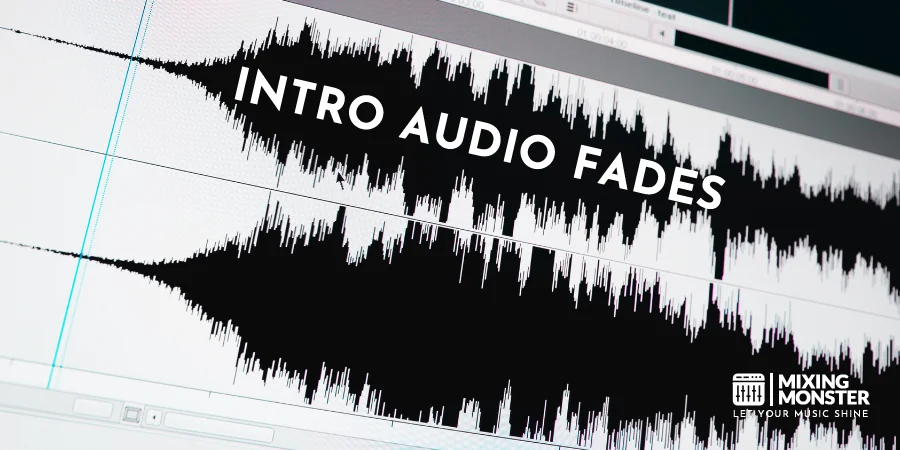
Fade-ins ease your audio in by bringing the volume up from zero. This prevents sudden loud starts that might jar listeners or disrupt your playlist flow. Music producers love fade-ins to set the mood or make transitions from track to track feel natural.
Fade-outs wind things down by lowering the volume to silence. They're great for songs that don't have a hard ending, or if you're making demo cuts of longer tracks. Podcasters use fade-outs on intro and outro music to blend in with speech.
The right fade length depends on your content. Music tracks usually sound best with 2–5 second fades, while podcast segments might only need 1–2 seconds. Just match the fade to the energy and pacing of your material.
Using Fades During Scene Or Section Changes
Video editors lean on audio fades to keep things smooth when cutting between scenes. A fade-out on dialogue or ambient noise, paired with a fade-in on the next scene, makes transitions feel natural and keeps viewers in the moment. Crossfading is especially useful when jumping between locations or time periods.
Podcasters use fades between interview segments, ads, or topic changes. These transitions cue listeners that something's shifting—without making it feel jarring. Common moves include:
- Going from intro music to the host speaking
- Switching between interview guests
- Moving from main content to ad breaks
- Returning from music breaks to narration
Scene transitions sound best with S-curve fades that start slow, speed up, then slow down again—making the change between sections feel the most natural.
Your Song Mixed & Mastered By Mixing Monster


Applying Fades To Background Music And Ambiance
Background music and ambient sounds need careful fade management so they don't fight with the main audio. Editors usually fade down the music when dialogue kicks in, keeping speech front and center. When this process is automated, it's called ducking, and it's kind of essential for a professional-sounding mix.
Fading background elements helps clean up audio by reducing distractions during crucial moments. Video folks often fade down things like traffic or crowd noise to make sure dialogue or narration stands out. The background's still there, just dialed back so it supports the story instead of taking it over.
Layered audio projects really come alive with smart fades on atmosphere tracks. Think of a documentary: nature sounds swell for a scenic shot, then fade out for interviews. That dynamic soundscape can do wonders for storytelling—when it's not overdone.
Knowing When Not To Use Audio Fades
Some audio needs to start or stop on a dime—no slow transitions. Live music recordings, for instance, keep their raw energy by letting the natural attack and decay shine through, without artificial fades. If you fade concert footage, you might actually dull the punch of big musical moments or crowd reactions.
Podcasts that focus on news or information usually skip fades between segments. The goal? Keep things moving and direct. Sound effects in games and films often need to play instantly, matching on-screen action perfectly—no fade-ins allowed.
Avoid fades when:
- You're syncing audio to specific visual cues or actions
- You want to keep the real feel of a live performance
- You're aiming for jarring, dramatic impact
- You're working with percussive or rhythmic sounds that need sharp attacks
Applying fades too abruptly or inconsistently can actually make things worse, leading to a messy mix and confusing the listener. Sometimes, skipping the fade is the best way to keep your audio honest.

4
Types Of Audio Fades And How They Work
Fade curves shape how volume changes over time. Each style serves a different purpose, from using basic fade effects to smoothly connecting tracks or pulling off emotional tricks in storytelling.
Linear Audio Fades And Their Use Cases
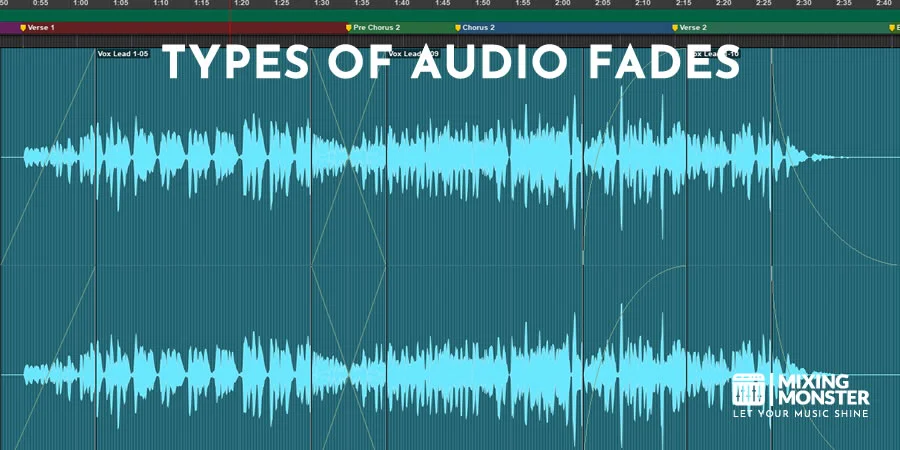
Linear fades move volume up or down at a steady, predictable pace from start to finish. If you graphed it, you'd see a straight line.
This style fits simple transitions—background music, for example—where you want a basic volume ramp. Editors often reach for linear fades when working with instrumentals or ambient sounds that don't need much nuance.
They're easy to use and great for beginners learning the ropes. Short linear fades (under two seconds) usually sound fine.
But let's be honest, linear fades can feel a bit off in longer stretches. Our ears don't actually hear volume changes linearly—they're more logarithmic. So, a linear fade might drop off too suddenly or drag on too long if you stretch it out.
Exponential And Logarithmic Fade Curves
Exponential fades drop volume quickly at first, then slow down near the end. You get a sharp initial dip that eases off, which can work well for dramatic transitions or cutting out unwanted sounds fast.
Logarithmic fades do the opposite: they start gently, then speed up as they finish. These sound more natural to our ears and tend to blend music or background beds more smoothly.
Audio editors often pick logarithmic curves for music fade-outs and podcast backgrounds. That slow, subtle start keeps the vibe going, then the sound quietly slips away without calling attention to itself.
Common uses for these curves:
- Exponential fades: Sudden scene changes, punchy transitions, quick exits for unwanted noise
- Logarithmic fades: Natural song endings, podcast music beds, film score transitions
Choosing between these comes down to the feel you want. Should the transition hit fast, or melt away gradually? Sometimes it's a bit of trial and error.
Related Articles

Equal Power Crossfades For Music Transitions
Equal power crossfades keep the overall loudness steady when you move from one track to another. As one fades out and the next fades in, their combined energy doesn't dip or spike.
This avoids those awkward volume drops you sometimes get with basic crossfades. A good crossfade uses specific curves for each track, so the overlap feels seamless and full.
DJs and anyone mixing continuous music rely on equal power crossfades. They let you blend songs without gaps or weird volume changes that could break the mood.
Most DAWs have preset equal-power crossfade options. These presets work out the curves for you—no need to fuss with manual settings unless you want to.
How long you make the crossfade matters, too. Quick crossfades (100–500 ms) work for similar tracks, while longer ones (2–4 seconds) help when tempos or keys don't match up.
Creative Fade Techniques For Storytelling
Inverted fades ramp volume up, then down—or flip that—to stir up tension or surprise. Producers use them to build suspense before dropping a big reveal or key dialogue.
S-curve fades start and end gently but move faster in the middle. They're great for complex mixes where you need elements to shift smoothly without stepping on each other.
Storytellers often layer different fade types across tracks for depth. Maybe dialogue gets a logarithmic fade while the background music uses an S-curve. Each piece finds its own space in the mix.
Special fade tricks include:
- Automating volume envelopes for dynamic fade patterns
- Pairing fades with reverb or delay for spatial transitions
- Using quick micro-fades to zap clicks and pops at edit points
These moves give editors fine-grained control over the listener's experience. The best fades guide attention without becoming the star of the show—they help the story land.

5
How To Fade Audio Using Popular Audio Editing Tools
Different audio editors handle fades differently, from pro DAWs with deep automation to free tools with basic options. Knowing your software's workflow is key if you want to fade quickly and still sound pro, no matter what you're using.
Fading Audio In DAWs Like Pro Tools And Logic Pro
Pro DAWs give you a bunch of ways to fade with precision. In Pro Tools, you select a region and hit Command+F (Mac) or Ctrl+F (Windows) to open the Fades dialog—then pick from standard, S-curve, or custom shapes. You can even batch-fade across multiple clips at once.
Logic Pro works similarly with its Fade Tool. Hit A to toggle between pointer and fade, then drag at a region's edge to set the fade length. The Inspector panel lets you dig into the curve—linear, exponential, logarithmic, or something custom.
Both DAWs offer clip-based fades and track automation. Automation's the way to go for complex patterns that shift throughout a project, while clip-based fades are perfect for quick transitions. Most engineers mix and match depending on what the session needs.
How To Fade Audio In Audacity And Free Editors
Audacity keeps it simple. Highlight the audio you want to fade, then go to Effect> Fade In or Fade Out. By default, it applies a linear fade, which is usually fine for basic edits.
For more control, Audacity's Envelope Tool lets you set manual volume points. Click on the waveform, add control points, then drag up or down to shape the fade however you want—no need to stick with presets.
Free online editors do much the same, usually with checkboxes for fade in/out and sliders for duration. They're not as precise as desktop apps, but for fast jobs, they get it done without installing anything.
Audio Fade Techniques In Video Editors
Video editors like Premiere Pro, Final Cut Pro, and DaVinci Resolve bake audio fading right into the timeline. You can add fades with keyframe animation directly on audio clips.
Adobe Express lets you tweak fade-out length and volume before exporting. Most editors show waveforms with handles at the edges—drag them in to create fades, with no extra menus.
The big win here is visual sync. You can match audio fades to cuts or transitions in your video, keeping everything smooth. It speeds up the process when you're juggling both sound and picture.
Using Automation Vs Clip-Based Fades
Clip-based fades attach directly to audio regions and stick with them wherever you move them. They're perfect for intros, outros, or any time you want a fade locked to a specific clip.
Automation fades use track-level volume envelopes that float above the clips. This approach gives you flexibility for dynamic mixing—volume can change anywhere in the timeline, and you can set as many control points as you like.
Most pros use both. Clip-based fades handle the simple stuff, keeping transitions tidy. Automation handles the bigger picture: ducking music under dialogue, building evolving soundscapes, and managing multiple fades at once.

6
Best Practices For Smooth And Natural Audio Fades
Getting fades right means paying attention to details like curve shape and timing, but also thinking musically—tempo, emotion, and context all matter. Good fades keep glitches out and listeners engaged, no matter where they're tuning in.
Choosing The Right Fade Length And Curve
Fade length really changes how natural it feels in a mix. Short fades—like 5 to 10 milliseconds—are great for zapping clicks at edit points. If you want a musical transition between sections or tracks, you'll usually need something longer, maybe 1 to 3 seconds.
The shape of the fade curve is just as important. Linear fades drop the volume at a steady rate, but honestly, they can sound a bit harsh. Exponential or logarithmic curves tend to give you smoother, more natural transitions since they match how we actually hear volume changes.
Common fade curve types include:
- Linear: Straight volume drop—useful for technical edits
- Exponential: Quick change at the start, feels smoother overall
- S-curve: Eases in and out, but ramps up in the middle
- Logarithmic: Closest to how our ears naturally hear fades
Honestly, you have to try different curves to see what fits the audio. Busy, energetic stuff usually likes shorter, sharper fades. Ambient or sparse tracks? They can handle those longer, gentler curves.
Matching Fades To Tempo, Rhythm, And Mood
The music's context should guide fade timing and character. Fades should land with the beat or phrase, not just wherever you happen to drop them. If a fade ends on a downbeat or at the start of a measure, it usually feels way more intentional than if it just cuts off mid-phrase.
Tempo really matters here. Fast tracks—say, 140 BPM—need snappier fades to keep the energy up. Slower songs at 70 BPM? You can stretch those fades out. Matching fade length to the tempo and vibe helps the edit support the music instead of fighting it.
The material's mood also plays a role. Intense or aggressive tracks often sound better with quick, punchy fades that don't sap their energy. On the other hand, melancholy or reflective pieces can really benefit from longer fades that let the emotion settle in. Sometimes, the most dramatic moments don't need any fade at all—just a sharp cut to keep things surprising.
Avoiding Over-Fading And Listener Fatigue
It's tempting to slap a fade on every edit, but too many fades can make things sound timid or just plain flat. Not every transition needs a big, sweeping fade—sometimes a crisp cut or a tiny fade does the job and keeps the track lively.
Drums and percussive sounds especially suffer from over-fading. If you fade in every drum hit, you'll sap all the punch out of your rhythm. Those sharp attacks are what give the mix its drive, and they disappear fast if you're not careful.
Signs of over-fading include:
- Drum hits lose their impact
- Transitions feel muddy or blurred
- The whole mix sounds flat and lacks contrast
- Listeners might sense hesitancy or a lack of boldness
It's all about picking your moments. Save fades for spots where they actually add something—otherwise, let the music breathe with sharper cuts when needed. That way, your fades really stand out when you use them.
Testing Fades On Multiple Playback Systems
Even if a fade sounds perfect on your studio monitors, it can fall apart on earbuds or in the car. When you listen on different systems, you'll catch problems with fade length, curve, or weird frequency bumps you might've missed. Consumer speakers often boost certain frequencies compared to pro gear.
Headphones can reveal small clicks, pops, or buildups that speakers gloss over. It's a good way to spot technical issues before you send the project out the door.
Don't forget about phones and laptops—people listen on those all the time. Their tiny speakers don't do much for bass and can squash the dynamics, making some fades sound choppy or just off. What feels smooth on big monitors might get lost or sound jagged on a smartphone.
Also, check your fades at different volumes. At low levels, you might miss artifacts that jump out when things get loud. Try a few volume settings on different systems for a solid reality check and cleaner, more professional mixes.

7
Common Mistakes To Avoid When Fading Audio
Audio editors run into all sorts of pitfalls with fades—timing errors, awkward transitions, or technical goofs that sneak in artifacts. Spotting these mistakes early helps keep your projects sounding sharp and professional.
Cutting Audio Too Quickly Or Too Slowly
Fade length can make or break the transition for listeners. Abrupt fades yank you out of the track and feel jarring. Sure, quick cuts work in some cases—like electronic music or sudden scene changes—but most of the time, you want something smoother.
On the flip side, fades that drag on too long just muddy things up. You end up with two elements fighting for space, and the clarity takes a hit. The sweet spot for fade length really depends on genre, tempo, and the overall vibe.
Usually, it's smart to match fade duration to the length of a musical phrase or a spoken sentence. For music, fades between 2 and 8 seconds often work, while podcasts tend to work best at 1 to 3 seconds. Just try a few options in context and trust your ears.
Don't forget about the fade curve, either. A linear fade, even if it's the right length, can sound harsher than an exponential one because of how we perceive volume.
Ignoring Frequency Buildup During Fades
When you crossfade two tracks, their frequencies can pile up—especially if you're not paying attention. Overlaps can cause certain frequencies to spike, making the mix muddy or even distorted.
Bass is usually the main culprit here. If both tracks have strong low end, the transition gets boomy and unfocused—super obvious in hip-hop, EDM, or rock. This can sneak up on you, especially if you're working fast.
Try throwing a high-pass filter on the outgoing track during the fade. Start around 100-200 Hz and raise it as the fade goes on. Some engineers also dip the low end on the incoming track for a second, then bring it back up after the fade.
Mid-range frequencies can clash too, making things sound crowded. Gentle EQ cuts on the outgoing track's mids can help, or you can tweak both tracks a bit to keep the transition clean.
Overusing Crossfades In Music Tracks
Crossfading means overlapping two tracks—one fades out, the other fades in. But using this trick everywhere can actually sap the energy. Not every transition needs a crossfade! If you use them for everything, the whole mix starts to feel bland and samey.
Sometimes, a hard cut works way better—especially in genres that thrive on tight rhythms and energy changes. Electronic, hip-hop, and rock often lean on direct cuts to keep things moving and spotlight section changes.
If you always default to crossfades, you miss out on creative silence or breathing space between sections. Those little pauses let listeners process what they just heard and get ready for what's next.
Honestly, the best way is to size up each transition on its own. Smooth, melodic bits might need a gentle crossfade, but percussive or beat-heavy sections usually want a sharp, on-the-beat cut.
Forgetting To Normalize Before Applying Fades
If your source clips have different loudness levels, your fades won't sound smooth—no matter how carefully you set them. Fades work best when everything starts at a similar volume.
Normalization sets all your audio to a consistent peak level, so when you fade out one clip and fade in another, they actually meet in the middle. If you skip this, a quiet clip fading into a loud one will still feel abrupt, even if your curves are perfect.
Most DAWs have normalization tools that do the heavy lifting. Aim for -3dB to -6dB peak normalization to leave some headroom for later tweaks. If you're working with spoken word or podcasts, you might want to use loudness normalization instead, since it focuses on perceived volume, not just peaks.
8
Key Takeaways For Fading Audio
Knowing how to fade audio means gradually turning the volume up or down to smooth out transitions in your projects. Mastering the fade-in and fade-out process is a basic but crucial skill for anyone editing music, podcasts, or video soundtracks.
Essential fade types include:
- Linear fades – volume drops at a steady pace
- Logarithmic fades – slight, natural-sounding decreases
- Exponential fades – quick, dramatic drops
- Crossfades – blend two tracks by fading one out while the other comes in
Most digital audio workstations let you dial in fades right down to the millisecond. Free tools like Audacity cover the basics for beginners, while pro software gives you more control and options.
Getting the timing and volume right is huge. The fade should fit the rhythm and feel of the audio. Short fades can feel abrupt; long ones make things subtle.
Watch out for mistakes like abrupt fades, transitions that don't match the rhythm, or volume jumps between clips. Always check your fades in the full mix, not just soloed tracks.
Audio fades do a lot of heavy lifting—they hide unwanted noises, spotlight certain elements, and help tracks end naturally. When done right, they guide the listener and make transitions feel effortless.
Custom fade curves let you get creative and shape unique soundscapes. Mixing fades with effects like reverb or EQ can add polish and depth to your work.
Happy audio fading!

Frequently Asked Questions
1
What are the steps to create an audio fade-out effect in Adobe Premiere Pro?
To fade out audio in Premiere Pro, use the Pen tool or go to the Effect Controls panel. Click your audio clip on the timeline, then open up Effect Controls.
Expand the audio track and find the Level property. Hit the stopwatch icon next to Level to set a keyframe where you want the fade to start.
Move the playhead to where you want silence, then drop another keyframe with a lower decibel value. Premiere draws the fade for you between those points.
Or, if you want a quicker route, drag the Constant Power or Exponential Fade effect from the Effects panel onto your clip. Those presets usually do the trick for most situations.
2
How can you achieve an audio fade in FL Studio?
FL Studio offers several ways to create audio fades. Most folks head to the playlist, grab an audio clip, and drag those little fade handles at the top corners.
If you pull the handle at the start, you'll get a fade-in; if you grab the one at the end, that's your fade-out. How far you drag it changes how long the fade lasts.
For more control, you can hop into the channel settings and tweak the volume envelope. There, you can actually draw your own fade curves with automation points—super handy if you're picky about how things sound.
The Fruity Balance plugin also lets you automate volume changes right in the pattern or playlist. If you want something fancier, automation clips let you shape intricate fades or transitions—definitely worth checking out for advanced stuff. Here's a guide for advanced fading curves if you're curious.
3
What is the shortcut for fading out audio in Adobe Premiere Pro?
Adobe Premiere Pro has some handy shortcuts to speed things up. Press Command+Shift+D on Mac or Ctrl+Shift+D on Windows, and Premiere slaps the default audio transition onto your selected clip.
That shortcut inserts a fade using whatever duration you've set as your default in Preferences. You can tweak that duration if you want it longer or shorter.
If you want more detailed fades, grab the pen tool and click the audio waveform in the timeline. It's not a one-key shortcut, but you can place fades exactly where you want them.
4
Which app allows you to fade audio easily on mobile devices?
Plenty of mobile apps make fading audio pretty painless, whether you're on iOS or Android. GarageBand for iOS, for example, has fade tools tucked away in the track settings menu.
You can flip on automatic fade-in or fade-out with a couple of toggles in the song settings. If you want to draw your own fades, open automation view and sketch the volume curves with your finger.
Android fans aren't left out—Audio Evolution Mobile Studio and WaveEditor both let you edit waveforms visually and add fades by touch, like you'd expect from desktop software. It's surprisingly smooth.
5
How can you perform an audio fade out in an online tool without installing software?
If you want to fade audio without installing anything, online editors have your back. TwistedWave Online and AudioMass both let you upload a file, highlight the section you want, and apply a fade-out from the effects menu. That's it—the processed file is ready to download right after.
Adobe Express has a free online audio fade tool too, where you can tweak fade duration and volume right in your browser. Most of these tools work with MP3, WAV, M4A, and the usual suspects.
6
What is the process for fading audio in Clipchamp by Microsoft?
Clipchamp makes it pretty straightforward to add audio fades when you're editing in Microsoft's video platform. Once you've dropped an audio clip onto the timeline, click it and go to the Audio tab in the properties panel.
You'll see fade-in and fade-out sliders right there—dragging them to the right gives you a longer fade, and sliding left shortens it. It's honestly about as simple as it sounds.
As you mess with the sliders, you can hear the fade in real time, so there's no guesswork. No need to mess with keyframes or anything complicated—tweak and listen until it sounds right to you.
Related Articles
You Might Also Be Interested In