


Have you ever struggled with clunky audio recordings that don't sound professional? Learning how to edit audio can quickly transform your content from amateur to polished. Using a professional audio editor allows you to process audio that elevates the listener experience.
Audio editing is the process of manipulating sound recordings by cutting unwanted sections, rearranging clips, and adjusting levels. This essential skill allows content creators and producers to remove background noise and create seamless transitions between segments.
Modern audio editing tools enable professional-quality editing without specialized training. Mastering advanced techniques requires practice, but the fundamentals include importing files and making precise cuts.
Whether you're producing a podcast, creating music, or editing video content, proper audio editing techniques will significantly improve the quality of your final product.
With beginner-friendly programs like Audacity and specialized mobile apps like Audio Editor - Music editor, you can start editing immediately without expensive equipment. The ability to remove background noise, balance levels, and create smooth transitions will make your audio content stand out in today's competitive digital landscape.
Key Takeaways / TL;DR
- Learning basic audio editing fundamentals like cutting, arranging clips, and applying effects creates professional-sounding results quickly.
- Beginner-friendly software options make audio editing accessible to everyone, regardless of technical background or budget.
- Establishing an efficient workflow with proper source monitoring significantly reduces editing time and improves overall sound quality.
1
How To Edit Audio - Core Fundamentals
Mastering audio editing requires understanding key technical concepts, properly setting up a workspace, and familiarity with essential workflows. The following fundamentals will help beginners navigate the sometimes complex world of audio manipulation with confidence.
Understanding Audio File Formats
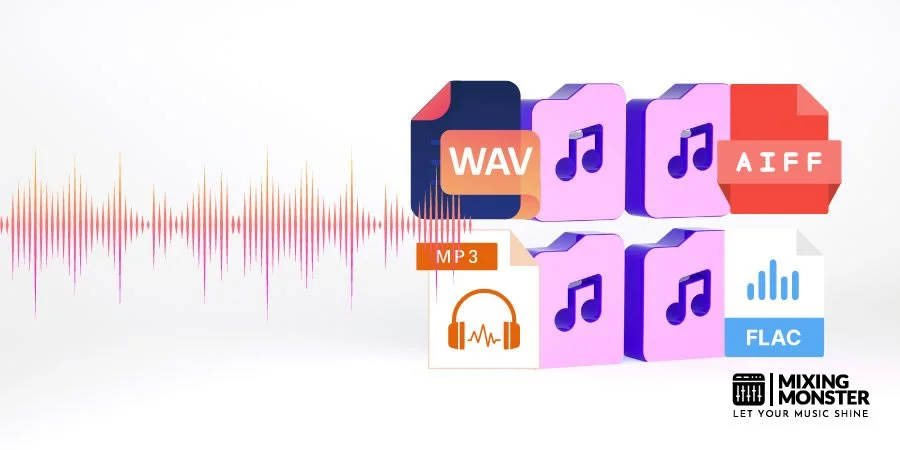
Audio files come in various formats, each with specific characteristics and uses. The most common formats include:
- WAV: Uncompressed format with excellent quality but larger file sizes
- MP3: Compressed format that balances quality and size
- AIFF: Apple's uncompressed format is similar to WAV
- FLAC: Lossless compressed format preserving audio quality
- OGG: Open-source compressed format
When beginning audio editing, it's important to understand that uncompressed formats like WAV are ideal for editing as they maintain all audio data. Compressed formats can lose quality with repeated editing cycles.
Most free audio editing software, such as Audacity, supports multiple formats, allowing users to import and export between different formats as needed. Always save original recordings in high-quality formats before converting them to compressed formats for distribution. This ensures the best possible sound quality throughout the audio editing process.
Essential Audio Terminology Every Beginner Should Know
Navigating audio editing requires familiarity with key technical terms:
Amplitude: The strength or volume of an audio signal, measured in decibels (dB).
Sample Rate: The number of samples per second in audio, typically 44.1kHz for standard quality. Higher sample rates capture more detail.
Bit Depth: Determines dynamic range quality (16-bit for CD quality, 24-bit for professional work).
Normalization: The process of optimizing volume levels across an entire audio file.
Equalization (EQ): Adjusting the balance between frequency components within audio.
Compression: Reducing the dynamic range between the loudest and quietest parts of audio.
Noise Floor: The level of background noise present in a recording.
Understanding these terms helps when following tutorials and makes learning new techniques easier. Audio professionals communicate using this vocabulary, making it essential for effective editing communication.
Setting Up Your Workspace For Optimal Editing
Creating an efficient workspace significantly impacts editing quality and productivity. Consider these essential elements:
- Hardware Requirements:
- Computer with sufficient processing power and RAM
- Quality headphones or studio monitors for accurate sound reproduction
- External audio interface for better sound quality
- Software Selection:
- Choose appropriate editing software based on needs and budget (Audacity is free and powerful for beginners)
- DAW (Digital Audio Workstation) options include Pro Tools, Adobe Audition, or Reaper
- Room Acoustics:
- Minimize background noise in your recording environment
- Consider acoustic treatment to improve recording quality
Organize project files systematically with clear naming conventions. Back up projects regularly to prevent data loss. Position monitors or headphones at ear level for accurate sound perception.
The Basic Audio Editing Workflow Explained
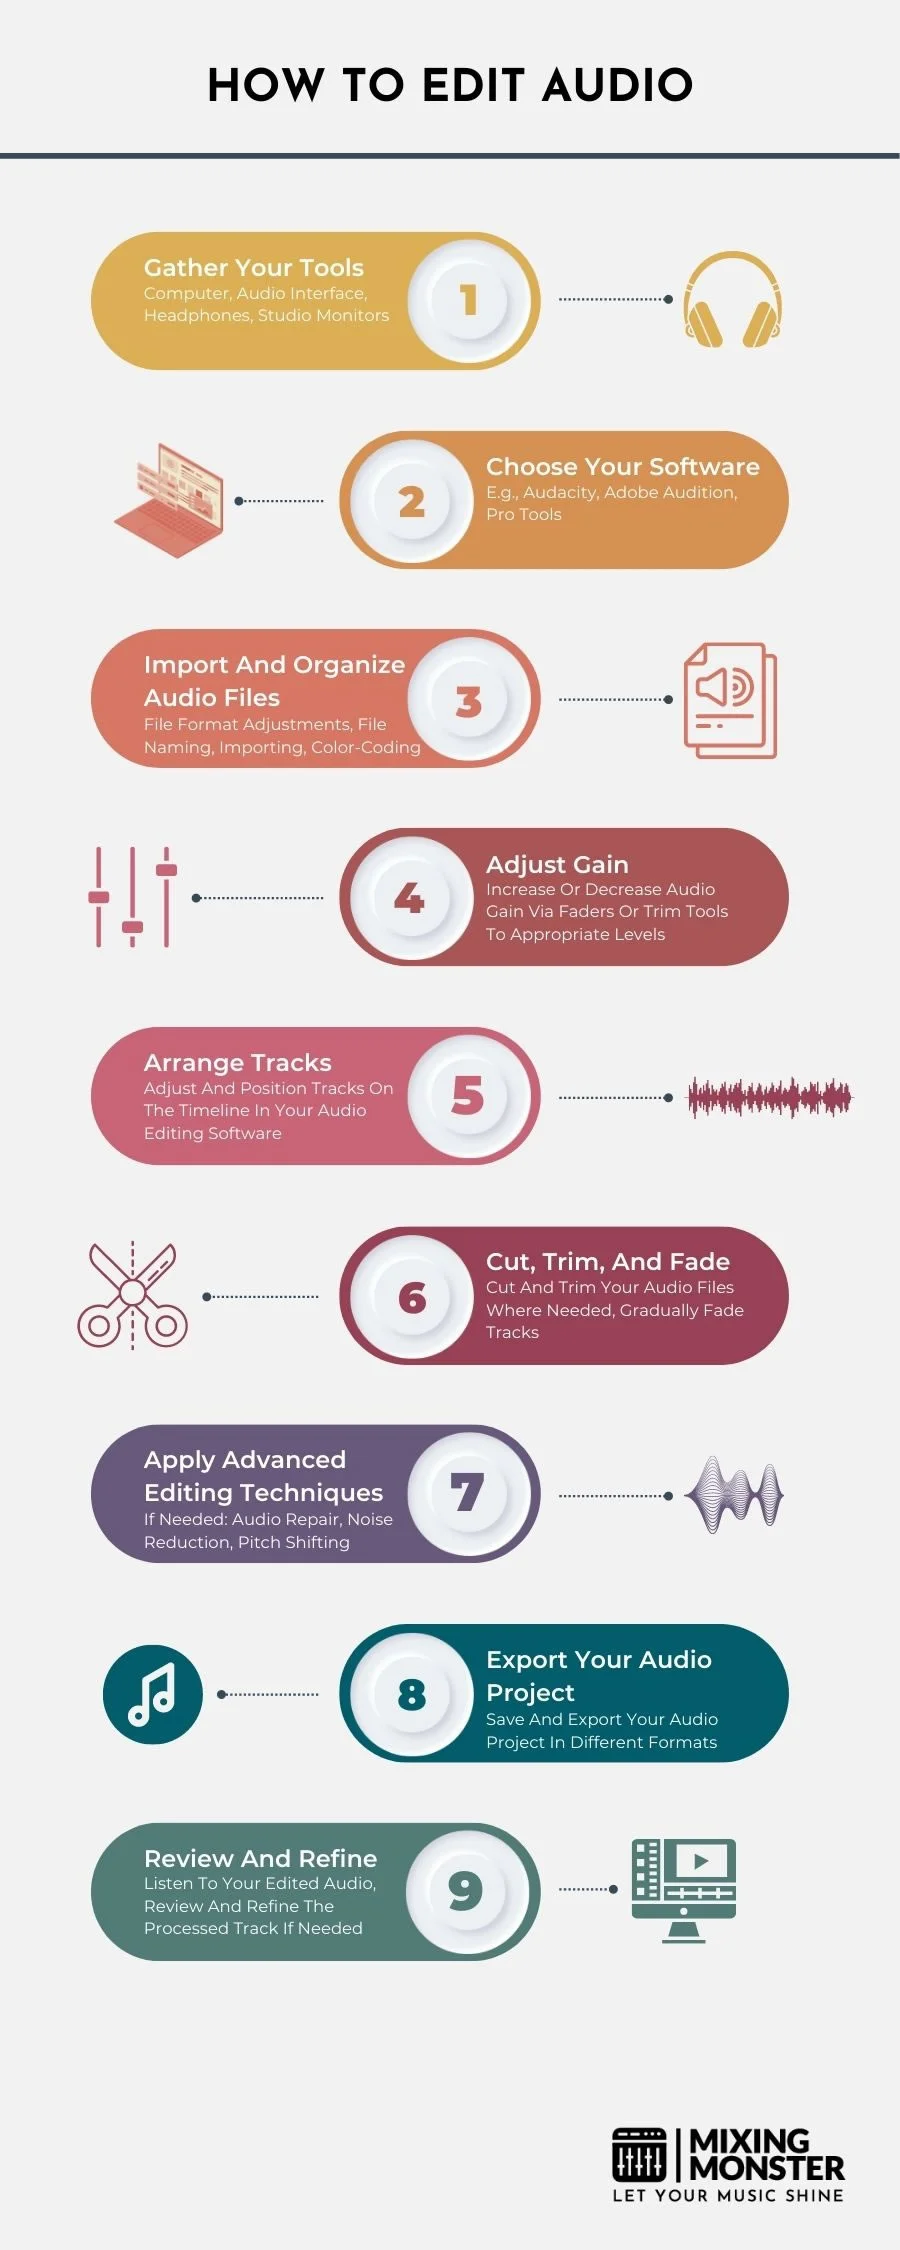
A standard audio editing workflow follows these key steps:
- Recording/Importing: Capture audio or import existing files into your editing software.
- Organization: Arrange tracks on the timeline and label them clearly for easier navigation.
- Editing: Remove unwanted sections like gaps, mistakes, and background noise.
- Mixing: Adjust levels across different audio elements and apply EQ, compression, and other effects.
- Mastering: Fine-tune the overall sound to ensure consistent quality throughout the project.
Most editing tasks involve using the selection tool to highlight segments, then applying modifications. When learning how to edit audio, common edits include trimming silence, removing mistakes, and adjusting volume levels.
Always maintain non-destructive editing practices by working on copies rather than original files. Use keyboard shortcuts to speed up repetitive tasks. The workflow becomes more efficient with practice, allowing editors to focus on creative aspects rather than technical hurdles.

2
Best Audio Editing Software For Beginners
Finding the right audio editing software can make all the difference when you're just starting. The ideal program balances essential features with an intuitive interface that won't overwhelm newcomers.
Free Audio Editing Tools Worth Trying
Audacity is the most popular free option for beginners, offering a comprehensive set of tools at no cost. It works across Windows, Mac, and Linux platforms, making it accessible to virtually everyone.
Ocenaudio provides a simpler alternative with a clean, user-friendly interface that's less intimidating than professional software. It handles basic editing tasks efficiently while maintaining a gentle learning curve.
AudioMass is a browser-based editor that requires no installation, making it perfect for quick edits. As a convenient online audio editor, it offers surprisingly capable features despite running in your web browser.
If you need to edit audio online, using a specialized online audio editor provides immense convenience. Some advanced platforms even guarantee your files never leave your device by processing the audio locally in the browser cache.
These free options provide excellent starting points for beginners who want to learn the fundamentals of audio editing without a financial investment.
Paid Solutions For Serious Audio Enthusiasts
Logic Pro offers Mac users a professional-grade experience with a relatively approachable interface. At around $200, it represents a significant step up from free options but provides industry-standard capabilities.
Adobe Audition integrates seamlessly with other Adobe products and offers both destructive and non-destructive editing workflows. Its monthly subscription model (approximately $20/month) provides regular updates and cloud features.
Reaper stands out for its generous evaluation period and a reasonable $60 personal-use license. Many users find Reaper is recommended for beginners who plan to grow into more complex projects, as it scales well from simple to advanced usage.
These paid options offer more refined interfaces, advanced features, and often better support than their free counterparts.
Discover Best Audio Gear & Equipment


Audacity - The Perfect Starting Point For Beginners
Audacity is the world's most popular audio editing and recording app, and for good reason. Its open-source nature means it's completely free while still offering capabilities comparable to paid software.
Key features include:
- Multi-track editing for working with complex projects
- Built-in effects like noise reduction, compression, and EQ
- Plugin support for expanding capabilities
- Spectral frequency display for visualizing audio
- Cross-platform compatibility across Windows, Mac, and Linux
Beginners appreciate Audacity's straightforward interface that exposes commonly used tools without overwhelming users. The extensive online community provides tutorials, forums, and support resources that make learning easier for newcomers.
While it lacks some of the polish of commercial options, Audacity's functionality makes it an excellent training ground for core audio editing skills.
Mobile Apps For On-The-Go Audio Editing
GarageBand for iOS offers impressive capabilities for Apple device users. It's free, surprisingly powerful, and maintains a user-friendly interface despite the constraints of mobile screens.
Ferrite Recording Studio provides podcast-focused editing tools on iOS. The basic version is free, with premium features available through in-app purchases.
WaveEditor for Android delivers fundamental audio editing capabilities in a clean interface. It supports common formats and provides essential effects for basic projects.
BandLab combines recording, editing, and social features, allowing beginners to collaborate with others. Available on both iOS and Android, it offers cloud storage and basic mastering tools at no cost.
Mobile apps can't match desktop software's depth, but they excel at quick edits and learning fundamental concepts when you're away from your computer.
3
Mastering Basic Audio Editing Techniques
Effective audio editing combines technical precision with creative decision-making to produce clean, professional-sounding results. These fundamental techniques form the backbone of any audio editing workflow, regardless of the software you choose.
Cutting, Trimming, And Arranging Audio Segments
The foundation of audio editing begins with manipulating sound segments. To trim audio, position your cursor at the desired point in the audio track and use the cut command or the scissors tool.
Using a dedicated audio trimmer in your software makes removing unwanted sections much faster. Most programs include a specialized audio trimmer for making precise adjustments to the start and end of clips.
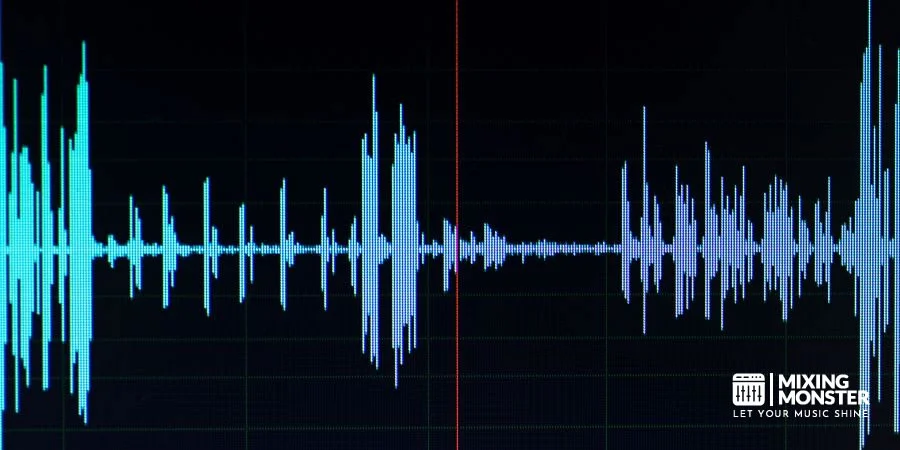
For precise editing, zoom in on your timeline panel to see the waveform details clearly. Most editors allow you to set in and out points to define exact sections for editing.
To rearrange content, use the copy-and-paste functions to duplicate or move sections to new locations. This is particularly useful when:
- Removing mistakes or unwanted sounds
- Creating repetitive sections (like choruses)
- Rearranging the structure of a recording
When you delete portions, be mindful of creating unnatural gaps or jumps in the audio. The goal is to make edits that sound seamless to listeners.
Applying Fades And Transitions Between Clips
Smooth transitions between audio clips prevent jarring changes that distract listeners. The crossfade is your primary tool for this task, blending the end of one clip with the beginning of another.
To create a crossfade in most editors:
- Position two clips so they slightly overlap
- Select the overlapping region
- Apply effect > Crossfade (or use dedicated crossfade tools)
Different types of fades serve various purposes:
- Fade-ins: Gradually introduce sounds (useful for starting tracks)
- Fade-outs: Smoothly end audio segments
- Constant power crossfades: Maintain consistent volume through transitions
- Constant gain crossfades: Create linear volume changes
For speech editing, shorter crossfades (5-20ms) work best, while music often requires longer transitions (50-500ms) depending on the material. The right fade creates natural transitions that listeners won't notice.
Your Song Mixed & Mastered By Mixing Monster


Noise Reduction And Background Cleanup Methods
Unwanted background noise can significantly impact audio quality. Most editing software includes noise-reduction tools that analyze and remove consistent background noise.
The typical noise reduction process involves:
- Select a short section containing only the background noise
- Use this as a "noise profile" or "noise print."
- Apply effect > Noise Reduction to the entire track
- Adjust reduction strength, attack/release times, and frequency settings
Be conservative with noise reduction settings. Excessive processing can introduce digital artifacts that sound worse than the original noise.
For isolated noises like coughs or clicks, use the splice tool to cut around the unwanted sound and delete it. For smoother results, add short crossfades at the edit points.
Additional cleanup tools include:
- De-essers (reduce harsh "s" sounds)
- De-clickers (remove pops and clicks)
- Gates (silence audio below a certain threshold)
Adjusting Volume Levels And Normalization
Consistent audio levels are crucial for professional results. Start by examining your timeline panel for sections that are too loud or too quiet relative to the rest.
To adjust specific segments:
- Select the portion needing volume adjustment
- Apply gain changes (usually shown as dB values)
- Add volume automation for dynamically changing levels
Normalization is a powerful tool that adjusts the amplitude of your entire audio file to reach a target level. There are two main approaches:
- Peak normalization: Increases the loudest point to a specified level (typically -0.3dB to avoid clipping)
- RMS normalization: Adjusts based on average loudness, creating more consistent perceived volume
For multi-track projects, use a combination of clip gain adjustments and track faders to balance elements. Pay special attention to transitions between sections to ensure volume changes feel natural.

4
Advanced Audio Enhancement Skills
Mastering audio enhancement requires technical knowledge and artistic judgment to transform raw recordings into polished productions. These techniques help create balanced, professional-sounding audio that engages listeners and conveys your message effectively.
Using Equalization (EQ) To Shape Your Sound
Equalization is the foundation of audio enhancement, allowing precise control over frequency balance. Professional editors use parametric EQ to target specific frequency ranges, adjusting gain, bandwidth (Q), and center frequency.
The audio spectrum can be divided into several key regions:
- Low frequencies (20-250 Hz): Bass, warmth, rumble
- Low-mids (250-500 Hz): Fullness, muddiness
- Mids (500-2000 Hz): Vocal presence, instruments
- High-mids (2-4 kHz): Definition, clarity
- Highs (4-20 kHz): Brilliance, air, sibilance
When applying EQ, use subtractive techniques first—cutting problematic frequencies rather than boosting others. This approach preserves headroom and creates cleaner results.
A common workflow includes removing low-frequency rumble with a high-pass filter, cutting resonant frequencies, and then making subtle boosts to enhance desirable characteristics. Most advanced audio editing techniques emphasize precision over dramatic changes.
Compression Techniques For Professional Results
Compression controls dynamic range by reducing the volume of loud signals while maintaining quieter ones. This creates consistency and adds polish to recordings.
Key compression parameters include:
- Threshold: Signal level where compression begins
- Ratio: Determines how much gain reduction is applied
- Attack: How quickly compression engages
- Release: How quickly compression disengages
- Makeup gain: Restores overall volume after reduction
For vocals, start with a 3:1 ratio and moderate threshold to gently control dynamics. Fast attack times (1-10ms) catch transients, while longer release times (50-300ms) maintain natural sound.
Multiband compression divides the audio spectrum into separate frequency bands, each with independent compression settings. This technique provides precise control over complex material, such as full mixes or podcasts with varying sound sources.
Parallel compression (also called "New York compression") involves blending the compressed signal with the original to maintain dynamics while adding thickness and power.
Related Articles
Adding Effects And Processing To Your Audio
Effects transform ordinary audio into compelling soundscapes by creating depth, movement, and character. Reverb simulates acoustic spaces, making recordings feel natural and three-dimensional.
When applying reverb:
- Choose a reverb type appropriate for your content
- Set pre-delay (10-30ms) to maintain clarity
- Adjust decay time to match the tempo and mood
- Use EQ to prevent muddy low frequencies
Delay effects create echoes and rhythmic patterns. For subtle enhancement, try a slap delay (80-120ms) mixed at low levels. For more dramatic effects, tempo-synced delays can create rhythmic interest.
Audio enhancements should complement the source material rather than dominate it. Modern software includes AI-powered tools that can enhance speech and repair problematic audio, saving hours of manual editing.
Other essential processing includes de-essing to control harsh sibilance, saturation for analog warmth, and stereo widening for spatial enhancement.
Multi-Track Editing In Modern Software
Multi-track editing enables precise control over complex audio projects by organizing elements across separate layers. This workflow is essential for podcasts, music production, and soundtrack design.
When working with multiple tracks:
- Use color coding and naming conventions for organization
- Group related tracks for efficient processing
- Apply bussing to process similar elements together
- Create automation for dynamic changes
Advanced recording and editing techniques, such as comping, involve recording multiple takes and selecting the best parts from each. This process creates perfect performances from several good ones.
Phase alignment between tracks prevents cancellation when combining similar signals. Time-aligning drums, doubling vocals, or blending microphones requires sample-accurate editing to maintain clarity.
Modern DAWs offer powerful advanced audio editing features, including spectral repair to remove unwanted noises, elastic audio to adjust timing without changing pitch, and region-based processing for selective enhancement.

5
Troubleshooting Common Audio Problems
Audio editing often involves fixing various technical issues that can diminish recording quality. Addressing these problems requires specific techniques and tools to achieve professional-sounding results.
Fixing Pops, Clicks, and Distortion Issues
Pops and clicks commonly occur from microphone bumps, harsh consonants, or digital errors. To fix these issues, use your editing software's spot healing tools to target specific problem areas. In Adobe Audition, the Spot Healing Brush can repair isolated problems without affecting surrounding audio.
For distortion caused by clipping (when audio exceeds maximum levels), try these approaches:
- Apply gentle compression to reduce peak volumes
- Use specialized de-clipping plugins like iZotope RX
- In extreme cases, re-record the affected segments if possible
For digital distortion, try changing your audio format settings in your operating system or DAW. Sometimes adjusting bit depth or sample rate can resolve digital artifacts.
Remember that prevention is ideal—record at appropriate levels (peaking around -6dB) to avoid distortion in the first place.
Dealing With Echo And Reverb Problems
Excess reverb and echo create muddy, unprofessional recordings that can distract listeners. These issues typically stem from recording in untreated rooms with reflective surfaces.
To reduce unwanted reverb:
- Use de-reverb plugins like iZotope RX or Waves X-Reverb
- Apply subtle noise gates to cut sound below certain thresholds
- Utilize spectral editing to target specific frequency ranges affected by reverb
For dialogue recordings, try directional editing—keeping speech intact while reducing the volume between words where reverb is most noticeable. This technique preserves natural speech patterns while minimizing echo tails.
In cases of extreme reverb, consider using AI-powered tools such as Adobe's DeReverb or the Accusonus ERA Bundle, which can intelligently separate direct sound from room reflections.
For future recordings, improve your recording environment with acoustic treatment or record in smaller, carpeted rooms with soft furnishings.
Removing Unwanted Background Noises
Background noise like computer fans, air conditioners, or traffic can severely impact recording quality. Most DAWs include noise reduction tools that can remove noise profiles sampled from quiet sections of your recording.
For effective noise removal:
- Capture a "noise print" from a section containing only background noise
- Apply noise reduction gradually (start with 6-10dB reduction)
- Use multiple light passes rather than one aggressive treatment
- Adjust the reduction threshold to prevent artifacts like "underwater" effects
For consistent hums or electrical interference, try notch filters targeting specific frequencies (usually 60Hz for US power-related hum or 50Hz internationally).
Surgical editing with spectral views lets you visually identify and remove unwanted sounds, such as door slams or coughs, by selecting and attenuating specific frequency regions.
Salvaging Low-Quality Recordings
When working with poor-quality source material, prioritize intelligibility over perfect audio quality. Focus first on enhancing the primary elements (usually voices) before addressing secondary issues.
Start by applying these techniques in sequence:
- Normalize audio to appropriate levels
- Use EQ to boost critical frequencies (voice clarity usually improves around 2-4kHz)
- Apply compression to even out volume inconsistencies
- Remove background noise as described above
For extremely damaged recordings, consider multiband processing to apply different treatments to different frequency ranges. This preserves a more natural sound than uniformly processing the entire spectrum.
When facing sound system problems, check your hardware connections and settings before extensive editing. Many issues stem from input problems that no amount of post-processing can fully repair.
Remember that subtle improvements across multiple dimensions often yield better results than aggressive processing in any single area.

6
Audio Editing Workflow Optimization
Streamlining your audio editing process saves significant time and improves output quality. Efficient workflows combine smart organization, keyboard mastery, and strategic techniques that reduce repetitive tasks.
Creating Templates For Faster Editing
Templates are powerful time-savers in audio editing. Create custom templates with your frequently used settings, tracks, and effects chains already configured.
Most DAWs allow you to save project templates with pre-configured routing, plugins, and folder structures. For podcast editing, set up templates with noise reduction, compression, and EQ already applied to voice tracks.
Breaking large projects into smaller segments makes complex edits more manageable. Organize your templates by project type:
- Music Production: Templates with instrument tracks and mixing buses
- Podcast Editing: Voice tracks with processing chains and music beds
- Sound Design: Effects buses and specialized processing chains
Store completed templates in an easily accessible folder for quick access when starting new projects.
Keyboard Shortcuts Every Editor Should Know
Mastering keyboard shortcuts dramatically increases editing speed. Most audio professionals can edit two to three times faster when using shortcuts instead of mouse-based editing.
Essential shortcuts to memorize:
- Play/Stop/Record: Space bar, R, numeric keypad controls
- Selection tools: Alt/Option+click for precise selections
- Zoom controls: Z for zoom tool, H for horizontal zoom
- Cut/Copy/Paste: Standard Ctrl/Cmd+X, C, V
- Ripple Delete: Removes audio and closes the gap automatically
For Logic Pro users, click zones and group editing streamline the editing process. Most DAWs allow you to customize shortcuts to match your workflow preferences.
Print a cheat sheet of your most-used shortcuts and keep it visible until muscle memory develops.
Batch Processing Multiple Files Efficiently
Batch processing saves hours when dealing with multiple audio files requiring similar treatments. Most DAWs and dedicated audio editors include batch processing functionality.
Set up batch operations for common tasks:
- Normalizing volume levels across multiple recordings
- Applying noise reduction to a collection of field recordings
- Converting file formats (WAV to MP3) with consistent settings
- Adding fade-ins and fade-outs to multiple clips
The project panel facilitates easy organization of files for batch operations. Create logical naming conventions that sort automatically in chronological or production order.
Consider using scripts or macros for complex multi-step processes that need to be repeated across multiple sessions or projects.
Quick Techniques To Master Editing In Under 10 Minutes
Some audio editing techniques deliver outsized results for minimal time investment. Focus on mastering these first to see immediate workflow improvements.
Rapid editing techniques:
- Ripple editing: Make edits that automatically adjust surrounding audio
- Transient detection: Quickly identify beat markers in audio files
- Strip silence: Automatically remove silent sections in voice recordings
- Edit and slice transients: Perfect for tightening musical performances
When editing podcasts, develop a system for removing filler words and excessive pauses. Create a mental checklist for quality control to execute quickly at the end of each editing session.
Set personal time limits for specific editing tasks to avoid perfectionism paralysis and maintain consistent productivity.

7
Key Takeaways For Audio Editing Success
Always edit with quality headphones to catch subtle issues that might be missed through speakers. Good monitoring is essential for professional results.
Backup your original files before starting any editing session. This practice prevents the permanent loss of valuable recordings in the event of mistakes.
Learning keyboard shortcuts for your digital audio workstation significantly improves workflow efficiency and reduces editing time.
Pay attention to background noise removal early in the process. Clean audio provides a better foundation for subsequent editing steps.
Focus on maintaining consistent volume levels throughout your project. Sudden volume changes can create a jarring experience for listeners.
Edit on tempo when working with music or rhythm-based content. Finding clean stopping points at the end of musical beats creates smoother transitions.
Remember that subtle editing is typically best. The goal is for listeners to remain unaware that the audio has been edited.
Use crossfades between audio clips to eliminate clicks and pops. Even short 10-15ms crossfades can dramatically improve transitions.
Keep the listener's experience in mind throughout the editing process. Consider where and how they'll consume your content.
Export test versions and listen on different devices (headphones, car speakers, phone) to ensure your audio sounds good across various playback systems.
Happy editing!

Frequently Asked Questions
1
What steps are involved in editing audio files on a Windows PC?
To edit audio on a Windows PC, start by selecting a suitable program, such as Audacity, which is free and feature-rich. Install the program and launch it to begin your editing journey.
Import your audio file by selecting File > Open or by simply dragging the file into the program window. Once imported, you can select the audio you want to change by clicking and dragging across the waveform.
Basic editing functions include cutting unwanted sections, copying parts you want to duplicate, and adjusting volume levels. Use the Effect menu to apply processes like noise reduction, equalization, or compression to enhance sound quality.
When finished, export your project by selecting File > Export in the desired format (MP3, WAV, etc.). Windows users can also consider Adobe Audition for more advanced editing capabilities.
2
Can I perform audio editing directly on my Android or iPhone, and if so, how?
Yes, both Android and iPhone devices offer multiple options for on-the-go audio editing. Install dedicated audio editing apps like GarageBand (iOS) or WaveEditor (Android), or cross-platform options like BandLab.
Open your chosen app and either record new audio or import existing files from your device storage. Most mobile apps offer intuitive interfaces with waveform displays and simple touch controls for selecting and modifying audio segments.
Common mobile editing features include trimming, splitting, merging clips, adding effects, and adjusting levels. Many apps also provide templates and presets to achieve professional-sounding results without technical expertise quickly.
3
What are the best free online audio editor tools available?
Several excellent free online audio editor platforms eliminate the need for software installation. These tools allow you to edit audio online with robust browser-based features accessible from any device.
Soundtrap offers a free tier with collaborative features, making it ideal for podcast editing or music projects with multiple contributors. These tools typically provide waveform visualization, basic cutting/trimming, and effect processing.
Another option is Audiotool, which includes synthesizers and drum machines, as well as editing features. For quick edits, TrimAudio.com lets you cut and export in various formats without creating an account.
4
How can I modify an audio recording I've made?
Start by importing your recording into your chosen audio editor. Listen through the entire recording first to identify areas that need improvement or removal.
Use selection tools to highlight unwanted sections like background noise, mistakes, or long pauses, then delete or silence them. For volume issues, apply normalization or compression effects to even out levels throughout the recording.
Enhancement tools can improve clarity and quality - try noise reduction for removing consistent background sounds, equalization for adjusting frequency balance, and de-essing for reducing harsh consonant sounds. For advanced editing, consider using Adobe Audition, which offers precision tools for professional results.
5
Is CapCut a good option for editing audio, and what are its main features?
CapCut is primarily known as a video editor, but it also offers capable audio editing features, making it suitable for many audio projects. Its user-friendly interface makes it accessible for beginners while providing enough depth for intermediate users.
Key audio features in CapCut include volume adjustment, speed modification, voice effects, and noise reduction. The app also provides a library of royalty-free music and sound effects you can incorporate into your projects.
CapCut allows you to extract audio from videos, split audio at specific points, and fade audio in or out for smooth transitions. The mobile version works well for quick edits, while the desktop version offers more precise control for detailed work.
6
What is the process for editing audio within Canva?
To edit audio in Canva, start by uploading your project and navigating to the "Apps" section, where you'll find the "Audio" tool. Canva provides a library of royalty-free music tracks, or you can upload your own audio files.
Once your audio is added to the project, use the timeline editor to trim the beginning and end points. You can also adjust volume levels and add fade-in or fade-out effects to create smoother transitions.
For more complex projects, Canva lets you layer multiple audio tracks, allowing you to combine background music with voiceovers or sound effects. While not as powerful as dedicated audio editing software, Canva's audio tools are sufficient for basic needs within design projects.
Related Articles