


Audio headroom often decides whether music sounds clean and dynamic or distorted and fatiguing. Audio headroom is the margin between a signal's normal operating level and the point at which distortion or clipping occurs. This simple concept plays a critical role in recording, mixing, mastering, and playback.
Audio headroom is the range above a nominal level before a system reaches its maximum capacity. In digital audio, this is measured relative to 0 dBFS, while in analog systems, it relates to voltage and amplifier limits. By leaving sufficient headroom, engineers prevent distortion, preserve dynamics, and ensure clarity.
Without sufficient audio headroom, even well-recorded material can sound harsh, compressed, or unbalanced. Maintaining proper headroom is therefore essential for professional audio engineering in both studios and home setups.
Those who understand audio headroom gain greater control over sound quality, whether working with a DAW, a live mixing console, or a playback system. Exploring this concept reveals how gain staging, amplifier choice, and monitoring practices all connect to clean, powerful audio. The following sections break down how it works, why it matters, and how to apply it effectively in any setup.
Key Takeaways / TL;DR
- Audio headroom is the range between normal levels and the point at which distortion begins.
- Proper headroom preserves clarity and prevents clipping.
- Managing headroom ensures consistent quality across different systems.

1
Defining Audio Headroom
Audio headroom is the safe margin between a system's operating level and the point at which distortion or clipping occurs. It ensures signals remain clean, dynamic, and free from unwanted artifacts during recording, mixing, and mastering.
In audio engineering, managing these levels correctly is a fundamental skill. It helps maintain the balance between loudness and clarity throughout the entire process. Knowing how much headroom to keep at each stage ensures a smoother workflow.
What Is Headroom in Audio?
Headroom in audio is the difference between the signal's peak and the maximum level that equipment or software can handle before distortion. Professional audio production requires this space to account for transients and processing. It prevents the signal from hitting the ceiling prematurely.
In digital systems, this maximum is fixed at 0 dBFS (decibels full scale). Any signal that exceeds this threshold is clipped, creating harsh artifacts. Monitoring levels relative to 0dBFS is standard practice for maintaining a clean signal path.
New mixers often wonder how much headroom is ideal for a standard project. Usually, this depends on the genre and the desired dynamic range. What is headroom to one person might be a strict limit, while to another, it is a creative safety net.
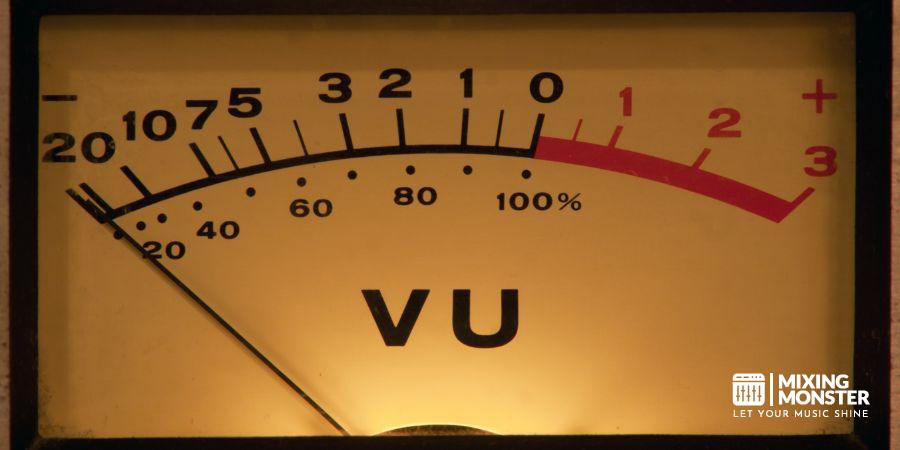
Analog systems measure headroom relative to a nominal operating level, often with meters calibrated around 0 VU. Unlike digital, analog gear may allow some peaks above nominal without immediate distortion, providing a "soft" margin.
Engineers typically leave 3–6 dB of headroom when preparing a mix for mastering. This range provides enough space for transient peaks while maintaining an adequate signal-to-noise ratio. More than this can make a mix unnecessarily quiet, while less increases the risk of clipping.
For a deeper look at how this margin functions in both digital and analog workflows, see the explanation in headroom (audio signal processing).
Importance of Headroom in Sound Quality
Maintaining proper headroom directly affects sound quality and dynamic range. Without it, peaks push into clipping, producing distortion that reduces clarity and listener comfort.
Headroom also gives engineers flexibility when applying processing such as equalization, compression, or limiting. Each adjustment can raise signal levels, so having space ensures changes do not overload the mix.
A balanced approach prevents both extremes:
- Too little headroom → clipping, distortion, reduced dynamics.
- Too much headroom → unnecessarily low levels, weaker perceived loudness.
In practice, good gain staging throughout the recording and mixing stages is the most reliable way to preserve headroom. Using tools like RMS or VU meters helps monitor average levels while keeping peaks under control.
Headroom Versus Clipping
Clipping occurs when a signal exceeds the system's maximum level, cutting off waveforms and creating distortion. Digital clipping is abrupt and harsh, while analog clipping can be more gradual but still undesirable in most cases.
Headroom acts as a safety buffer against clipping. By leaving enough space, engineers ensure that sudden transients—like drum hits or vocal peaks—do not exceed the maximum limit.
The relationship can be summarized:
|
Concept |
Definition |
Impact on Sound |
|
Headroom |
Margin between signal peaks and max level |
Preserves clarity and dynamics |
|
Clipping |
Exceeding max level |
Causes distortion and harshness |
Understanding this balance allows for mixes that are both powerful and clean.

2
How Headroom Works in Audio Systems
Headroom in audio systems is the margin between the loudest signal level and the point at which distortion or clipping occurs. It ensures clean playback, preserves dynamics, and provides space for sudden peaks without degrading the sound.
Signal Peaks and Dynamic Range
Every audio signal has peaks that rise above its average level. These peaks often come from drums, plucked strings, or sudden vocal accents. If levels are set too close to the system's maximum, these peaks can exceed the limit, resulting in clipping.
Headroom provides a buffer zone that allows each peak level to pass naturally. This ensures a dynamic mix that sounds open and punchy. Without this margin, the dynamic range can collapse, leaving the mix flat or distorted.
A well-managed mix typically leaves 3–6 dB of headroom before mastering. This range balances clarity with loudness, ensuring transients remain intact while still allowing engineers to boost overall levels later.
Digital vs. Analog Headroom
Digital systems define their absolute ceiling at 0 dBFS (decibels full scale). Any signal that exceeds this threshold clips immediately, introducing harsh distortion. For this reason, engineers monitor input levels and often aim for average levels around -18 to -12 dBFS during recording to leave sufficient space for peaks.
Maintaining these levels is a core part of audio engineering in the digital age. It ensures that internal processing does not cause digital overs. Leaving this margin also makes it easier to combine multiple tracks later in the mix.
Analog systems behave differently. They often have a "soft" clipping characteristic and can tolerate limited overdrive before distortion becomes unpleasant. Many analog devices are calibrated to a nominal operating level, such as +4 dBu, with several decibels of headroom above that level.
This distinction means digital workflows require a stricter level of management, while analog gear sometimes benefits from subtle saturation. Understanding both helps engineers decide how much margin to leave, depending on the equipment in use.
Discover Best Audio Gear & Equipment


Measuring Headroom
Accurate measurement is essential to control headroom. Engineers use tools such as peak meters, RMS meters, and VU meters to assess both transient spikes and average levels.
- Peak meters show the highest instantaneous values.
- RMS meters reflect the average loudness of the signal.
- VU meters respond more slowly, approximating perceived loudness in analog-style workflows.
In digital audio, monitoring levels ensure signals never exceed 0 dBFS. In analog setups, meters help maintain a strong signal-to-noise ratio while leaving space for peaks. Using these tools consistently makes it easier to maintain the recommended 3–6 dB of headroom before mastering.
3
Gain Structure and Volume Control
Proper gain structure and careful use of volume control help prevent clipping, reduce noise, and preserve headroom. Each stage of the signal path must be managed so that the audio remains strong without exceeding system limits.
Gain Staging for Optimal Headroom
Gain staging is the process of adjusting signal levels at each point in the audio chain to maintain clarity and dynamic range. If the signal is set too high, it risks clipping; if it is too low, the noise floor becomes more noticeable.
In analog systems, engineers often push levels closer to 0 dBVU, whereas in digital systems, caution is required, as clipping at 0 dBFS can cause harsh distortion. Many professionals aim for peaks around -12 dBFS to -6 dBFS in digital setups, leaving sufficient headroom.
Good gain staging also ensures that the signal-to-noise ratio remains favorable. By optimizing levels at the preamp, EQ, and faders, engineers can create headroom throughout the signal chain. This process helps increase headroom for later processing and avoids unnecessary boosts that would raise noise.
A consistent approach across devices—such as setting laptop or instrument outputs to about 75–80%—helps maintain a balanced signal flow. This keeps the system operating within its intended range and reduces the risk of overloading downstream components.
Your Song Mixed & Mastered By Mixing Monster


Role of Volume Control in Maintaining Headroom
Volume control is the final adjustment that determines playback loudness, but should not be confused with gain. While gain sets the signal strength entering a device, volume control adjusts the level after processing.
For example, keeping the master fader at unity gain and adjusting loudness with an amplifier's volume knob or monitor controller maintains proper headroom. This avoids driving the mix bus into distortion while still achieving the desired listening level.
A practical guideline is to let the mix peak around -6 dB on the master output. This ensures the combined signal from multiple tracks does not exceed available headroom.
Volume control also plays a role in monitoring. Engineers can listen at different playback levels without altering the gain structure, ensuring accurate perception of balance and dynamics while keeping the signal path clean.
By separating gain staging from volume adjustments, systems remain stable, predictable, and free from unnecessary distortion.

4
Headroom in Mixing and Mastering
Headroom ensures that audio signals remain clean and free from unwanted distortion while leaving space for processing during mastering. Proper gain staging and level management allow engineers to balance dynamics without pushing signals too close to the clipping point.
In modern audio production, this safety margin allows a track to be polished without introducing artifacts. Mastering involves significant level changes, so having room to work is essential. Without it, the final result can sound small or oversaturated.
Setting Levels to Prevent Clipping
Clipping occurs when audio exceeds the maximum level a system can handle, resulting in distortion. In digital systems, this limit is 0 dBFS, while in analog gear, it varies depending on the design. To avoid clipping, engineers typically aim for peak levels around -6 dBFS during mixing.
Maintaining this margin gives flexibility for adjustments later in the process. For example, if a mix peaks too close to 0 dBFS, even small EQ boosts or compression changes can cause distortion. Leaving space between the average signal level and the clipping point helps preserve dynamics.
Some engineers use metering systems like the K-System, which shifts the reference point to encourage lower average levels. This approach makes it easier to maintain consistent headroom and avoid pushing signals into distortion.
Related Articles


Best Practices for Track and Master Bus Headroom
Headroom management applies at both the track level and the master bus. Individual tracks should be gain-staged so their peaks do not overload plugins or buses. A practical range for tracks is often between -18 and -12 dBFS RMS, keeping peaks well below 0 dBFS.
On the master bus, leaving 3–6 dB of headroom before exporting is a common practice. Many mastering engineers recommend this because it provides enough space for EQ, compression, and limiting without risking distortion. Applying subtle bus compression can help unify a mix while preserving the margin needed for the mastering stage. This range is widely accepted across professional workflows.
For final masters, limiter ceilings are often set slightly below 0 dBFS, such as -1 dBTP, to prevent inter-sample peaks from clipping on consumer playback systems. This ensures the final product remains clean across different formats and devices.

5
Headroom in Headphones and Amplifiers
Headroom determines how well headphones and amplifiers handle sudden audio peaks without distortion. It relates directly to available power, the headphones' sensitivity, and the amplifier's ability to deliver current when needed.

Why Headroom Matters for Headphones
Headphones vary widely in impedance and sensitivity, which directly affects the headroom they require. High-impedance models such as the Sennheiser HD 600 often need more power to reach the same volume levels as lower-impedance headphones. Without enough headroom, peaks in music can clip, leading to distortion.
For listeners, this becomes most noticeable in dynamic recordings with sudden volume changes. A headphone with adequate headroom can reproduce these shifts cleanly, while one pushed beyond its limits compresses or distorts.
Key factors that influence headphone headroom include:
- Impedance (higher values demand more voltage)
- Sensitivity (lower sensitivity requires more amplifier power)
- Music dynamics (classical or live recordings often need more headroom)
In practice, headroom ensures that headphones play at comfortable listening levels while still handling transient spikes without strain. This is especially relevant for critical listening, mixing, or when using demanding headphones that need more power than portable devices can provide.
Choosing Headphone Amps for Adequate Headroom
A headphone amplifier with sufficient headroom ensures clean output even when driving demanding models. Headroom in amplifiers refers to the extra power available beyond typical listening levels, allowing them to handle peaks without distortion.
More power than the headphone usually needs provides a buffer for dynamic swings.
When selecting an amp, it is important to match it with the headphone's impedance and sensitivity. For example, the Sennheiser HD 600 pairs best with amplifiers that can deliver higher voltage swing, as portable devices often fall short.
Considerations when choosing an amp include:
- Output power relative to headphone requirements
- Impedance matching for optimal performance
- Clean gain structure to avoid unnecessary noise
Dedicated headphone amps are particularly useful for high-end or studio headphones, where accuracy and dynamic range are priorities. They provide the necessary headroom to maintain clarity across both quiet passages and sudden peaks, reducing the risk of distortion or fatigue during long listening sessions.

6
Preamplifiers and Power Amps: Impact on Headroom
Headroom in audio systems depends on both the preamplifier and the power amplifier. Each stage must handle signal levels cleanly, leaving enough margin to prevent distortion or clipping when dynamics increase.
Preamplifier Headroom Considerations
A preamplifier sets the initial signal level before it reaches the power amp. If its headroom is too low, signal peaks can overload the stage and cause unwanted distortion. Designers often build extra voltage margin into preamps so they can handle a range of input levels without straining.
This attention to detail is what separates high-end audio engineering from consumer-grade gear. Preamps with high headroom allow for more natural sound reproduction. They capture the full expression of the performance without getting in the way.
For example, some preamps rated at 2 volts output can actually deliver more than double that without clipping. This added capacity ensures that even when a digital-to-analog converter outputs a higher-than-expected signal, the preamp remains within a safe operating range.
Maintaining clean headroom in a preamp also relates to its gain structure. Excessive gain reduces usable headroom, while carefully chosen gain stages keep the signal within a comfortable operating window. As explained by PS Audio, headroom is not just about avoiding clipping but also about keeping the signal in its most linear range.
In practice, a well-designed preamp allows the volume control to operate in a useful range while still leaving space for dynamic peaks. This balance helps avoid both overload and noise floor issues.
Power Amps and Headroom Performance
Power amplifiers must deliver enough wattage to drive speakers cleanly. Headroom here refers to the margin between the average listening level and the maximum power the amp can produce without clipping. A higher-powered amp can reproduce sudden peaks more accurately without distortion.
For instance, a 500-watt amplifier playing at moderate levels has more reserve capacity than a 50-watt amp at the same volume. The smaller amp may already be near its limit, leaving little margin for dynamic passages. This difference becomes noticeable with music that has a wide dynamic range.
According to r/audiophile discussions, headroom prevents the amplifier from compressing or distorting during demanding moments. It ensures that sudden transients, such as drum hits or orchestral peaks, remain clean and undistorted.
Key factors that influence headroom in power amps include:
- Rated wattage relative to speaker efficiency
- Power supply design and stability under load
- Gain matching with the preamp to avoid overdriving
When the preamp and power amp have sufficient headroom, the system can reproduce dynamic material accurately and without stress.

7
Managing Distortion and Maximizing Clean Output
Maintaining clean audio depends on controlling signal levels so they stay below the clipping point while leaving enough headroom for peaks. Engineers focus on balancing the gain structure and monitoring tools to prevent distortion that reduces clarity and dynamic range.
Successful audio production involves a constant awareness of signal flow. By keeping an eye on the meters, you can ensure that the signal remains in the sweet spot. This prevents the need for drastic fixes later in the process.
How Distortion Relates to Headroom
Distortion occurs when a signal exceeds the maximum level a system can handle, pushing it past its headroom. In digital audio, this limit is fixed at 0 dBFS, while analog gear may allow a small margin above its reference level before clipping.
When signals approach these limits, waveforms flatten, producing harsh, unpleasant artifacts. This not only reduces audio quality but also eliminates dynamic detail.
Headroom acts as a safety margin, allowing transient peaks such as drum hits or vocal accents to pass without distortion. Without adequate headroom, these peaks overload the system, causing audible clipping.
A balanced mix typically leaves 3–6 dB of headroom before mastering, giving engineers space to process dynamics and EQ without introducing distortion. Audio headroom is therefore not just about loudness but about preserving integrity across the entire production chain.
Techniques for Reducing Unwanted Distortion
Managing distortion starts with proper gain staging. Each stage of the signal chain—from microphones and preamps to DAW channels—should be set so levels remain strong but never approach the clipping point.
Meters such as VU, RMS, or peak meters help visualize both average and transient levels. Using these tools, engineers can identify problem spots where peak risk exceeds available headroom.
Other techniques include:
- Lowering the input gain on preamps to avoid overloading.
- Using compressors to control peaks without crushing dynamics.
- Maintaining a strong signal-to-noise ratio ensures that clean sound is preserved at lower levels.
By combining these practices, engineers maximize clean output and keep distortion under control, ensuring a mix that remains clear and balanced even after mastering.
8
Selecting Audio Gear for Sufficient Headroom
Choosing the right equipment requires attention to how much clean power the gear can deliver and how efficiently it works with the headphones it connects to. Matching the amplifier output to the headphone sensitivity ensures sufficient headroom without distortion or noise.
Evaluating Headroom in Audio Equipment
Headroom in audio gear refers to the margin between normal listening levels and the point where distortion begins. Amplifiers and headphones both have limits, and selecting the right combination prevents clipping and ensures consistent dynamics.
For headphone amplifiers, wattage alone does not define usable headroom. The headphones' efficiency and impedance rating must be considered. For example, a 300-ohm headphone will require a greater voltage swing than a 32-ohm model.
A useful guideline is to leave at least 20% extra amplifier power beyond typical listening needs. This prevents the amp from running at its limit and avoids harshness in transients. In professional mixing, engineers often leave 6–12 dB of headroom when setting levels to preserve clarity, and this principle applies similarly to playback systems.
When evaluating gear, it helps to check manufacturer specifications for maximum SPL, distortion figures, and recommended amp pairings. Some brands highlight this clearly, while others require comparing sensitivity ratings to amplifier output.
Recommended Headphones and Amps
Pairing the right headphones with an appropriate amplifier ensures both comfort and performance. Models like the Sennheiser HD 600 are popular for their neutral response, but they require a capable amp to deliver sufficient headroom. Without one, they may sound underpowered and flat.
Dedicated headphone amps provide more current and voltage than typical consumer devices. Options such as desktop solid-state amps or portable units can supply the necessary clean power. Users should look for low output impedance to maintain accurate frequency response.
For higher-impedance headphones, tube amplifiers can also be effective, though they may color the sound. In contrast, efficient low-impedance headphones can perform well with compact solid-state amps. Matching gear to headphone requirements ensures that dynamics remain intact without pushing the system into distortion.
A simple comparison table can help clarify:
| Headphone Model | Impedance | Amp Requirement | Notes |
|---|---|---|---|
| Sennheiser HD 600 | 300 Ω | High-voltage desktop amp | Neutral, reference-grade |
| Typical 32 Ω headphones | 32 Ω | Portable or low-power amp | Easy to drive |
| Planar magnetic models | Varies | High-current amp | Demands strong power delivery |
9
Key Takeaways For Understanding Audio Headroom
Audio headroom is the margin between a signal's average operating level and the point at which clipping or distortion begins. It ensures that sudden peaks or transients do not overload the system.
Engineers often ask how much headroom they should provide to the mastering studio. While individual preferences vary, the goal is always to keep the signal clear of the maximum threshold. This is a critical step in professional audio engineering for any genre.
Engineers typically aim for 3–6 dB of headroom during mixing and mastering to maintain clarity and prevent distortion, as noted in eMastered's guidance. This range provides enough space for peaks without making the mix unnecessarily quiet.
Headroom is measured in decibels (dB), often relative to 0 dBFS in digital systems. In analog systems, the clipping point may vary, but the principle remains the same: avoid pushing signals into distortion while maintaining a high signal-to-noise ratio.
Practical tips include:
- Use proper gain staging at every stage of recording.
- Monitor levels with VU or RMS meters to balance peaks and average loudness.
- Keep transient spikes under control with compression when needed.
A simple comparison can help:
| Situation | Recommended Headroom |
|---|---|
| Recording tracks | ~6–12 dB |
| Mixing before mastering | ~3–6 dB |
| Final mastered track | Close to 0 dBFS |
Maintaining appropriate headroom allows the mix to retain dynamic range and ensures the mastering process has enough flexibility.

Frequently Asked Questions
1
How does headroom affect the overall sound quality in a mix?
Headroom helps preserve detail by preventing distortion when peaks rise above average levels. Without enough space, signals clip and introduce unwanted harshness. Properly managed headroom ensures a mix remains clean and balanced.
2
What are the best practices for managing headroom in a digital audio workstation?
Engineers often use gain staging to control levels at each stage of the signal path. Keeping peaks below 0 dBFS, usually around -6 dBFS, prevents digital clipping. Tools like RMS and peak meters provide accurate monitoring for consistent results.
3
How do you calculate the optimal level of headroom for mastering audio?
Most mastering engineers recommend leaving about 3 to 6 dB of headroom before exporting a mix. This range gives enough space for processing without pushing levels into distortion. Monitoring peak values in a DAW provides a clear measurement of available headroom.
4
What role does headroom play in the dynamics of a recording?
Headroom allows transients, such as drum hits or vocal peaks, to pass through without distortion. It maintains dynamic range by keeping softer and louder parts distinct. This balance ensures recordings feel natural and not overly compressed.
5
Can excessive headroom negatively impact the loudness of a track?
Yes, too much unused headroom can make a mix sound unnecessarily quiet. While mastering can raise overall volume, an overly low mix level reduces efficiency. Maintaining a reasonable range prevents both clipping and underpowered output.
6
What is the relationship between headroom and signal clipping in audio production?
Headroom is the buffer zone that prevents clipping. When a signal exceeds the maximum level, clipping occurs, producing distortion and loss of detail. By keeping peaks safely below the ceiling, engineers avoid damaging the audio signal.