


Ever wondered "what is music mixing"? Music mixing is an essential part of music production that can make or break a song. Whether you are a budding producer or just curious, mixing is where the magic happens. It's the process that turns raw recordings into polished tracks that sound balanced and professional. Professional mixing requires a combination of technical skill and creative intuition to make a song radio-ready.
Music mixing is the process of combining and adjusting individual audio tracks to create a cohesive and balanced final product. This involves setting levels, panning sounds, and adding effects like reverb, compression, and saturation. Using tools like volume faders, EQs, and compressors, mixing engineers ensure that each element of a song sits well together. This creates a harmonious and dynamic listening experience.
Discover more about the basics of music mixing, the tools and techniques used by professionals, and how to create the right space and dimension in your mixes. Excited to dive in? Stick around to uncover proven mixing concepts and practical tips to set up your own mixing environment.
Key Takeaways / TL;DR
- Music mixing combines and adjusts audio tracks.
- Essential tools include volume faders, EQs, and compressors.
- Learn the basics and advanced concepts of mixing for a professional-sounding track.

1
What Is Music Mixing: The Basics
Music mixing involves combining and adjusting individual elements of a song to create a balanced, cohesive final product. This process includes organizing, balancing levels, and using various effects to enhance sound quality.
Understanding The Music Mixing Process
Mixing starts with organizing your tracks and understanding the song structure. Each instrument and vocal part is isolated, which helps clarify the arrangement. This transition from the recording process to the mix stage is critical for clarity. This is where a static mix comes in: it sets initial volume levels without any effects.
Next, you focus on gain staging to ensure each track has an optimal signal level. Balancing the gain and volume of each track ensures no single element overpowers the rest. Volume automation then adjusts levels dynamically to maintain balance throughout the song.
Equalization (EQ) shapes the tone of each track, removing unwanted frequencies and enhancing desirable ones. Using an equalizer helps prevent different instruments from clashing. Compression controls the dynamic range, making quieter parts louder and louder parts softer for a smooth, consistent sound. Reverb and delay add depth and space, making the mix feel more natural and polished.
Defining Key Audio Mixing Terms
Mixing: The process of combining and adjusting individual audio tracks to create a final mixdown. It includes balancing, EQ, compression, and effects. High-quality recording technique and the right choice of microphones during the tracking phase make this job much easier. A professional mixing engineer relies on these clean signals to build a great sound.
Audio Mixing: Often used interchangeably with mixing, it specifically refers to the technical process of blending audio tracks.
Sound: The overall auditory result of the music mixing process, encompassing all tracks and effects.
Balance: Achieving harmony among track levels so that no single element dominates.
Levels: The volume of individual tracks relative to each other.
Gain: The input volume of a track before it is processed.
Volume Automation: Dynamic changes in track volume throughout the song.
Mixdown: The final stereo or multichannel audio mix created after the mixing process.
Static Mix: Initial volume settings for each track, usually without effects or processing.
Understanding these terms will help you navigate the mixing process and communicate effectively with other audio professionals.

2
Digital Audio Workstations (DAWs)
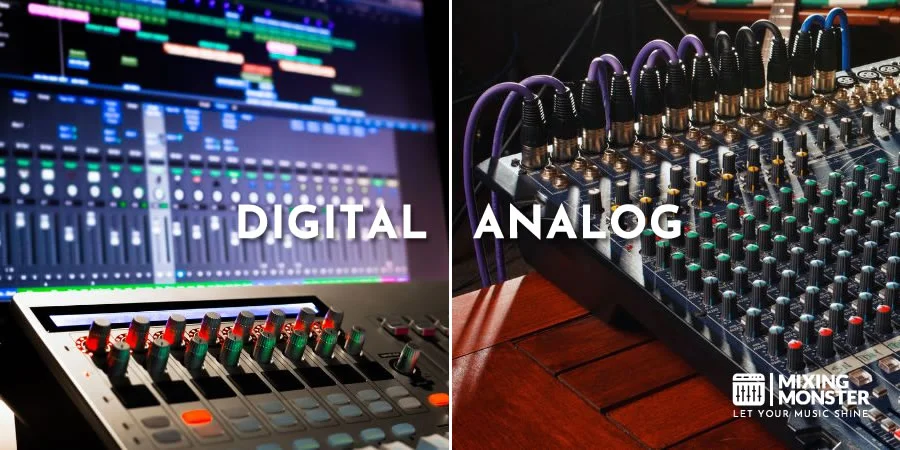
Digital Audio Workstations (DAWs) are essential for any music mixing process. They let you record, edit, and mix audio tracks seamlessly. Your DAW choice impacts your workflow and mixing quality.
Choosing The Right DAW
Choosing the right DAW depends on your individual needs and preferences.
Apple Logic Pro is great for Mac users, offering features like Live Loops and a new step sequencer. Ableton Live is popular for electronic music production and live performances.
Pro Tools is often preferred by professionals for its robust editing and mixing capabilities. Consider the type of music you produce and your computer's operating system when making your choice.
Navigating The DAW Interface
Navigating a DAW interface can seem daunting at first. Most DAWs have similar sections: the main timeline, track controls, and a mixer panel. Learn where the basic tools are located: play, stop, record buttons, and how to zoom in and out of your tracks.
Familiarize yourself with keyboard shortcuts to improve your efficiency. Explore the menu for additional features and settings that can enhance your mixing process.
Discover Best Audio Gear & Equipment


Utilizing DAW Tools For Mixing
Utilizing DAW tools effectively can make a huge difference in your mixing. Use plugins and virtual instruments to add effects and sounds to your tracks. Third-party plugins can provide additional functionality, such as unique reverb or compression options.
Automation tools let you adjust volume levels and panning over time, adding dynamic changes to your mix. Learn to use the EQ to balance frequencies, and the mixer to control track levels and effects sends.
3
Essential Music Mixing Tools And Techniques
To achieve a polished sound, you'll need to understand essential tools and techniques like equalization, dynamics processing, time-based effects, and mix automation. Each of these plays a crucial role in shaping the final mix.
Equalization (EQ)
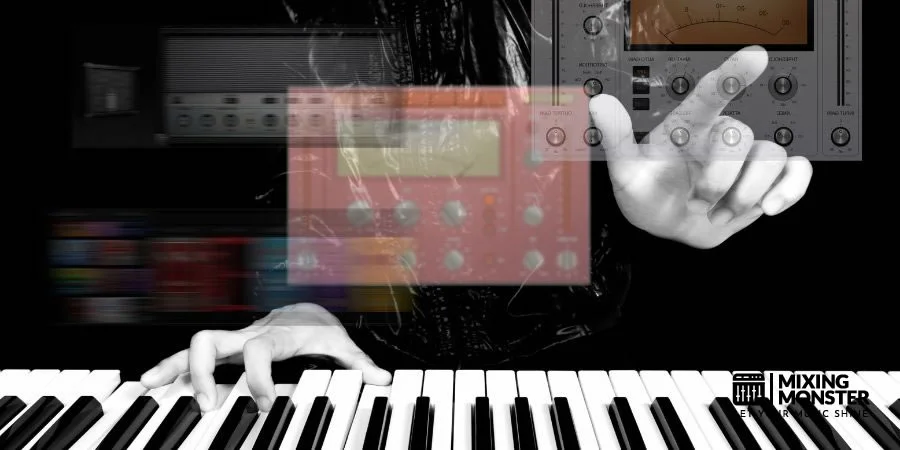
Equalization (EQ) is the process of adjusting the balance between different frequency components. Using an equalizer can enhance specific aspects of your track or reduce unwanted frequencies. Tools like graphic and parametric EQs are common for this task.
Graphic EQs offer fixed-frequency bands, making them easier to use for quick adjustments. Parametric EQs give you control over frequency, bandwidth, and gain, offering more precision. Key techniques include:
- Cutting frequencies to remove mud and clutter
- Boosting frequencies to highlight instruments
- Using high-pass filters to remove low-end rumble
Judicious use of EQ can make individual tracks sit better in the mix, creating clarity and balance.
Dynamics Processing
Dynamics processing involves controlling the range between the loudest and quietest parts of your track. Compressors and limiters are key tools in this area.
Compression reduces the dynamic range, making quiet sounds louder and loud sounds quieter. This creates a more cohesive sound. Limiters prevent audio signals from exceeding a set threshold. Limiting is a critical final step in dynamics processing to prevent clipping.
Common techniques include:
- Gentle compression to even out performances
- Sidechain compression for creating rhythmic effects
- Multi-band compression for controlling specific frequency ranges
Be cautious not to overuse compression, as it can make your music sound lifeless.
Your Song Mixed & Mastered By Mixing Monster


Time-Based Effects: Reverb And Delay
Time-based effects like reverb and delay add space and depth to your mix. Reverb simulates the sound of a space, making a track feel more lifelike. Delay creates echoes and can add rhythmic complexity.
Reverb types include:
- Room reverb for a natural sound
- Hall reverb for grand, smooth spaces
- Plate reverb for a bright, classic tone
Delay settings to consider:
- Delay time for the interval between echoes
- Feedback for the number of repeats
- Mix level for the balance between dry and wet signals
Using reverb and delay thoughtfully can add dimension without cluttering the mix.
Mix Automation For Detail Work
Mix automation allows you to control various parameters over time, adding detail and interest to your mix. You can automate volume, pan, effects, and more.
Important automation tasks include:
- Volume automation for dynamic shifts and vocal rides
- Pan automation to create movement and space
- Effect automation for changing reverb or delay settings over time
Using automation, you can ensure each element in your mix is heard at the right time and in the right way. This adds a professional touch to your work, making it more engaging and polished. For example, you might automate the width of the chorus to make it feel larger than the verses.

4
Mixing Various Elements
Balancing instruments, treating vocals, handling drums and percussion, and managing bass and low end are crucial in music mixing. These elements must be carefully adjusted to create a coherent and polished track.

Achieving Balance Between Instruments
Balancing each instrument in a mix ensures a harmonious sound. Each instrument needs its space in the frequency spectrum to avoid clashing.
|
Instrument |
Frequency Range |
Tips for Balance |
|
Vocals |
85 Hz - 255 Hz |
Boost presence (3 kHz - 5 kHz), avoid muddiness. |
|
Drums |
60 Hz - 4 kHz |
Ensure kick and snare cut through the mix. |
|
Bass |
20 Hz - 200 Hz |
Focus on low end, clear up higher frequencies. |
|
Guitar |
80 Hz - 1.2 kHz |
Balance mids, avoid interference with vocals. |
|
Keys |
100 Hz - 2 kHz |
Provide body, avoid overlapping with bass. |
Panning instruments across the stereo field can also enhance clarity. This avoids piling sounds on top of each other and helps each instrument stand out.
Vocal Treatment in Mixing
Vocals are often the focal point of a track. Start by cleaning up any noise and unwanted breaths. Use EQ to remove muddiness around 200-300 Hz and to boost presence between 3-5 kHz, where clarity is essential.
Compression is key to keeping vocals consistent. This helps control volume spikes and brings softer parts up, especially during a high-energy chorus. A reverb or delay can add space and depth, making vocals sit nicely in the mix.
De-essing is crucial for reducing harsh sibilance, those sharp "s" sounds, without making the track sound dull.
Related Articles


Handling Drums and Percussion In A Mix
Drums and percussion provide rhythm and must be mixed carefully to drive the song. Ensure the kick drum is prominent in the low end, around 60-100 Hz. Be careful with how microphones were placed during recording to avoid phase issues. Proper microphone placement ensures the drum kit sounds natural and punchy before you even start mixing. Too much low-end can muddy the mix.
Snare drums should stand out. Boost around 1-2 kHz to add snap and presence. For hi-hats and cymbals, focus on the higher frequencies above 5 kHz for brightness and clarity without becoming harsh.
Use parallel compression to add punch. This technique involves blending a heavily compressed version of the drum track with the uncompressed track.
Managing Bass and Low End
The bass guitar needs careful attention to fill out the low end without overwhelming other elements. A solid bass guitar performance provides the rhythmic and harmonic foundation. Start with EQ, cutting muddiness in the 200-300 Hz range. Boost the fundamental frequencies around 60-80 Hz for depth and power.
Compression ensures a steady bass line. Set the attack and release times to keep the bass tight without losing its natural feel.
Use sidechain compression with the kick drum to avoid clashing. This technique slightly reduces bass volume when the kick hits, maintaining a clean, punchy low end.
Additionally, use a high-pass filter on non-bass instruments to clear up the low end. This focuses the bass energy where it belongs, providing a solid foundation for the song.

5
Creating the Right Space and Dimension
Using Reverb and Delay Strategically
Reverb adds a sense of space by simulating the reflections of sound in a room. Different types of reverb, such as hall or room reverbs, can shape the perceived size of the space. Using reverb helps make instruments or vocals sound like they are in a specific environment, whether large or small.
Delay is another tool that can create space. It works by repeating the sound at set intervals, which can add a sense of depth and spaciousness. Short delays can make a sound fuller, while longer delays can create echo effects.
Strategically placing reverb and delay helps avoid a mix that feels crowded or muddy. Be careful not to overdo it, as too much reverb or delay can make everything sound distant and unclear.
Panning and the Stereo Field
Panning places sounds in the stereo field, which is the left-to-right space in the mix. Proper panning helps ensure that each instrument or vocal has its own space, making the mix feel more open and balanced. Panning can prevent sounds from clashing and give each element its distinct position.
For instance, you might pan a guitar slightly to the left while placing a keyboard a bit to the right. This way, each instrument stands out, and the listener can distinguish between them more easily.
Using panning effectively creates a wide and immersive soundstage, making the mix more dynamic and interesting. It's an essential technique for achieving clarity and balance in your music.

6
Advanced Mixing Concepts
In advanced music mixing, you need to focus on dynamic range, frequency balance, and emotional impact. These elements work together to enhance the overall quality and emotional depth of your music. Let's explore each in more detail.
Dynamic Range and Its Importance
Dynamic range refers to the difference between the quietest and loudest parts of a track. Maintaining a good dynamic range is essential for keeping your mix engaging. If the range is too narrow, the track can sound flat.
But if it's too wide, crucial elements may get lost. Use compression to control dynamic range. It helps optimize headroom, letting you raise the overall volume without distortion. It's crucial to balance soft and loud parts to ensure clarity and impact.
Don't overuse compression. Too much can kill the natural dynamics of your track, making it sound lifeless. Instead, find a balance that keeps the mix vibrant and interesting.
Frequency Balance and Separation
Frequency balance involves properly distributing low, mid, and high frequencies across all elements of your track. Achieving this balance ensures that no single element overshadows the others. Use equalization (EQ) to carve out spaces for each instrument.
For example, cut low frequencies in non-bass elements to give the bass and kick drum room to breathe. Boosting or cutting specific frequencies helps prevent muddiness and masking issues.
Separation is also crucial. Pan elements left or right to create a stereo image, allowing different sounds to stand out. Proper frequency separation creates a clear, cohesive mix, ensuring each element is heard distinctly.
Emotional Impact Through Mixing
Your mix should evoke emotions and connect with the listener on a deeper level. Every decision you make affects the emotional impact of the track. Use reverb and delay to add space and depth, making the mix feel immersive.
Automation helps emphasize emotional shifts. For instance, automate volume and effects parameters to create dynamic changes that resonate with the listener. Adjusting the levels of different elements at key points in the song can significantly enhance emotional delivery.
Balance technical precision with emotional expression. Ensuring the mix not only sounds good but also feels engaging can elevate your music to a professional level.

7
Finalizing the Mix
Getting a mix ready for mastering requires careful attention to detail. Both recording and mixing play significant roles in how the final master will translate across different speakers. You'll need to reference other tracks, ensure all elements are balanced, and finally export the mix in a format suitable for mastering.
The Art of Mix Referencing
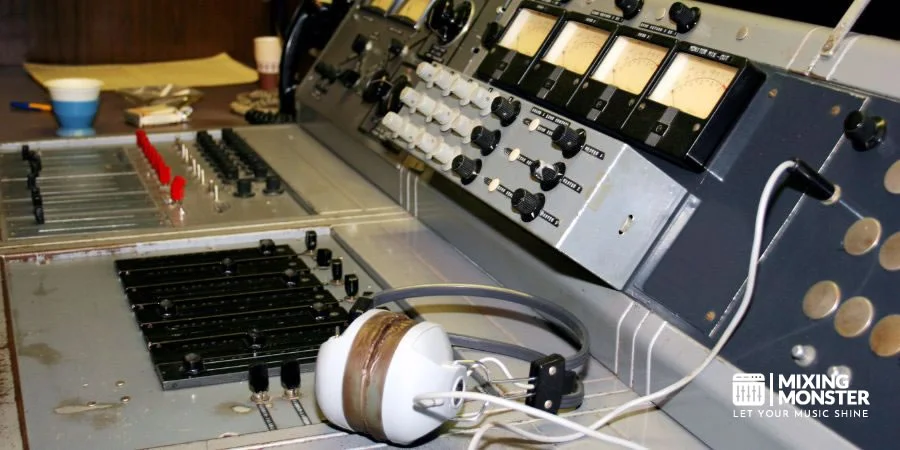
To achieve a professional-quality mix, it's important to use reference tracks. These are songs you respect and that share similar tonal qualities with your project. By comparing your mix to these references, you can identify areas that need adjustment, such as the balance of instruments or overall tone.
Referencing helps ensure that your mix is competitive and sounds good across different playback systems. Use a professional track and critically listen to how instruments sit within the mix. This can guide your adjustments, providing a clearer path to a polished final mix.
Preparing for Mastering
Once your mixdown feels well-balanced, it's time to prepare for mastering. Preparation involves checking that levels are not exceeding peaks and ensuring there is headroom. Headroom is the space between the loudest part of your track and 0 dBFS, typically around -6 dB. This allows the mastering engineer room to enhance your track without clipping.
You should also check for any technical issues, such as unwanted noise or clicks, and address them at the mix stage. Exporting stems or a final mix with these considerations will make the mastering process smoother and more effective.
The Export Process
Exporting your mix correctly is crucial. First, ensure all your settings are properly adjusted. Your sample rate and bit depth should match the highest-quality settings you used during recording, which are typically 44.1 kHz and 24-bit. Turn off any normalization settings to avoid unintended changes to your levels.
Export your track in a common format such as WAV or AIFF, which are uncompressed and maintain high quality. After exporting, double-check your file by listening to it on different systems to ensure consistency. This step ensures your mix is ready for mastering, making the final product as polished as possible.
8
Setting Up Your Mixing Environment
Setting up a good mix environment involves choosing the right equipment, treating your room for better acoustics, and organizing your workspace efficiently. Let's discuss these critical aspects to ensure your mixing sessions are productive.
Choosing the Right Monitors and Headphones
Selecting studio monitors and studio headphones is essential to achieving an accurate mix. Studio monitors should have a flat frequency response to give you a true representation of your music. Place them at ear level and form an equilateral triangle with your listening position for optimal sound.
For headphones, choose studio headphones designed for mixing and mastering. They should offer a neutral sound and good isolation. Open-back headphones are great for natural sound, but closed-back headphones are better in noisy environments.
Acoustic Treatment for Your Room
Improving your room acoustics can greatly enhance your mixing accuracy. Working in a treated room allows you to hear frequencies more clearly. Start by placing bass traps in corners to manage low-frequency buildup. Acoustic panels on the walls can help reduce reflections.
Consider installing a diffuser on the back wall to scatter sound waves and create a more balanced sound field. Avoid placing your desk against a wall with windows or large mirrors, as they can create unwanted reflections.
Organizing Your Workspace
A well-organized workspace ensures you can work efficiently without distractions. Keep your audio interface, mixing console, and other essential equipment within easy reach. Cable management is crucial; use cable ties or clips to keep your setup tidy.
Having a clear workspace helps you focus. Store away non-essential items and keep your desk clean. Place your computer screen so it doesn't block the sound from your monitors. Use shelves or racks to store additional gear.
By focusing on these areas, you can create a professional-quality home studio setup that supports your mixing needs.
9
Key Takeaways For Music Mixing Beginners
Start With a Good Listening Environment
A well-organized workspace is crucial. Ensure your home studio has proper acoustic treatment to avoid unwanted echoes. Use studio monitors to achieve a clear, accurate sound. If you're on a budget, high-quality studio headphones are a good alternative.
Keep your mixing tools and equipment easily accessible. This helps you focus on the mix rather than searching for gear. Label your tracks clearly and group similar tracks together for easier management.
Edit your audio clips to remove any noise, clicks, or silence. This makes your final product sound professional. Pay extra attention to rhythmic elements, such as drums, and ensure the vocals are consistent.
Maintain a good balance among different elements in your mix. Use panning to place instruments in the stereo field. This gives your mix depth and keeps it interesting.
These effects add space to your mix but can also make it sound muddy if overused. Apply them smartly to enhance the overall sound without overwhelming it.
Monitor at Different Volumes
Check your mix at various volume levels. This helps you catch issues that might not be noticeable at one volume but become obvious at another.
Practice Regularly
Practice is essential. The more you mix, the better you will become at identifying common mixing mistakes. Each mix will teach you something new, so keep working on different projects and researching mixing tips.
Using these tips will help you create better music mixes, making the process smoother and more enjoyable. Remember to be patient and keep learning.
Happy mixing!

Frequently Asked Questions
1
What is music mixing, and how does a beginner start?
To start mixing music as a beginner, you need a Digital Audio Workstation (DAW). Import your tracks into the DAW and organize them. Begin by adjusting levels, panning, and applying EQ to balance the different elements. Experiment with effects like reverb and compression to enhance the sound.
2
What are some common examples of music mixing techniques?
Some common music mixing techniques include panning, EQ, compression, reverb, and delay. Panning places sounds in the stereo field. EQ adjusts the balance of frequencies. Compression controls dynamics, while reverb and delay add space and depth.
3
What role does a music mixer play in producing a track?
A music mixer balances and blends individual tracks to create a cohesive sound. They adjust levels, apply effects, and ensure that every element sits well together. The mixer's goal is to create a polished and harmonious final product. A professional mixing engineer also ensures the song translates well across all types of playback systems.
4
How can I mix music on my computer?
You can mix music on your computer using a DAW. Programs like Ableton Live, FL Studio, and Pro Tools offer tools for editing, processing, and blending your tracks. Export your tracks into the DAW, organize them by type, and use the mix controls to adjust and enhance each element.
5
What is the difference between mixing and mastering in the music production process?
Mixing and mastering are two distinct steps. Mixing involves combining and adjusting individual tracks within a song to create a cohesive sound. Mastering, on the other hand, is the final step where the mix is polished and optimized for different listening environments and formats.
6
What purposes does sound mixing serve in creating a song?
Sound mixing makes a song sound balanced and professional. It ensures that vocals and instruments complement each other, maintains dynamics, and adds depth and space. Good mixing can elevate a track from average to compelling and ready for release.