


Ready to transform your raw recordings into professional-sounding tracks? Learning how to mix music starts with understanding fundamental music production tips. These basic audio mixing techniques form the foundation of modern music production for students and professionals alike.
Basic audio mixing techniques involve combining and adjusting individual audio tracks to create a balanced, polished final mix by carefully manipulating levels, EQ, compression, and spatial effects.
The process requires attention to detail and understanding of how different sonic elements interact within the frequency spectrum. A well-executed mix brings clarity to vocals, punch to drums, and depth to instruments. These audio mixing tips will help you maintain the song's artistic vision.
Learning these essential mixing skills opens doors to creating professional-quality music from your home studio. Whether you're working with a modest setup or professional gear, mastering fundamental mixing principles will dramatically improve your productions and help develop your signature sound.
Key Takeaways / TL;DR
- Balance levels and pan positioning create the foundation for a professional mix
- EQ and compression shape individual elements to fit together seamlessly
- Strategic use of effects adds depth and dimension to the final production

1
Overview Of Basic Audio Mixing Techniques
Audio mixing transforms raw recordings into polished, professional tracks through careful balance and sonic manipulation. The process requires both technical skill and creative intuition. Applying these audio mixing tips requires a solid foundation in sound engineering principles. By carefully balancing these elements, you can craft a rich soundscape that engages the listener. A professional soundscape allows every instrument to be heard clearly.
The first step involves level balancing - adjusting the volume of individual tracks to create a cohesive blend. The faders are your primary tools for creating a sense of hierarchy and importance within the mix.
Essential mixing techniques include equalization (EQ), compression, and effects processing. EQ shapes the frequency content of each track, while compression controls dynamic range.
Key mixing elements:
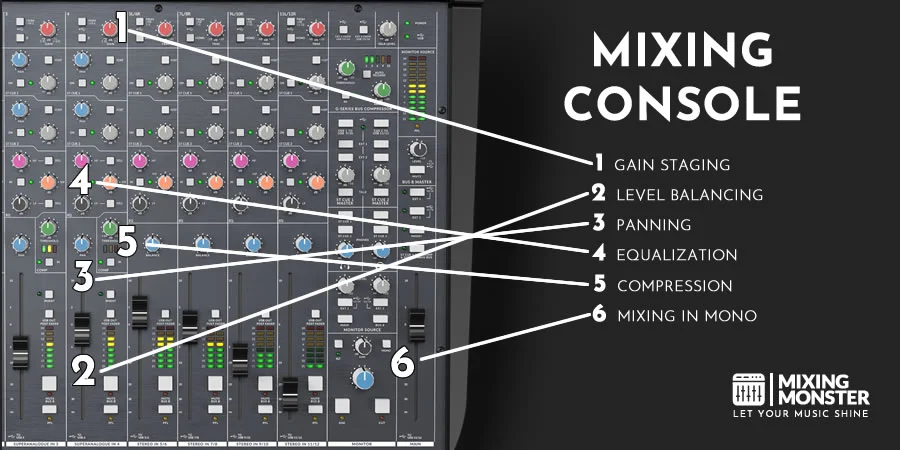
- Track leveling and gain staging
- Frequency balance through EQ
- Dynamic control with compression
- Spatial placement through panning
- Effects like reverb and delay
Professional audio mixing requires quality monitoring through studio headphones or speakers to make accurate decisions about sound placement and balance.
Basic signal flow typically moves from gain staging to EQ, then to compression, and finally to effects processing. This order helps maintain clarity as the mix is built.
The mixing console or digital audio workstation (DAW) serves as the central hub for all these processes. Each track can be processed independently before being combined into the final stereo output.

2
Balancing Levels And Gain Staging
Proper level balancing forms the foundation of professional audio mixing. Setting appropriate gain stages and managing volume levels creates clarity, depth, and professional sound quality.
Understanding The Importance Of Balanced Levels
Volume balancing creates depth and space in a mix by establishing proper relationships between audio elements. Each instrument needs its own space in the frequency spectrum and mix.
A balanced mix requires careful attention to decibel levels. The kick drum and bass typically sit between -6 and -8 dB, while other elements, such as guitars and vocals, usually range from -12 to -15 dB.
Professional engineers start by balancing the static volume using faders before applying any effects. These essential mixing tips help establish a solid foundation for the rest of the process.
Proper Gain Staging Techniques
Gain staging involves controlling audio levels through each stage of the signal chain. The goal is to maintain optimal headroom while avoiding distortion.
Key Gain Staging Steps:
- Set recording levels between -18 and -12 dB
- Maintain consistent levels between plugins
- Leave 6 dB headroom on the master bus
- Monitor input and output levels on each processor
Setting proper gain staging early prevents issues with clipping and distortion later in the mixing process. Using a limiter on the final output can also help manage transients that might otherwise cause digital clipping during peaks.
Discover Best Audio Gear & Equipment


Using Metering Tools Effectively
Engineers rely on various metering tools to monitor and adjust levels accurately:
Essential Meters:
- Peak meters for detecting sudden transients
- RMS meters for average volume levels
- LUFS meters for perceived loudness
- Phase correlation meters for stereo balance
Visual feedback from meters helps identify potential issues and ensures consistent levels throughout the mix.
Achieving A Balanced Mix
Volume balancing is the most important part of mixing. Start with the most prominent elements like drums and bass, then layer in other instruments. Small adjustments to the faders can significantly affect how the listener perceives the track's energy.
Volume Automation Tips:
- Automate subtle level changes for natural dynamics
- Use volume rides on vocals for a consistent presence
- Adjust levels during different song sections
- Create depth by varying instrument volumes
Track placement in the stereo field affects perceived volume. Pan position changes can help resolve masking issues between competing elements.
3
Panning And Stereo Imaging
Panning and stereo imaging techniques enhance mix clarity and create depth in audio production. Proper placement of sounds in the stereo field creates an immersive listening experience. This expands the stereo image and helps separate elements within the mix. A wide stereo image creates a more immersive listening experience.
The Role Of Panning In Mixing
Panning distributes audio signals between left and right speakers to create a sense of space and direction. The stereo field placement defines a clear soundstage for the listener. It affects how people perceive sound locations and relationships between mix elements.
Center positioning works best for key elements like lead vocals, kick drums, and bass to maintain focus and power. This creates a solid foundation for the mix.
Wider panning helps create separation between instruments and reduces frequency masking. Guitar parts, backing vocals, and percussion often benefit from strategic left-right placement.
Creating Width And Depth With Stereo Imaging
Stereo imaging techniques expand beyond basic panning to create a three-dimensional sound space. Microshifting duplicates tracks with slight timing and pitch variations, then pans them left and right.
Reverb and delay effects add depth perception when applied with different settings to the left and right channels. Short delays create subtle width while longer reverbs suggest distance.
Key stereo imaging tools:
- Stereo widening plugins
- Mid/side processing
- Haas effect
- Chorus and modulation
Your Song Mixed & Mastered By Mixing Monster


Panning Techniques For Different Instruments And Vocals
Lead vocals typically stay centered to maintain focus. Background vocals work well panned 30-70% left and right to create width.
Drums follow common positioning patterns:
- Kick drum and snare: center
- Hi-hats: 20-40% right
- Overheads: hard left/right
- Toms: graduated left to right
Guitar layers benefit from complementary panning: rhythm guitars at 50-70% on opposite sides, with lead parts closer to the center. Synths and pads often use wide stereo placement for atmosphere.
Maintaining Balance And Clarity In The Stereo Field
Monitor mix balance in mono to check phase relationships and ensure important elements remain clear. Avoid extreme panning below 150 Hz as low frequencies work better centered.
Use spectrum analyzers to identify frequency buildup in particular stereo locations. Adjust panning or EQ to prevent masking between similarly-panned elements.
Creative panning automation adds movement and interest. Subtle position changes can make static elements more engaging without compromising mix stability.

4
Equalization (EQ) Basics
Equalization shapes the frequency content of audio signals to enhance clarity, fix problems, and create the desired tonal balance in a mix. EQ is a powerful tool that serves both technical and creative purposes.
Understanding The Frequency Spectrum
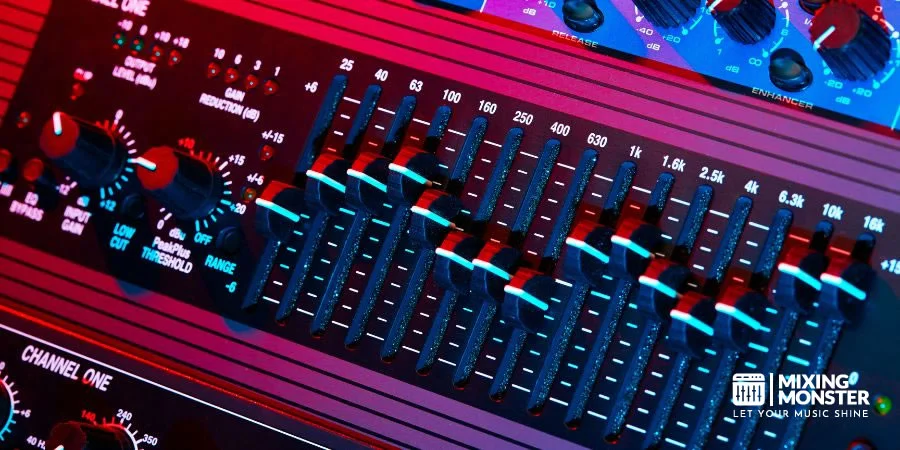
The audible frequency spectrum spans from 20 Hz to 20 kHz. Different instruments and sounds occupy specific frequency ranges within this spectrum. Understanding how to balance these frequency ranges is essential for any mix engineer. Sub-bass (20-60 Hz) provides depth and power, while bass (60-250 Hz) forms the foundation of most music.
Low-mids (250-500 Hz) add warmth but can cause muddiness when used excessively. The midrange (500-2 kHz) carries the core of most instruments and vocals.
Upper-mids (2-6 kHz) control presence and clarity. High frequencies (6-20 kHz) add air and sparkle to the mix.
Types Of EQ And Their Applications
Parametric EQ offers precise control over frequency, gain, and Q-factor. This type excels at surgical frequency corrections and creative sound shaping.
High-pass and low-pass filters remove unwanted frequencies below or above specific points. These help clean up mud and excessive high-end.
Shelving EQ boosts or cuts all frequencies above or below the target frequency. This type works well for broad tonal adjustments.
Related Articles


Using EQ To Shape And Enhance Sounds
EQ techniques help address frequency masking, in which multiple instruments compete for the same frequency range. Creating space for each element ensures clarity.
Small cuts often work better than boosts. A 2-3 dB reduction in problematic frequencies can improve the sound more naturally than aggressive boosts.
Using a high-pass filter around 80-120 Hz on most non-bass elements helps clear up the low end.
Common EQ Techniques And Best Practices
The 1-2 kHz range adds bite and presence to instruments without making them harsh. Careful boosts here can help elements cut through the mix.
Avoid boosting or cutting the same frequencies across multiple tracks. This approach can lead to phase issues and an unnatural sound.
Monitor at different volume levels when making EQ decisions. This practice helps ensure changes work well across various playback systems.
Use reference tracks to compare frequency balance. Professional mixes provide valuable guidance for achieving proper tonal balance.

5
Compression And Dynamic Range
Compression shapes the dynamics of audio signals by reducing the volume difference between loud and quiet parts. This essential mixing tool helps create professional-sounding mixes with controlled dynamics and enhanced clarity.
What Is Compression And Why Use It?
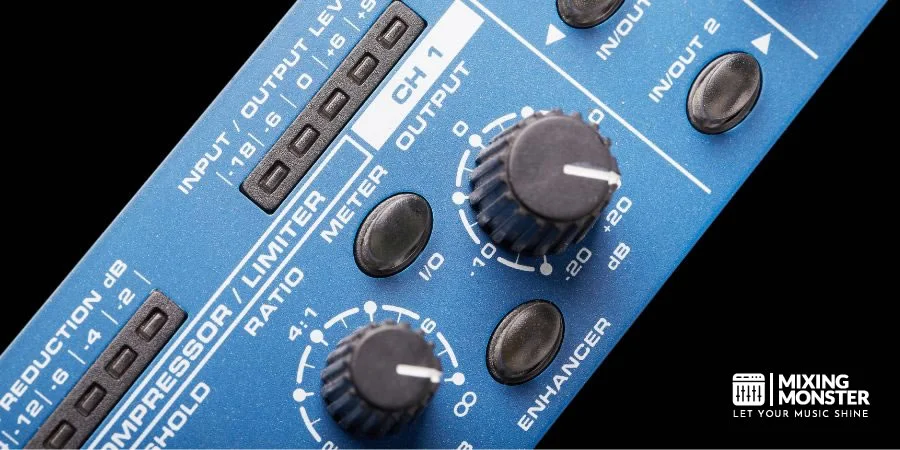
Dynamic range compression controls the dynamic range of an audio signal, i.e., the difference between the quietest and loudest parts of the signal. A compressor automatically reduces the level of sounds that exceed a set threshold, making loud parts quieter while leaving softer parts unchanged.
Compression serves multiple purposes in audio mixing. It is a vital tool for controlling dynamics and creating a consistent energy across the song:
- Evens out volume inconsistencies
- Adds punch and density to tracks
- Controls peaks and prevents distortion
- Enhances the sustain of instruments
- Creates a more polished, professional sound
Types Of Compressors And Their Parameters
Key compression parameters include:
Threshold: Sets the level where compression begins. Ratio: Determines the amount of compression applied. Attack: Controls how quickly compression starts. Release: Sets how fast compression stops. Knee: Affects the transition at the threshold
Engineers often use saturation to add harmonic richness and perceived weight to a sound. At the end of the signal chain, a limiter keeps peaks under control while helping you achieve the desired loudness.
Common compressor types:
- VCA: Clean and precise
- FET: Fast and aggressive
- Optical: Smooth and musical
- Variable-mu: Warm and vintage-style
- Multiband compressor: Frequency-specific dynamics control. Besides standard compression, saturation is a popular choice for adding harmonic character and warmth to digital recordings.
Applying Compression To Control Dynamic Range
Setting appropriate compression levels requires careful attention to the audio material. Start with a low ratio (2:1 to 4:1) and adjust the threshold until you see 2-6 dB of gain reduction.
Monitor the attack and release times closely. Fast attack times can squash transients, while slow release times might cause pumping effects.
Use parallel compression to blend compressed and uncompressed signals for more control over the final sound.
Compression Techniques For Different Instruments And Vocals
When mixing vocals, you need consistent compression to maintain clarity and presence. Apply 2-4 dB of reduction with medium attack and release times.
Bass instruments benefit from faster attack times to control peaks and longer release times to maintain sustain.
Drums often require different compression approaches:
- Snare: Fast attack, medium release
- Kick: Medium attack, short release
- Overheads: Gentle compression with slow attack
Guitar and synth compression varies based on playing style and arrangement needs. Use moderate ratios and adjust attack times to preserve or reshape transients.

6
Reverb And Delay
Reverb and delay effects create spatial depth and dimension in audio mixes. Adding reverb helps simulate natural sound reflections and echoes, placing instruments in a believable space. When applied properly, these effects help place instruments in a virtual space and create engaging sonic textures.
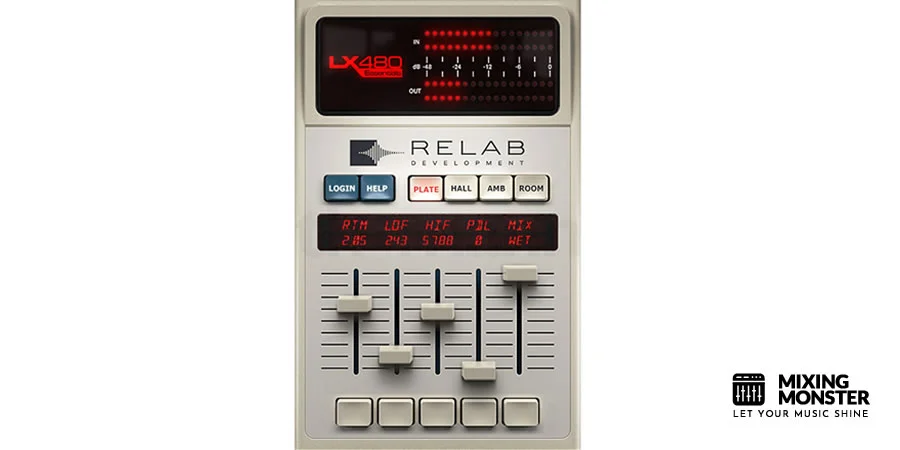
Understanding The Role Of Reverb In Mixing
Reverb simulates space and room acoustics in a mix, adding natural ambiance to dry recordings. It helps instruments sit together cohesively in the mix.
Pre-delay settings control the time between the direct sound and the first reflections. Using 20-40ms of pre-delay helps maintain clarity while still adding depth.
Setting appropriate decay times keeps reverb tails from muddying the mix. Faster tempos typically need shorter decay times of 0.8-1.2 seconds, while slower songs can use longer 2-3 second decays.
Types Of Reverb Effects And Their Applications
Different reverb types create distinct spatial characteristics. Room reverb adds subtle depth with short decay times, ideal for drums and percussion.
Hall reverb creates larger, more dramatic spaces perfect for vocals and orchestral instruments. The longer decay times work well for ballads and atmospheric music.
Spring reverb produces metallic, bouncy reflections commonly used on guitars in rock and blues music.
Plate reverb offers dense, smooth tails that complement vocals and snare drums without overwhelming the mix.
Using Delay To Add Depth And Dimension
Delay creates distinct echoes that can add rhythmic interest and spatial depth. Short delays (30-100ms) create subtle thickness, while longer delays produce obvious repeats.
Tempo-synchronized delays lock repeats to the song's rhythm. Common settings include quarter notes, eighth notes, and dotted eighth notes.
Ping-pong delay bounces echoes between the left and right channels, creating engaging stereo width. This works especially well on lead instruments and vocals.
Creative Ways To Use Reverb And Delay In Your Mixes
Using reverb sends instead of inserts allows precise control over wet/dry balance. Multiple instruments can share the same reverb, creating a cohesive space.
Automating reverb and delay parameters adds dynamic interest. Increasing decay times during song transitions creates dramatic buildups.
Applying EQ to reverb returns prevents low-frequency buildup. High-pass filtering below 100Hz keeps the low end tight and focused.
Layering different reverb types creates unique spaces. Short room reverb combined with longer hall reverb adds both intimacy and grandeur to vocals.

7
Mixing Best Practices And Tips
Professional mixing requires a systematic approach, technical expertise, and attention to detail to achieve outstanding results. A methodical workflow, combined with proper tools and techniques, produces polished, radio-ready tracks.
Organizing Your Mix Session
Start by creating a consistent mixing workflow in your DAW. Color-code similar tracks and group them into buses - drums, vocals, instruments, and effects.
Create template sessions with routing, plugins, and basic processing chains already set up. This saves time and maintains consistency across projects.
Label all tracks clearly and use markers for different song sections. Keep the session organized with proper naming conventions for tracks, buses, and automation lanes.
Start With A Rough Mix And Refine
Begin by setting approximate levels and panning positions for all tracks. Focus on balancing the key elements - drums, bass, vocals, and main instruments.
Create basic groups and apply broad EQ moves to establish frequency relationships between instruments. Set up initial compression on drums and vocals.
Monitor in mono periodically to check phase relationships and ensure mix translation across different playback systems.
Focusing On Clarity And Separation
Use EQ to carve out space for each instrument. Cut competing frequencies rather than boosting - this helps maintain headroom and reduces frequency masking.
Apply sidechain compression strategically to create space for important elements. For example, duck the bass slightly when the kick hits.
Pan similar instruments to different positions in the stereo field. Create depth using reverb sends with different pre-delay times.
Continuously Referencing And Comparing
Use professional reference tracks in similar genres to compare your mix. Listen for relative levels, frequency balance, and spatial placement.
Switch between multiple pairs of studio monitors and headphones to check translation. Test the mix on consumer-grade speakers and earbuds.
A/B your mix against the reference tracks frequently, but keep listening sessions short to avoid ear fatigue.
Taking Breaks And Listening With Fresh Ears
Schedule regular 15-minute breaks every hour to rest your ears. This allows you to mix with fresh ears and make better objective decisions about your balance. Returning to a mix with fresh ears often reveals details you may have missed before.
Work on different sections of the song during separate sessions. This prevents getting too attached to specific mix decisions.
Listen at various times of day when your ears are fresh. Morning sessions often yield the best results in critical listening.
Mixing At Appropriate Volumes
Mix primarily at conservative volumes around 83-85 dB SPL. This prevents ear fatigue and allows better judgment of frequency balance.
Occasionally, check the mix at very low volumes to ensure clarity and balance. Test at louder volumes briefly to verify impact and excitement.
Use a calibrated SPL meter to maintain consistent monitoring levels across sessions.
Using High-Quality Monitoring Equipment
Invest in accurate studio monitors and proper acoustic treatment. Bass traps and absorption panels improve monitoring accuracy.
Position monitors correctly - form an equilateral triangle with your listening position and maintain proper speaker height.
Use quality studio headphones as a secondary reference. Choose models known for neutral frequency response and accurate stereo imaging.
Seeking Feedback And Collaborating With Others
Share mixes with trusted peers and professional mix engineers for constructive criticism. Focus on specific aspects needing improvement.
Consider the feedback objectively and make targeted adjustments. Test changes with multiple listeners before finalizing.
Document successful techniques and settings for future reference. Build a personal library of proven mixing approaches.
8
Key Takeaways For Basic Audio Mixing Techniques
Audio mixing techniques require both technical skills and artistic creativity to achieve professional results. The mixdown process combines multiple audio tracks into a cohesive final product. Applying saturation during this stage can help glue the different elements together before they reach the mastering phase. While mixing and mastering are distinct steps, properly preparing your file helps the mastering engineer achieve the best possible result.
Volume leveling forms the foundation of a good mix. Each instrument needs careful balance to create clarity and prevent frequency masking.
Essential Mixing Elements:
- EQ adjustment for frequency separation
- Compression to control dynamics
- Reverb and delay for depth
- Panning for stereo width
- Gain staging for clean signals
Professional mixing practices emphasize moderation in the use of effects. Over-processing can degrade sound quality and muddy the mix.
Reference tracks play a vital role in achieving industry-standard results. Compare mixes against commercial releases for balance and quality benchmarks.
Testing the mix on multiple speaker systems ensures compatibility across different playback devices. This step reveals potential issues that might not be apparent on studio monitors.
Quick Tips:
- Start with the loudest elements
- Mix at moderate volumes
- Take regular listening breaks
- Keep headroom for mastering. Avoid overusing a limiter on individual tracks, as it can kill the audio's natural punch and dynamic range.
- Use high-pass filters on non-bass elements.
Happy mixing!

Frequently Asked Questions
1
What are the foundational principles of audio mixing?
Balancing track volumes and proper gain staging form the core of mixing. Each element needs clear separation in the frequency spectrum through EQ. Stereo positioning gives instruments their own space in the mix.
Compression controls dynamic range and adds cohesion between elements. Proper monitoring through calibrated speakers or headphones ensures mix decisions translate accurately.
2
Can self-learning adequately equip you to mix music professionally?
Self-learning mixing requires dedication, critical listening skills, and quality reference tracks. Regular practice with fundamental mixing techniques builds competence over time.
Online courses, tutorials, and mixing forums provide valuable knowledge. Feedback from experienced engineers helps identify areas for improvement.
3
What are the essential tools for a beginner starting to mix music?
A digital audio workstation (DAW), an audio interface, and studio monitors or professional headphones make up the basic setup. Quality monitoring equipment enables accurate mixing decisions.
Essential plugins include EQ, compression, reverb, and metering tools. Room treatment helps create an accurate listening environment.
4
What are the various sound mixing techniques used by professionals?
Parallel compression adds punch while preserving dynamics. Mid-side processing controls stereo width and mono compatibility.
Bus processing and grouping create cohesion between similar elements. Automation controls volume, effects, and positioning changes throughout the mix.
5
How can someone mix music effectively using just a computer?
High-quality headphones and room correction software compensate for acoustic limitations. Reference tracks guide mixing decisions when monitoring options are limited.
Plugin-based mixing allows full creative control within the computer. Regular breaks prevent ear fatigue and maintain mixing perspective.
6
What are the steps involved in mixing audio for music production?
Organizing and labeling tracks creates an efficient workflow. Setting initial volume balances and pan positions establishes the foundation.
EQ removes problematic frequencies and creates space. Compression, effects, and automation refine the mix. Regular referencing on different playback systems ensures translation.