


Creating professional-quality music requires more than just good songwriting and performance - it demands skilled mixing to bring all the elements together cohesively. Effective music mixing relies on both technical knowledge and creative intuition.
Learning how to mix music involves balancing volume levels, applying effects, adjusting equalization, and creating space in your tracks to achieve a polished, radio-ready sound. A professional mixing engineer understands how to guide the listener's ear through a dense arrangement. By focusing on clarity and emotional impact, they transform raw sounds into a finished story.
Mixing is a crucial stage in music production where individual recorded tracks are balanced, processed, and combined into a cohesive final product. Audio engineers use tools like equalizers, compressors, and reverb to shape each element's tone and dynamics. The process requires careful attention to frequency balance, stereo placement, and dynamic range to ensure clarity and impact across different playback systems.
The art of mixing transforms raw recordings into professional productions that captivate listeners. Whether you're a bedroom producer or working in a professional studio, mastering the fundamentals of mixing will elevate your music to new heights. This guide explores essential techniques, proven workflows, and creative approaches to help you achieve better-sounding mixes.
Key Takeaways / TL;DR
- Proper volume balance and EQ form the foundation of a professional mix
- Practical mixing tips like parallel processing can add depth and punch
- Strategic use of compression and effects enhances clarity and impact
- Organized workflow and reference monitoring ensure consistent, high-quality results

1
Understanding The Basics Of How To Mix Music
Mixing music combines technical skill and artistic judgment to blend individual tracks into a polished, professional sound. Working with a digital audio mixer allows for precise control over every channel and effect. These fundamental mixing tips provide a roadmap for your production journey.
The process requires careful attention to volume levels, frequency balance, and spatial positioning. Understanding how each tool affects the soundstage is essential for success.
The Importance Of Balanced Levels And Gain Staging
Proper gain staging prevents unwanted distortion and maintains audio clarity. Start by setting input levels around -18 dB to leave headroom for processing.
Set your DAW's faders and the master fader to unity gain (0dB) initially. This creates a clean foundation for your mix decisions.
Key gain staging steps:
- Check input levels on each track
- Avoid red peaks and clipping
- Maintain consistent levels between tracks
- Leave 6dB headroom on the master bus
Exploring The Frequency Spectrum And EQ Techniques
Effective EQ shapes individual sounds to fit together harmoniously. Focus on removing problematic frequencies before boosting desirable ones.
Critical frequency ranges:
- Sub-bass: 20-60Hz
- Bass: 60-250Hz
- Low mids: 250-500Hz
- Mids: 500Hz-2kHz
- High mids: 2-8kHz
- Highs: 8-20kHz
Use high-pass filters to remove unnecessary low frequencies from non-bass elements. This creates space for kick drums and bass instruments.
Mastering The Art Of Panning And Stereo Imaging
Strategic planning adds breadth and depth to your mix. Keep low-frequency elements centered while spreading other instruments across the stereo field.
Panning guidelines:
- Bass and kick drum: Center
- Snare drum: Slightly off-center
- Guitars: 30-50% left/right
- Background vocals: 40-60% left/right
Use stereo imaging tools carefully to enhance width without compromising mono compatibility. Check your mix in mono regularly to ensure balanced translation.

2
Essential Tools And Plugins For Mixing Music
Professional mixing requires specific digital tools that work together to shape and enhance audio. The right combination of software, plugins, and monitoring equipment forms the foundation for creating polished, balanced mixes.
Top DAWs And Their Key Features For Mixing
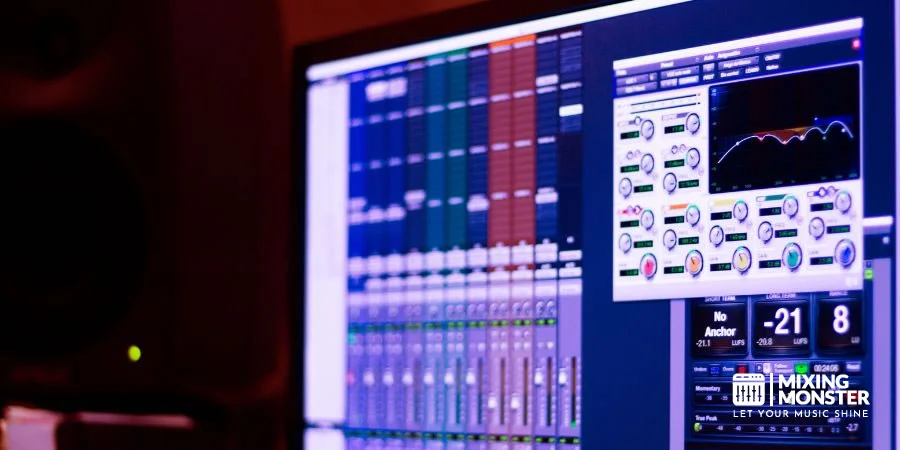
Digital Audio Workstations serve as the primary platform for mixing music. Pro Tools leads the industry with its comprehensive editing capabilities and professional-grade mixing console emulation.
Logic Pro X offers exceptional value for Apple users, featuring built-in plugins and intuitive mixing workflows. Ableton Live excels in real-time processing and creative sound design.
Studio One provides advanced channel strip modules and drag-and-drop functionality that speeds up the mixing process. Each DAW includes essential mixing tools like:
- Built-in EQ and dynamics processors
- Routing matrices for signal flow
- Automation capabilities
- Plugin compatibility (VST, AU, AAX)
Must-Have Mixing Plugins For EQ, Compression, And Effects
The FabFilter Pro Bundle represents the gold standard for mixing plugins, featuring the Pro-Q 3 equalizer and Pro-C 2 compressor.
Essential plugin categories for mixing include:
Dynamic Processing:
- Multiband compressors
- Limiters
- Noise gates
Sound Shaping:
- Parametric EQs
- Channel strips
- Saturation tools
Spatial Effects:
- Reverb processors
- Delay units
- Stereo imaging tools
Discover Best Audio Gear & Equipment


Optimizing Your Monitoring Setup For Accurate Mixing
Professional mixing requires accurate monitoring to make informed decisions. Studio monitors with flat frequency response provide uncolored sound reproduction.
Room treatment plays a crucial role in monitoring accuracy:
- Bass traps for low-frequency control
- Absorption panels for early reflections
- Diffusers for balanced acoustics
Monitoring accessories enhance precision:
- Monitor isolation pads
- Reference headphones
- Monitor controllers for volume management
The monitoring chain should include high-quality audio interfaces with clean preamps and D/A conversion.
3
Step-By-Step Guide To Mixing Music
Mixing music requires careful attention to five key elements: balance, stereo image, tonal balance, dynamics, and space. These components work together to create a professional, polished sound.

Preparing Your Session And Organizing Your Tracks
Create a logical track order, grouping similar instruments. Label all tracks clearly with descriptive names like "Kick_Main" or "LeadVox_Verse1."
Color-code tracks by instrument type - drums in red, bass in blue, vocals in yellow. This visual organization speeds up workflow.
Essential Track Groups:
- Drums and percussion in a submix
- Bass instruments
- Harmony instruments (guitars, keys)
- Lead elements (vocals, solos)
- Effects and ambient sounds
Balancing Levels And Setting Up Gain Staging
Start with setting proper volume levels before adding any processing. Begin with drums, then bass, then other instruments, and finally vocals.
Keep track of meters peaking between 18dB and -12dB for optimal headroom. This prevents digital clipping and maintains audio quality.
Set up a basic static mix using only volume faders. Pay special attention to the relationship between kick drum and bass - these elements form the foundation.
Key Volume Relationships:
- Kick drum and bass should work together
- Lead vocals should sit 2-3dB above backing instruments
- Hi-hats and cymbals should not mask other elements
Your Song Mixed & Mastered By Mixing Monster


Applying EQ And Compression To Individual Tracks
Apply high-pass filters to remove low-frequency content from non-bass instruments. Most tracks benefit from cutting below 100Hz.
Use compression on drums to control dynamics. Typical settings:
- Kick: 4:1 ratio, 30ms attack, 100ms release
- Snare: 6:1 ratio, 10ms attack, 60ms release
- Vocals: 2:1 ratio, 15ms attack, auto release
EQ adjustments should be surgical and purposeful. Cut problem frequencies rather than boosting good ones.
Creating Depth And Space With Reverb And Delay
Create three reverb sends: small room, medium hall, and large space. This establishes front-to-back depth in the mix.
Use pre-delay on reverb to maintain clarity - 20-30ms for vocals, 10-15ms for instruments.
Short delays (50-150ms) add width without muddying the mix. Apply them sparingly to lead elements.
Automating Parameters For Dynamic Mixes
Write volume automation for vocals to maintain consistent levels throughout. Focus on phrase-by-phrase adjustments.
Automate effects sends to increase reverb during song breaks or enhance specific moments. Use a crossfade between overlapping audio clips to ensure smooth, pop-free transitions. A well-placed crossfade ensures that audio edits remain completely transparent to the listener.
Program filter sweeps and delay throws to create tension and release at key points in the arrangement. A subtle volume boost on a lead melody can help it stand out during the most energetic parts of the song.
Fine-Tuning Your Mix With Detailed Adjustments
Check the mix in mono to reveal phase issues and balance problems. Make corrections as needed.
Listen at low volumes to evaluate balance. If something disappears when quiet, it needs attention.
Use reference tracks to compare your mix against professional releases in the same genre.
Final Check Points:
- Vocal intelligibility
- Kick/bass relationship
- Stereo width
- Overall dynamics
- Transition smoothness

4
Mixing Techniques For Different Genres And Styles
Different musical genres demand specific mixing approaches to achieve their signature sound and emotional impact. The right technical choices in EQ, compression, and effects processing make all the difference.
Mixing Techniques For Pop, House, And EDM
Modern genres like pop and house often require a very specific balance between the vocals and the rhythm section. EDM mixing prioritizes powerful low end and crystal-clear highs. The kick drum and bass relationship forms the foundation through careful EQ and compression techniques.
Sidechain compression helps create the signature "pumping" effect by ducking other elements when the kick hits. This creates rhythmic movement and energy.
Key mixing elements for EDM:
- Heavy compression on drums
- Wide stereo imaging on synths
- Precise automation of filters and effects
- Bright, present high frequencies
- Subtractive EQ around 250-500 Hz to reduce muddiness
Mixing Techniques For Hip-Hop And Rap
Hip-hop demands punchy drums and clear vocals. The mixing approach focuses on rhythm and clarity while maintaining heavy bass impact.
Vocal processing requires careful attention:
- Multiple layers of compression
- De-essing to control sibilance
- Parallel compression for power
- Subtle delay and reverb
Bass frequencies need special treatment through:
- Low-pass filtering below 30-40 Hz
- Mild distortion for harmonic content
- Compression with slow attack times
Related Articles
Mixing Techniques For Rock And Alternative Music
Rock mixing emphasizes energy and instrumental balance. Guitar tones need space to breathe while maintaining aggression and power.
Dynamic control is crucial:
- Multiband compression on guitars
- Parallel compression on drums
- Volume automation for emotional impact
The drum mix requires:
- Heavy compression on room mics
- Careful EQ to cut competing frequencies
- Balance between the close and overhead mics
Guitars benefit from:
- Mid-range sculpting between 2-5 kHz
- Strategic planning for width
- Blend of direct and ambient signals

5
Advanced Mixing Techniques To Enhance Your Sound
Advanced mixing techniques create depth, clarity, and professional polish in your productions through specialized processing methods and creative signal manipulation. These tools transform ordinary mixes into standout tracks when applied with precision and purpose.
Parallel Compression And Its Applications
Parallel compression techniques blend compressed and uncompressed signals to maintain dynamics while adding punch and weight. Engineers use this method extensively on drums and vocals.
The process starts with duplicating the original track. Apply heavy compression to the duplicate while keeping the original untouched. Mix both signals, adjusting the balance to taste.
Key settings for parallel compression:
- Ratio: 4:1 to 10:1
- Attack: 10-30ms
- Release: 50-100ms
- Threshold: -20dB to -30dB
Mid-Side Processing For Unique Stereo Effects
Mid-side processing separates audio into center (mid) and side channels, enabling precise control of the stereo field. This advanced mixing technique enhances spatial awareness and creates width.
Apply different EQ curves to mid and side channels:
- Mid: Focus on fundamental frequencies
- Side: Enhance high frequencies for air and space
Processing options:
- Mid channel: Compression for punch
- Side channel: Reverb for dimension
- Both: Independent level control
Creative Use Of Saturation And Distortion
Saturation and distortion add harmonic content and character to sounds. These tools work particularly well on bass, drums, and synths.
Different types of saturation provide unique sonic characteristics:
- Tube: Warm, smooth harmonics
- Tape: Subtle compression and roll-off
- Digital: Aggressive, bright overtones
Apply saturation in stages. Start with subtle amounts on individual tracks. Group similar instruments and process them together for cohesion.
Use multiband saturation to target specific frequency ranges without affecting the entire signal. This maintains clarity while adding character to chosen areas of the spectrum.

6
Mixing Workflow And Organization Strategies
A structured mixing workflow and organized session layout form the foundation of professional-quality mixes. Clear track organization, proper template setup, and systematic comparison methods allow for faster, more efficient mixing decisions.
Setting Up An Efficient Mixing Template
Creating an efficient mixing template starts with setting up basic routing and processing chains. Start with dedicated buses for drums, vocals, instruments, and effects.
Create standard processing chains with EQ, compression, and effects slots ready to go. This saves time on repetitive setup tasks.
Set up parallel processing buses and effects sends in advance. Include delay, reverb, and compression buses with basic settings dialed in.
Keep CPU-intensive plugins disabled until needed. Store commonly used plugin presets in an easily accessible folder.
Color-Coding And Labeling Tracks For Easy Navigation
Proper track organization significantly speeds up the mixing process. Assign consistent colors to different instrument groups: red for drums, blue for vocals, and green for bass.
Label tracks clearly with instrument names and take numbers. Add prefixes like "LD" for lead vocals or "BV" for backing vocals.
Group related tracks together using folders or track stacks. Keep similar instruments adjacent to each other in the mixer view.
Utilizing Mix References And A/B Comparison
Select 3-4 professional reference tracks in the same genre with similar arrangements. Match their levels to your mix using RMS metering.
Create a dedicated reference-track bus with an EQ to compensate for the monitoring system's coloration. Switch between your mix and references frequently.
Develop a systematic approach to comparing specific elements, such as kick drum level, vocal presence, or stereo width. Take notes on areas that need adjustment.
Use spectrum analyzers to compare the frequency balance between your mix and references visually. Focus on one element at a time when making comparisons.

7
Mastering The Final Mix For Professional Results
Professional mastering requires precise control over dynamics, loudness, and frequency balance to create a polished final product. The right tools and techniques transform a good mix into a commercial-ready track.
Preparing Your Mix For Mastering
Export your mix as a high-quality WAV or AIFF file at the original sample rate and bit depth. Leave 3-6 dB of headroom on the master bus and monitor the master fader to prevent unwanted clipping.
Remove any processing from the master bus, including compressors and limiters. These tools belong in the mastering phase.
Check the mix for phase issues and frequency conflicts between instruments. A clean, balanced mix creates the foundation for effective mastering.
Label all files clearly with song title, version number, and sample rate. Include reference tracks to guide the mastering process.
Using Limiters And Maximizers Effectively
Start with a brickwall limiter to catch peaks and prevent digital clipping. Set the ceiling at -0.3 dB to avoid conversion artifacts.
Professional mastering requires careful gain staging. Increase the input gain gradually while monitoring the gain reduction meter.
Use parallel compression to maintain dynamics while increasing perceived loudness. Mix the compressed signal with the original to taste.
Consider multiband limiting for more precise control over specific frequency ranges. This helps tame problematic frequencies without affecting the entire mix.
Ensuring Optimal Loudness And Dynamic Range
Target an integrated LUFS measurement of -14 for streaming platforms. Check true peak levels remain below -1 dB to prevent distortion.
Monitor the dynamic range using a DR meter. Aim for DR6-DR8 for most contemporary music while preserving musical impact.
Apply subtle EQ adjustments to enhance clarity and balance. Boost or cut frequencies in 0.5 dB increments.
Professional sound quality requires regular breaks to keep ears fresh. Compare the master against reference tracks every few minutes.
8
Key Takeaways For Mixing Music
Balancing track volume levels forms the foundation of professional mixing. Start by setting proper gain staging and ensuring no single element dominates the mix.
Essential mixing tools:
- EQ for frequency shaping
- Compression for dynamic control
- Reverb and delay for spatial depth
- Multiband compression for tonal balance
- High-quality monitoring system
Proper stereo placement through panning helps create width and separation between instruments. Keep bass-heavy elements centered while spreading other instruments across the stereo field.
The mixing process differs from mastering. Mixing focuses on individual track relationships, while mastering optimizes the final stereo output.
Critical listening tips:
- Take frequent breaks to avoid ear fatigue
- Reference professional tracks in your genre
- Check the mix on multiple speaker systems
- Listen at moderate volumes
- Focus on one element at a time
EDM mixing requires special attention to low-end control and impact. Use multiband compression on the master bus to maintain tight bass while preserving high-frequency clarity.
Always mix with the song's emotional intent in mind. Technical decisions should serve the musical message rather than following rigid rules.
Happy mixing!

Frequently Asked Questions
1
What equipment do I need to start mixing music?
A computer with at least 8GB RAM and quality headphones for mixing form the essential foundation. An audio interface and studio monitors become important as skills advance.
Studio-grade headphones provide more accurate sound reproduction than consumer headphones. This accuracy helps make better mixing decisions.
2
Can I learn to mix music on my own, and where should I begin?
Learning resources for mixing include YouTube tutorials, online courses, and mixing forums. Starting with basic concepts like gain staging and EQ provides a solid foundation.
Practice with simple projects first, focusing on just a few tracks. This approach builds confidence before tackling more complex mixes.
3
What are the best apps or software for mixing music on a computer or smartphone?
Digital Audio Workstations (DAWs) like Pro Tools, Logic Pro, and Ableton Live offer professional mixing capabilities. Free options like GarageBand provide good starting points for beginners.
Mobile apps can supplement learning, but shouldn't replace proper DAW software for serious mixing work.
4
What are the basics of audio mixing for absolute beginners?
Basic mixing techniques start with proper gain staging and volume balancing. Setting levels correctly prevents distortion and creates clarity.
EQ helps create space for each instrument. Compression controls dynamic range and adds punch to tracks.
5
How can I acquire tracks for mixing, and what legal considerations should I keep in mind?
Recording original material ensures full rights to the content. Many online platforms offer legal stem tracks specifically for mixing practice.
Always obtain proper licenses when working with copyrighted material. This protects both the mixer and original artists.
6
What basic techniques should I master to become proficient at DJ mixing?
Beat matching forms the foundation of DJ mixing. Understanding phrase matching helps create smooth transitions between tracks.
Using EQ to blend songs and proper gain staging prevents unwanted volume jumps. These skills transfer well to studio mixing.