


Poor gain staging destroys mixes before they even begin, turning professional-sounding recordings into distorted, noisy disasters that no amount of post-processing can fix.
Gain staging is the process of managing audio signal levels at each stage of the production chain to ensure clean, undistorted sound by keeping signals strong enough to avoid noise but low enough to prevent clipping. This fundamental practice involves setting appropriate levels throughout the entire audio signal path, from recording through mixing and mastering.
Proper gain staging affects every aspect of audio production, whether working with analog gear or digital audio workstations. The technique maintains optimal headroom and clarity while preventing the buildup of noise and distortion that can compromise audio quality.
This comprehensive guide covers essential recording practices, digital workflows, advanced mixing strategies, and troubleshooting methods that ensure consistent results. Discover practical tools, metering solutions, and step-by-step approaches that eliminate common problems while maximizing signal quality throughout your productions.
Key Takeaways / TL;DR
- Proper gain staging prevents noise and distortion by maintaining optimal signal levels throughout the entire audio production chain.
- Digital workflows require different approaches than analog systems, with specific target levels for recording, mixing, and mastering stages.
- Professional metering tools and systematic level management techniques ensure consistent audio quality and provide adequate headroom for processing.

1
What Is Gain Staging In Audio Production
Gain staging is the process of managing audio signal levels throughout every stage of the recording and mixing chain to maintain optimal sound quality. It involves balancing signal strength to avoid noise while preventing distortion and clipping.
Understanding Audio Signal Levels And Headroom
Audio signals require careful level management to maintain clarity and prevent technical issues. Signal levels must be strong enough to avoid noise but low enough to prevent clipping.
Headroom refers to the available space between the current signal level and the maximum level before distortion occurs. Digital audio typically requires 6-12 dB of headroom to accommodate dynamic peaks.
The signal-to-noise ratio determines how much usable audio sits above the noise floor. Low signal levels create hiss and background noise. High signal levels cause distortion and clipping.
Peak levels measure the loudest moments in audio material. RMS levels represent the average signal strength over time. Using RMS meters alongside peak meters provides a better understanding of the signal's energy and helps guide proper gain staging decisions.
Key Level Ranges:
- Recording: -18 to -12 dB average levels
- Mixing: -18 to -6 dB for individual tracks
- Master bus: -6 to -3 dB peak levels
The Difference Between Analog And Digital Gain Staging
Analog and digital systems handle gain staging differently due to their distinct technical characteristics. Gain staging approaches vary between analog gear and digital audio production.
Analog systems exhibit gradual saturation when approaching maximum levels. Tape machines and analog consoles add harmonic distortion that can enhance musical content. The "sweet spot" often occurs at higher signal levels.
Digital systems produce hard clipping at 0 dBFS with no musical saturation characteristics. Digital recordings require more conservative level management to maintain headroom.
Analog gear typically operates optimally around -10 dBV or +4 dBu reference levels. Digital audio uses dBFS (decibels relative to full scale) measurements.
Conversion Considerations:
- ADCs require proper input levels to maximize bit depth usage.
- DACs benefit from appropriate output levels to minimize quantization noise.
- Hybrid workflows demand careful level matching between analog and digital stages.
Why Proper Gain Structure Matters For Sound Quality
Proper gain staging affects every aspect of audio production by maintaining signal integrity throughout the entire chain. Each processing stage builds upon the previous one's output level.
Dynamic range preservation relies on appropriate signal levels at every stage. Compressed dynamic range cannot be recovered in later processing steps.
Plugin performance depends heavily on input levels. EQs, compressors, and effects respond differently to various signal strengths. Many plugins model analog behavior and expect specific input ranges.
Mix clarity improves when individual elements maintain proper relationships. Consistent gain staging prevents frequency masking and maintains stereo imaging.
Processing artifacts multiply through cascaded stages with improper levels. Noise accumulates while headroom decreases with each poorly managed gain stage.
Benefits of proper gain staging:
- Reduced noise and distortion
- Improved plugin performance
- Better mix translation across playback systems
- Enhanced dynamic range retention
Common Gain Staging Mistakes That Ruin Your Mix
Recording levels that are too low create noise issues that persist throughout production. Signals that are too quiet cause hiss, while signals that are too hot cause distortion.
Peak level fixation leads producers to ignore average signal levels and dynamic content. RMS levels matter more for perceived loudness and processing behavior.
Plugin chain mismanagement occurs when each processor adds unnecessary gain without compensation. Cumulative level increases cause master bus clipping.
Master bus overload happens when individual track levels seem reasonable but sum to excessive combined levels. The mix bus requires headroom for summing and master processing.
Ignoring the difference between gain and volume creates improper signal flow. Gain controls input levels while volume controls output levels.
Common mistakes to avoid:
- Recording too close to 0 dBFS
- Ignoring cumulative gain through plugin chains
- Setting levels by visual meters instead of listening
- Boosting makeup gain unnecessarily after compression
- Leaving insufficient headroom for mastering processing

2
Essential Gain Staging Techniques For Recording
Proper recording techniques require precise level management from input to output, with optimal signal levels averaging -18dB to maximize plugin performance and minimize noise. Recording engineers must balance preamp settings, interface levels, and real-time processing to achieve professional results.

Setting Optimal Input Levels On Audio Interfaces
Audio interfaces perform best when input levels hit the sweet spot between noise floor and digital clipping. Engineers should target -18dB average levels with peaks reaching no higher than -10dB to maintain headroom.
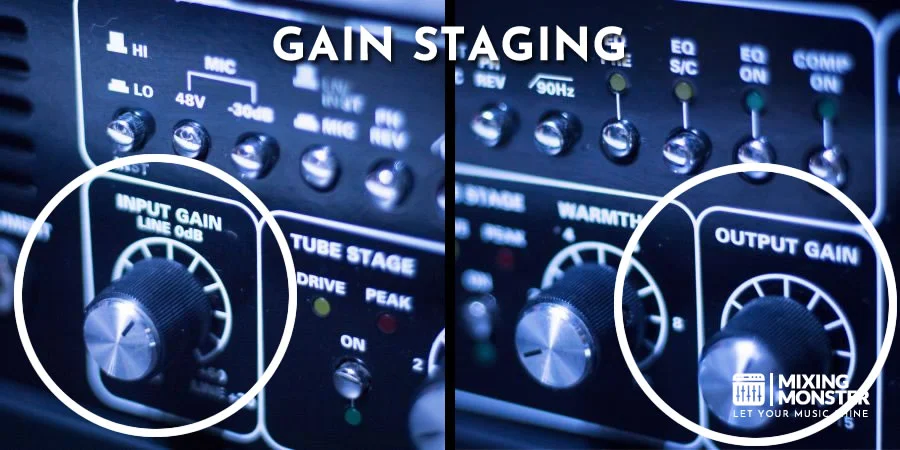
Most professional interfaces include input gain knobs and LED level indicators. The green LEDs indicate healthy signal levels, while yellow warns of approaching limits.
Digital clipping occurs at 0dBFS and creates harsh, unrecoverable distortion. Unlike analog saturation, digital clipping cannot be fixed in post-production.
Engineers can use the interface's direct monitoring feature to check levels without software latency. This allows real-time adjustments before signals reach the DAW.
Buffer settings also affect recording quality. Lower buffer sizes reduce monitoring latency but increase CPU load and potential dropouts.
Microphone Preamp Gain Staging Best Practices
Preamp gain determines how much the microphone signal gets amplified before reaching the audio interface. Different microphone types require different gain amounts based on their sensitivity and output levels.
Dynamic microphones typically need 40-60 dB of gain due to their lower output. Condenser microphones usually require 20-40dB because of their higher sensitivity and active electronics.
Ribbon microphones demand the most gain, often requiring 60-70dB for quiet sources. Using a cloudlifter or similar gain booster can improve signal-to-noise ratio with ribbon mics.
Engineers should set preamp gain while the performer plays at their loudest expected level. This prevents unexpected peaks from clipping during the actual recording.
Phantom power affects condenser microphone performance and should be enabled before setting gain levels. The +48V supply can change the microphone's output characteristics.
Quality preamps maintain clean gain across their range, while cheaper units may introduce noise or distortion at higher settings.
Discover Best Audio Gear & Equipment


Managing Levels With Compressors And EQ During Tracking
Recording with compression and EQ requires careful attention to both input and output levels throughout the signal chain. Each processor can significantly alter signal levels and affect downstream equipment.
Compressors reduce dynamic range but often include makeup gain to compensate for level reduction. Engineers must balance the amount of gain reduction with makeup gain to maintain consistent levels.
Fast attack times can cause pumping artifacts if input levels are too hot. Slower attack settings work better with properly staged signals around -18dB.
EQ boosts can push signals into clipping territory. A 6dB boost at a resonant frequency can cause unexpected peaks even when the average level appears safe.
High-pass filters during tracking help manage low-frequency buildup without affecting the main signal level. This technique prevents rumble and handling noise from accumulating.
Some engineers prefer recording "flat" and adding processing during mixing. This approach maintains maximum flexibility but requires excellent tracking technique.
Using Peak Meters And VU Meters Effectively
Different meter types provide unique information about signal levels and help engineers make informed decisions about gain staging during recording sessions.
Peak meters show instantaneous signal peaks and help prevent digital clipping. They respond quickly to transients and display the exact dBFS values that determine headroom.
VU meters display average signal levels over time, making them ideal for setting general recording levels. They correspond more closely to perceived loudness than peak meters.
Professional engineers often use both meter types simultaneously. Peak meters prevent clipping while VU meters guide musical balance and dynamics.
PPM (Peak Programme Meters) offer a compromise between peak and VU response times. They catch transients better than VU meters while providing more stable readings than true peak meters.
Digital workstations typically include multiple meter options in their mixer sections. Engineers can customize meter ballistics and ranges to match their preferred working style.
Some audio interfaces include hardware meters on the front panel for monitoring without computer screens. These meters help during live room recording when the engineer moves away from the control surface.
3
Digital Gain Staging Workflow In Your DAW
Modern DAWs require specific strategies for managing signal levels across multiple processing stages. The key is balancing clip gain adjustments at the source level with proper fader management and strategic use of trim utilities throughout your plugin chains.
Clip Gain Vs Fader Gain Management Strategies
Clip gain operates at the audio file level before any processing occurs. This makes it the ideal tool for initial level adjustments when tracks are recorded too hot or too quiet.
Clip gain advantages:
- Affects the signal before insert plugins
- Preserves fader position for mix moves
- Allows precise level matching between takes
Channel faders control post-insert levels and serve as the primary mixing tool. Proper gain staging ensures clean and professional mixes when these two controls work together strategically.
Use clip gain to bring overly loud recordings down to workable levels. Aim for peaks around -18 dBFS to -12 dBFS after clip gain adjustment.
Keep faders near unity gain (0dB) during initial balancing. Managing fader volume becomes much easier when the internal signal levels are consistent across the board. This provides headroom for both cuts and boosts during the creative mixing process.
Plugin Chain Gain Structure Optimization
Each plugin in your insert chain requires proper input levels to function optimally. Analog-modeling plugins suffer audibly when overloaded beyond their intended operating range.
Monitor plugin input meters to ensure signals stay within the green zone. Most quality plugins include input and output level controls for precise gain management.
Structure your plugin chain with gain-conscious ordering:
- Corrective EQ - Set input around -18dBFS
- Compression - Maintain consistent input levels
- Creative processing - Monitor for cumulative gain buildup
- Final EQ - Balance output to desired level
Compensate for gain changes immediately after each processor. If a compressor adds 3dB of makeup gain, reduce the output by 3dB or adjust the next plugin's input accordingly.
Your Song Mixed & Mastered By Mixing Monster


Using Trim Plugins And Utility Gains Properly
Trim plugins provide transparent gain adjustment without affecting your main faders. Insert them strategically throughout your signal chain to maintain optimal levels at each processing stage.
Place utility gains before plugins that are sensitive to input levels. EQs, compressors, and saturators all perform differently based on the signal level hitting their input stage.
Common trim plugin placements:
- First insert slot for initial level setting
- Before analog-modeled compressors
- After high-gain EQ boosts
- Before parallel processing sends
Use trim plugins to create consistent input levels across similar sources. Drum samples, vocal takes, and instrument layers benefit from matched input levels before group processing. When working with software synths, gain staging virtual instruments is often overlooked.
These instruments can output very high levels that immediately trigger transient peaks, making it difficult to leave headroom for subsequent processing.
Maintaining Consistent Levels Throughout Your Mix
Consistent levels prevent individual tracks from overwhelming your mix bus and ensure each element has appropriate headroom. Modern DAWs offer extensive internal headroom, but plugin performance varies at extreme levels.
Target these level ranges during mixing:
|
Element |
Peak Level |
Average Level |
|
Individual tracks |
-12dBFS to -6dBFS |
-18dBFS to -15dBFS |
|
Group buses |
-6dBFS to -3dBFS |
-12dBFS to -9dBFS |
|
Mix bus |
-6dBFS to -3dBFS |
-18dBFS to -12dBFS |
Monitor your mix bus meters regularly during the mixing process. If levels consistently hit -3dBFS or higher, reduce individual track levels rather than pulling down the master fader.
Use reference tracks at reduced levels to maintain proper perspective. Mastered references should be lowered by 6-12dB to match your mix's headroom structure.

4
Advanced Gain Staging For Mixing And Mastering
Professional mixing and mastering requires precise gain control to maintain headroom for dynamic processing while avoiding digital distortion. Engineers must balance multiple track levels, prepare clean stems, and prevent inter-sample peaks that cause problems in the final master.

Balancing Headroom For Dynamic Processing
Dynamic processors like compressors and limiters require adequate headroom to function properly without introducing unwanted artifacts. Proper gain staging ensures optimal levels for processing while maintaining clarity and punch.
Compressor Input Levels:
- Peak levels: -12 dBFS to -6 dBFS
- RMS levels: -18 dBFS to -12 dBFS
- Threshold range: -15 dB to -5 dB
Engineers should set input gains before applying compression to avoid hitting the processor too hard. This prevents over-compression and maintains natural dynamics.
EQ Processing Headroom: Digital EQs can cause intersample peaks when boosting frequencies. Engineers typically leave 3-6 dB of headroom before EQ processing.
Subtractive EQ requires less headroom than additive EQ. High-Q boosts above 10 kHz need the most headroom to prevent digital clipping.
Gain Staging Multiple Tracks And Bus Processing
Mix engineers work with dozens of individual tracks that feed into buses and the master channel. Managing signal levels throughout the signal flow prevents cumulative level buildup and maintains mix clarity.
Individual Track Levels:
- Drums: -18 dBFS to -12 dBFS peak
- Bass: -20 dBFS to -15 dBFS peak
- Vocals: -15 dBFS to -10 dBFS peak
- Instruments: -18 dBFS to -12 dBFS peak
Bus Processing Considerations: Group buses should receive signals at moderate levels to prevent overload. Engineers typically aim for -6 dBFS to -3 dBFS at bus inputs before processing.
The master bus requires the most headroom. Professional mixes peak between -6 dBFS and -3 dBFS before mastering limiting. Applying mix bus processing requires a conservative approach to input levels. If the combined signal hits the bus too hard, the plugins will react aggressively and squash the dynamics. This leaves room for the mastering engineer to work without digital distortion.
Related Articles


Preparing Stems For Mastering Engineers
Stem preparation requires specific level and formatting standards to ensure mastering engineers receive clean, workable audio. Proper level setting creates cleaner mixes ready for professional mastering.
Stem Export Levels:
|
Stem Type |
Peak Level |
RMS Level |
|
Drums |
-6 dBFS |
-12 dBFS |
|
Bass |
-8 dBFS |
-14 dBFS |
|
Instruments |
-10 dBFS |
-16 dBFS |
|
Vocals |
-6 dBFS |
-12 dBFS |
File Format Standards: Engineers export stems at the project sample rate without dithering. Common formats include 24-bit/48kHz or 24-bit/96kHz WAV files.
Each stem should contain the same processing applied in the mix. This includes EQ, compression, and effects but excludes master bus processing.
Avoiding Inter-Sample Peaks And Digital Overs
Inter-sample peaks occur when digital-to-analog conversion creates peaks higher than the digital maximum. These peaks distort playback systems and streaming platforms.
True Peak Limiting: True peak meters measure reconstructed analog signals rather than digital samples. Engineers use true peak limiting to prevent overs during conversion.
Maximum true peak levels should not exceed -1 dBTP for streaming or -0.3 dBTP for CD mastering. This prevents distortion in consumer playback devices.
Oversampled Processing: Plugins with oversampling reduce inter-sample peaks by processing at higher sample rates internally. Engineers enable oversampling on limiters, saturators, and non-linear processors.
Sample rate conversion also creates inter-sample peaks. Engineers avoid multiple conversion stages and use high-quality SRC algorithms when necessary.

5
Gain Staging Tools And Metering Solutions
Modern audio production relies on precise measurement tools and monitoring systems to maintain optimal signal levels throughout the recording and mixing process. The right combination of metering plugins, hardware solutions, and calibrated monitoring ensures clean signal flow without unwanted noise or distortion.
Essential Metering Plugins For Level Management
Professional metering plugins provide detailed visual feedback for maintaining proper gain structure across digital audio workstations. VU meters remain industry-standard tools that display average signal levels, while peak meters show instantaneous level readings.
Klanghelm VUMT Deluxe offers authentic analog-style VU and PPM meter ballistics with multiple calibration options. The plugin includes RMS metering, K-System calibration, and resizable interfaces for different workflow needs.
Process Audio Decibel provides comprehensive metering with LUFS readings, frequency analysis, and TrueDyn dynamic range measurements. Its Super Meter displays multiple measurements in a single semicircular readout.
TBProAudio mvMeter2 combines RMS, EBUR128, VU, and PPM measurement modes in one plugin. Users can switch between different reference levels and measurement standards for various mastering requirements.
The Waves VU Meter delivers industry-standard VU metering with adjustable headroom calibration. Engineers can set reference levels to match their DAW's full-scale metering system.
Hardware Vs Software Gain Staging Solutions
Hardware metering provides tactile control and dedicated display screens independent of computer processing power. Analog VU meters respond to signal voltage changes with characteristic ballistics that many engineers prefer for musical material.
Software solutions offer greater flexibility with multiple measurement standards, customizable displays, and integration with DAW automation systems. Digital meters show full-scale measurements that display instantaneous peak levels rather than averaged volume units.
Hardware advantages include zero-latency monitoring, dedicated controls, and visual feedback that remains constant regardless of screen real estate. Many analog consoles feature built-in VU meters calibrated to specific operating levels.
Software benefits encompass multiple metering modes, detailed analysis features, and the ability to insert meters at any point in the signal chain. iZotope Neutron's input and output meters include gain modules and level-matching features for accurate gain-structure management.
Real-Time Analysis Tools For Optimal Signal Flow
Real-time analyzers display frequency content, dynamic range, and stereo information while audio plays back. These tools help identify gain-staging issues before they affect final mix quality.
Spectrum analyzers reveal frequency distribution and help identify resonant peaks that may cause problems at higher gain levels. Real-time FFT analysis shows how gain changes affect different frequency ranges.
Phase correlation meters display stereo imaging information and identify mono compatibility issues that often result from improper gain relationships between channels. Correlation values between +1 and -1 indicate stereo width and potential phase problems.
Dynamic range meters show the difference between peak and average levels in real-time. TrueDyn measurements help engineers maintain appropriate dynamic range while optimizing gain structure.
Loudness meters display integrated LUFS values for broadcast standards compliance. Short-term and momentary LUFS readings help maintain consistent perceived loudness across different program material.
Calibrating Your Monitoring Chain For Accurate Levels
Proper monitor calibration ensures accurate level assessment throughout the gain staging process. Analog and digital systems handle voltage and headroom differently, requiring specific calibration approaches for each domain.
SPL calibration involves setting playback levels to industry standards using pink noise and an SPL meter. Most professional monitoring systems calibrate to 85 dB SPL for 0 dBFS signals.
Reference level alignment matches analog gear operating levels with digital converter settings. Common alignments include -20 dBFS = +4 dBu or -18 dBFS = +4 dBu depending on headroom requirements.
Monitor controller settings affect the relationship between digital levels and acoustic output. Proper gain structure through monitor controllers prevents level misinterpretation during mixing decisions.
Room acoustics impact perceived levels and frequency balance, affecting gain staging decisions. Acoustic treatment and measurement help establish consistent monitoring conditions for accurate level assessment.

6
Troubleshooting Common Gain Staging Problems
Most gain staging issues stem from incorrect signal levels at different points in the recording chain. These problems typically manifest as harsh distortion, background noise interference, inconsistent volume levels between recordings, or phase cancellation that weakens the overall sound.

Fixing Distorted And Clipped Audio Recordings
Digital clipping creates harsh, irreversible distortion that cannot be fixed after recording. The waveform becomes permanently damaged when signals exceed 0 dBFS in digital systems.
Prevention strategies include:
- Recording peaks between -18 dBFS and -12 dBFS
- Using input pads on audio interfaces during loud performances
- Monitoring levels continuously during recording sessions
When distortion occurs during recording, engineers must re-record the affected sections. No plugin or processing technique can restore clipped digital audio to its original quality.
Analog distortion behaves differently than digital clipping. Tape saturation and tube warmth add harmonic content that many consider musical, while digital clipping sounds brittle and unpleasant.
For existing clipped recordings:
- Lower the input gain and record new takes
- Use gentle limiting during recording to prevent future clipping
- Check that all devices in the signal chain operate within their optimal ranges
Dealing With Noise Floor Issues In Quiet Passages
Low input gain forces engineers to boost levels later in the signal chain, which amplifies unwanted noise along with the desired signal. This problem becomes especially noticeable during quiet musical passages.
The noise floor represents the baseline level of unwanted sound in any recording system. Poor gain staging raises this floor, making hiss, hum, and interference more prominent.
Identifying noise sources:
- Electrical interference from power supplies, fluorescent lights, or computer fans
- Preamp noise from insufficient input gain settings
- Environmental noise from air conditioning, traffic, or room acoustics
Engineers should set adequate gain at the source rather than compensating with downstream amplification. Proper microphone placement and appropriate gain settings at the preamp stage minimize noise issues.
Solutions for existing noise problems:
- Increase preamp gain and lower downstream levels
- Use noise gates during quiet passages
- Apply spectral editing to remove specific frequency ranges
- Improve the recording environment for future sessions
Correcting Gain Imbalances Between Multiple Takes
Inconsistent recording levels between takes create volume jumps that disrupt the listening experience. This issue commonly occurs when musicians move closer or farther from microphones between performances.
Level matching techniques:
- Use reference tones or consistent input levels for each take
- Mark optimal microphone positions with tape
- Monitor input levels consistently across all recording sessions
- Document gain settings for each instrument and vocalist
Digital audio workstations provide tools for matching levels between takes. Gain plugins allow precise adjustments without affecting the original audio files.
Correction workflow:
- Identify the reference take with optimal levels
- Measure peak and RMS levels using metering plugins
- Apply gain adjustments to match other takes
- Use crossfades between sections to smooth transitions
Automation can handle minor level differences, but significant imbalances require gain adjustments before other processing. This approach maintains headroom and prevents downstream clipping issues.
Solving Phase And Polarity Problems From Poor Staging
Incorrect gain staging can mask phase relationships between multiple microphones or stereo recordings. When levels differ significantly between channels, phase cancellation becomes less obvious but still affects the overall sound quality.
Phase problems occur when identical audio signals arrive at slightly different times. This creates comb filtering that removes certain frequencies and weakens the overall signal strength.
Common phase scenarios:
- Stereo microphone pairs with mismatched levels
- Multi-microphone drum recordings with inconsistent gain settings
- Direct input and microphone combinations on amplified instruments
Proper gain staging reveals phase relationships more clearly. When levels match between sources, engineers can hear phase issues and make appropriate corrections.
Phase correction steps:
- Match levels between all related microphones
- Use phase inversion switches to test for improvements
- Adjust microphone timing with delay plugins
- Consider the phase and polarity problems from poor staging in complex recording setups
Level matching must occur before phase correction. Significant volume differences between channels can disguise phase cancellation that reduces punch and clarity in the final mix.

7
Key Takeaways For Gain Staging In Audio Productions
Gain staging keeps audio clean by balancing levels at every stage of the signal chain. Poor gain structure introduces unwanted noise, distortion, or harsh digital clipping.
Digital systems have strict limitations. Clipping above 0 dBFS causes irreversible damage to audio signals. Every plugin and device performs optimally when receiving a signal at the intended level.
Managing signal levels throughout different stages of an audio signal chain ensures clean, detailed, and dynamic sound. This prevents unnecessary boosting or cutting that degrades audio quality.
Essential gain staging principles:
- Keep signals strong enough to avoid noise floor issues
- Maintain levels low enough to prevent clipping
- Preserve adequate headroom for processing
- Set optimal input levels for each plugin and device
Proper gain staging affects every aspect of audio production. Whether working with analog gear or digital audio workstations, consistent level management creates professional results.
The process applies across all production stages. From initial recording through mixing and mastering, maintaining appropriate signal levels prevents common audio problems.
Professional mixes rely on correct gain staging as their foundation. This technique ensures clarity, punch, and headroom in modern audio production workflows.
Poor gain staging often causes muddy or distorted mixes. The problem frequently stems from incorrect volume management rather than EQ or compression issues.
Happy gain staging!

Frequently Asked Questions
1
Should you gain stage before or after applying EQ and compression plugins?
Proper gain staging should occur both before and after applying EQ and compression plugins. Setting appropriate input levels before these processors ensures they receive clean signals without clipping.
After applying EQ, engineers should adjust output gain to compensate for frequency boosts that increase overall level. Compression typically reduces dynamic range, so output gain adjustments maintain consistent levels for subsequent processors.
Each plugin in the chain requires monitoring of both input and output levels. This prevents cumulative gain buildup that can distort later stages of the mix.
2
What are the best practices for gain staging in a digital audio workstation?
Digital audio workstations benefit from maintaining peak levels between -18 dBFS and -12 dBFS during recording and mixing. This approach provides adequate headroom while keeping signals well above the noise floor.
Engineers should use clip gain or trim plugins at the beginning of each channel strip to establish proper input levels. Digital gain staging focuses on preventing clipping while maintaining optimal headroom and clarity.
Track meters should show occasional peaks reaching -6dBFS during mixing, with most content sitting lower. This leaves sufficient headroom for mastering while ensuring clean signal processing throughout the chain.
3
How does proper gain staging affect the mastering process?
Well-staged mixes provide mastering engineers with balanced levels that require minimal corrective processing. Properly gained tracks allow mastering processors to work within their optimal operating ranges without introducing distortion.
Consistent levels across all mix elements enable transparent processing in the mastering chain. This includes EQ, compression, and limiting stages that shape the final sound without fighting level imbalances.
Clean and balanced mixes from proper gain staging allow mastering engineers to focus on enhancing the music rather than correcting technical issues. The mastering process becomes more efficient and produces superior sonic results.
4
At what point in the signal chain should gain staging be addressed for live sound?
Live sound gain staging begins at the microphone preamp stage, where input gain establishes the foundation for the entire signal path. Engineers set preamp gain to achieve strong signal levels without overloading the input stage.
Different gain staging approaches are needed for live versus studio mixing due to environmental factors and real-time constraints. Console channel strips require careful attention to gain structure from input to auxiliary sends.
Monitor sends and main outputs need proper gain staging to prevent feedback and ensure adequate headroom. Live engineers must balance signal strength against the higher noise floors typical in performance venues.
5
Can you explain the optimal level setting for each instrument during the mix?
Drum tracks typically require the highest levels in a mix, with kick drums peaking around -6dBFS and snares slightly lower. Bass instruments should maintain consistent levels between -12 dBFS and -9 dBFS to provide a solid foundation without overwhelming other elements.
Vocal tracks benefit from peak levels around -9dBFS to -6dBFS, ensuring clarity and presence in the mix. Lead instruments like electric guitars and synthesizers work well at similar levels, depending on their role in the arrangement.
Background elements, including reverb returns, ambient sounds, and supporting instruments, should peak no higher than -15 dBFS. This creates proper balance and prevents these elements from competing with primary mix components.
6
What role do effects pedals play in the gain staging process for guitarists?
Guitar effects pedals can significantly alter signal levels throughout the pedal chain, requiring careful attention to input and output gains. Overdrive and distortion pedals often boost signal levels substantially, potentially overloading subsequent pedals or amplifier inputs.
Volume pedals and boost pedals serve as gain staging tools, allowing guitarists to match levels between different pedal combinations. Clean boost pedals help maintain consistent signal strength when multiple pedals reduce overall output.
Proper equipment setup and calibration throughout the entire chain prevent signal degradation from pedal interactions. Guitarists should monitor levels at each pedal's output to maintain optimal signal integrity to the amplifier or recording interface.