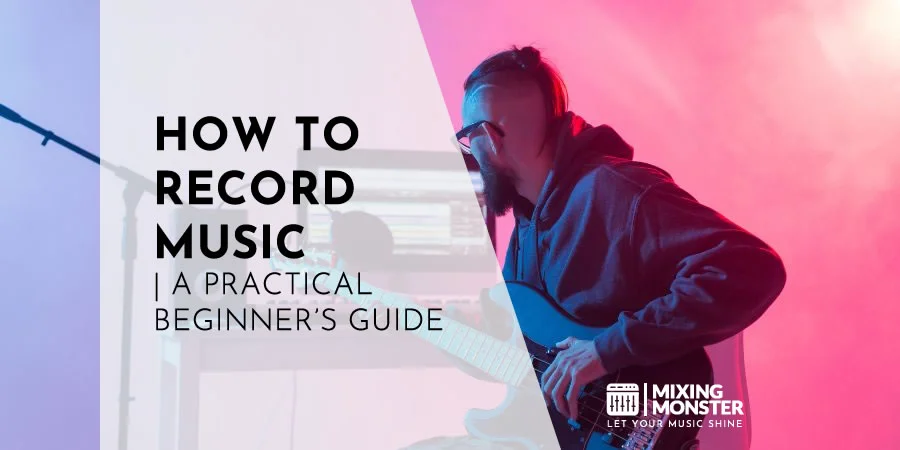



Recording music at home has never been more accessible than it is today. With the right equipment and techniques, you can create professional-quality recordings without setting foot in an expensive studio.
Learning how to record music effectively involves understanding the four key stages: multitrack recording, editing, mixing, and mastering. The process of recording music begins by capturing individual instrument and vocal tracks with microphones and audio interfaces. These components connect to a computer running digital audio workstation (DAW) software, which serves as your virtual recording studio.
Quality recordings depend on proper microphone placement, room acoustics, and gain staging to ensure clean signal capture. Whether you're a songwriter looking to share your compositions or a band ready to release your first EP, mastering the four stages of music production will transform your musical ideas into polished recordings.
The journey from concept to finished product involves creative decisions at every stage. It is easier than ever to get started when learning how to record music, once you have the right mindset to record a song from start to finish.
Key Takeaways / TL;DR
- Recording music requires four essential steps: recording individual tracks, editing audio for timing and pitch, mixing with panning, and mastering for final polish.
- A basic home recording setup requires a computer, an audio interface, a microphone, headphones, and recording software to capture professional-quality sound.
- Creating a proper recording environment with acoustic treatment helps minimize unwanted noise and produce cleaner, more professional recordings.

1
How To Record Music: The Fundamentals
Recording music involves understanding essential technical concepts, choosing between digital and analog approaches, setting achievable goals, and mastering the psychological elements that lead to quality recordings.
Understanding The Recording Chain
The recording chain refers to the path your audio signal travels from its source to your final recording. This typically includes:
- Sound source (instrument or voice)
- Microphone or direct input (captures the sound)
- Preamp (boosts the signal to usable levels)
- Audio interface (converts analog signals to digital)
- Computer with DAW software (records and processes the audio)
Each link in this chain affects your sound quality, and weakness in any component can compromise your recording. When recording acoustic instruments, proper microphone selection and placement are crucial.
For vocals and instruments, use a pop filter to reduce plosive sounds like "p" and "b" that can cause distortion. Consider room acoustics as well - even a basic treatment with acoustic panels can drastically improve recording quality.
Digital Vs. Analog Recording
Digital recording offers accessibility, affordability, and flexibility for most modern musicians. It allows you to easily edit audio on a computer using an audio interface and DAW software like Pro Tools, Logic, or Ableton Live.
Digital advantages include:
- Unlimited takes and non-destructive editing
- No tape noise or degradation
- Lower cost for high-quality results
- Easy sharing and collaboration
Analog recording utilizes tape machines or direct-to-vinyl systems, providing a distinctive warmth and character many producers still value. While requiring more specialized equipment and technical knowledge, analog recording can impart a natural compression and harmonic richness.
Many professional studios use hybrid approaches, recording digitally while incorporating analog hardware like compressors, EQs, and preamps to add character to otherwise clean digital signals.
Setting Realistic Goals For Your First Recordings
Begin with simple projects that match your current skill level and equipment capabilities. If you're starting, focus on capturing a clean, clear recording. This is the first step when recording a song and aiming for professional results.
Start by recording one instrument or voice at a time rather than tackling a full-band recording. This approach allows you to focus on microphone placement and signal quality without becoming overwhelmed.
Set specific, achievable targets for each recording session.
Examples include:
- Record a complete vocal take without technical issues
- Experiment with three different microphone positions for the guitar
- Successfully set appropriate recording levels without clipping
The music production process involves multiple stages—recording, editing, mixing, and mastering. Understanding each stage helps set appropriate expectations for what your recordings should sound like at different points.
The Psychology Of Great Recordings
The technical aspects of recording are only part of the equation—the psychological elements often determine whether a recording captures the emotion and energy of the performance.
Creating a comfortable environment for performers is essential. Simple things like room temperature, lighting, and privacy can significantly impact a musician's ability to deliver their best performance.
Time management plays a crucial role in maintaining creative energy. Marathon sessions often lead to diminishing returns as ears fatigue and concentration wanes. Schedule regular breaks to maintain perspective.
The best recordings often strike a balance between technical perfection and emotional authenticity. Sometimes, a take with minor imperfections but strong emotional delivery creates a more compelling recording than a technically flawless but emotionally flat performance.
Building performers' confidence through positive reinforcement while still providing honest feedback creates an atmosphere where creativity can flourish during the recording process.

2
Essential Equipment For Home Recording
Creating a functioning home studio requires specific gear to capture and process high-quality audio. The right tools will make the difference between amateur and professional-sounding recordings, even on a limited budget.
Budget-Friendly Recording Setups
Getting started doesn't require spending thousands of dollars. A basic but effective setup can include:
- Computer - Any modern laptop or desktop with at least 8GB RAM
- DAW (Digital Audio Workstation) - Free options like GarageBand or Audacity can work for beginners
- Audio interface - Entry-level models from Focusrite, PreSonus, or Behringer (starting around $100)
- USB microphone - An all-in-one solution like the Audio-Technica ATR2100x or Blue Yeti ($60-130)
- Headphones - Closed-back models like Sony MDR-7506 or Audio-Technica ATH-M20x ($50-100)
Consider purchasing components as a bundle when possible. Many manufacturers offer starter packs that include an interface, microphone, headphones, and necessary cables at a discounted price.
Choosing The Right Microphones For Your Needs
Different recording applications require specific microphones to capture optimal sound. Understanding the basic types is essential:
Dynamic Microphones:
- Durable and affordable (Shure SM58, SM57)
- Excellent for loud sources (drums, guitar amps)
- Less sensitive, requiring stronger input signals
Condenser Microphones:
- Higher sensitivity with greater detail
- Require phantom power from an interface
- Large-diaphragm condenser mic models for vocals (AKG P220) offer superior detail.
- Small-diaphragm models for instruments (Rode NT5)
Consider the polar pattern as well - cardioid patterns capture sound from the front while rejecting noise from the sides and rear, making them ideal for home environments with less-than-perfect acoustics.
Discover Best Audio Gear & Equipment


Audio Interfaces And Preamps Explained
An audio interface serves as the bridge between analog audio sources and your computer's digital environment. Key features to consider:
Connection Type:
- USB interfaces are most common and compatible with nearly all computers
- Thunderbolt connections offer faster data transfer but require compatible ports
Preamp Quality:
- Better preamps provide cleaner amplification with less noise
- Entry-level interfaces typically offer 2-4 preamps
- The preamp quality directly impacts recording clarity
I/O Configuration:
- Consider how many inputs you'll need simultaneously
- Most beginners need 2-4 inputs for vocals and instruments
- MIDI inputs allow the connection of keyboards and controllers
Higher-end interfaces often feature better analog-to-digital converters, resulting in more accurate recordings and lower monitoring latency.
Headphones And Monitors For Accurate Listening
Proper monitoring is crucial for making informed mixing decisions. Both headphones and studio monitors serve important purposes:
Studio Headphones:
- Closed-back headphones like the Audio-Technica ATH-M50x isolate sound during recording.
- Open-back models (Sennheiser HD600) provide a more natural sound for mixing
- Avoid consumer headphones that color the sound with enhanced bass
Studio Monitors:
- Near-field monitors like the KRK Rokit or JBL LSR series ($300-400/pair)
- Position at ear level in an equilateral triangle with the listening position
- Acoustic isolation pads prevent bass resonance with desk surfaces
Don't forget about proper cabling. Balanced XLR and TRS cables reduce interference and noise, especially over longer distances. High-quality cables ensure signal integrity throughout the recording chain.
3
Setting Up Your Home Recording Space
Creating an effective recording space is crucial for capturing quality audio. The right setup minimizes unwanted noise while maximizing sonic clarity and creative workflow.

Acoustic Treatment Basics
Sound reflections can ruin otherwise perfect recordings. Start by identifying and treating the primary reflection points in your room - typically the walls directly to your sides, the ceiling, and the wall behind your monitors.
Acoustic panels made of rigid fiberglass (2-4 inches thick) are highly effective for mid and high frequencies. Place them at ear level where sound first reflects off the walls.
For bass frequencies, which are more problematic in small rooms, consider:
- Bass traps in room corners
- Ceiling cloud panels above your listening position
- Floor treatment is on hard surfaces
DIY options exist for budget constraints. Rockwool insulation wrapped in breathable fabric can create effective panels for approximately $20-30 each, versus $100+ for commercial versions.
Creating A Productive Recording Environment
Your home recording studio should inspire creativity while remaining functional. Proper lighting significantly impacts mood and performance - natural light is ideal during the day, while adjustable lighting helps create an atmosphere for evening sessions.
Keep these elements in mind:
- Comfortable seating that supports proper posture during long sessions
- Cable management to prevent tripping hazards and equipment damage
- Storage solutions for instruments, microphones, and accessories
Temperature control is essential as both equipment and performers function best between 68-72°F (20-22°C). Excessive heat can damage electronics, while cold affects instrument tuning and performer comfort.
A small dedicated table for notes, charts, or reference materials helps maintain organization during sessions, keeping your main workspace focused on the technical aspects of recording.
Your Song Mixed & Mastered By Mixing Monster


Minimizing External Noise
External noise is the enemy of clean recordings. Start by selecting the quietest room in your home - preferably one away from street noise, plumbing, and household activity. Basements often work well because of their natural isolation.
For doors and windows, apply weatherstripping to seal gaps where sound leaks through. Heavy curtains or window inserts can significantly reduce outdoor noise. Doors can be improved with door sweeps and acoustic seals.
Consider recording the schedule carefully:
- Early mornings or late evenings for the quietest neighborhood conditions
- Coordinate with household members to avoid interruptions
- Turn off noisy appliances (refrigerators, HVAC) during critical recording takes
Setting up your recording space might require negotiation with family members to establish "recording in progress" protocols that everyone respects.
Optimal Equipment Placement
The arrangement of your equipment directly impacts recording quality. Position your workstation and monitors to form an equilateral triangle with your listening position, with monitors at ear height pointing toward your ears.
Keep your computer away from recording areas to minimize fan noise and electromagnetic interference. Using longer cables allows you to position the computer in a separate area or even in a dedicated isolation box.
Microphone placement fundamentals include:
- Vocals: 6-8 inches from the singer, with a pop filter
- Acoustic instruments: 6-12 inches from the sound source
- Amplifiers: 2-12 inches, depending on desired tone
Reserve a dedicated zone for each instrument in your recording environment to speed up setup between sessions. Marking microphone positions with tape helps maintain consistency across recording days.

4
Recording Software And DAWs
Digital Audio Workstations (DAWs) serve as the control center for music production, offering tools for recording, editing, and mixing audio tracks. Modern DAWs provide everything needed to transform musical ideas into finished productions.
Comparing Popular DAWs For Beginners
Several DAWs stand out as particularly accessible for newcomers to music production. GarageBand offers an intuitive interface and comes free with all Mac and iOS devices, making it perfect for beginners who want to start recording immediately.
For Windows users, Reaper provides a fully functional option with a generous evaluation period and affordable licensing. Its lightweight design runs well even on modest hardware.
Logic Pro offers a natural progression from GarageBand, maintaining similar workflows while adding professional capabilities. This makes it ideal for Mac users looking to advance their skills.
Pro Tools remains the industry standard in professional recording studios. While it has a steeper learning curve, mastering Pro Tools opens doors to professional recording environments.
Ableton Live stands out for electronic music production with its unique Session View for loop-based composition. It excels in both studio production and live performance.
Free Vs. Paid Software Options
The market offers both free and paid recording software options, each with distinct advantages. Free DAWs like Audacity offer basic recording and editing capabilities without a financial commitment, making them perfect for beginners testing the waters.
Cakewalk by BandLab offers remarkable value as a completely free, full-featured DAW for Windows that once retailed for hundreds of dollars. It includes professional mixing tools and virtual instruments.
Paid options like FL Studio provide lifetime free updates, making them cost-effective long-term investments despite the initial purchase price. Their more refined interfaces often streamline workflow efficiency.
Professional DAWs like Logic Pro ($199) and Pro Tools (subscription-based) offer advanced features, including:
- Comprehensive plugin libraries
- Superior audio processing algorithms
- Extensive MIDI editing capabilities
- Industry-standard file compatibility
- Regular updates with new features
Many paid DAWs offer free trials, allowing users to evaluate before purchasing. This helps determine which interface and workflow best suit individual production styles.
Related Articles
Essential Plugins For New Producers
Every new producer should build a collection of essential plugins to enhance their DAW's capabilities. EQ plugins are fundamental tools that shape the frequency content of recordings, helping elements sit properly in a mix.
Compression plugins control dynamic range, making recordings sound more polished and professional. They're particularly useful for vocals and percussion elements.
Virtual instruments expand creative possibilities without requiring physical instruments. Most DAWs include basic virtual instrument packages covering drums, keyboards, and orchestral sounds.
Reverb and delay plugins create spatial dimension, helping to place sounds in a realistic or creative audio environment. They transform dry recordings into immersive sonic experiences.
Free plugin options from developers like MeldaProduction, TDR, and Voxengo offer professional-quality sound without cost. These serve as excellent starting points before investing in premium options.
Producers should focus on mastering a small collection of versatile plugins rather than accumulating too many options. This prevents option paralysis and accelerates the learning curve.
Cloud-Based Recording Solutions
Cloud-based recording platforms have revolutionized collaboration. Using an online song recorder allows you to capture ideas instantly in your browser. Services like BandLab and Soundtrap enable multiple musicians to work on projects simultaneously from different locations, eliminating the need to exchange large audio files.
These platforms typically offer:
- Web-based interfaces accessible from any computer
- Mobile apps for recording on the go
- Built-in sharing and feedback tools
- Basic mixing and editing capabilities
- Integrated publishing to streaming platforms
Cloud DAWs generally require less processing power than traditional software, making them accessible on less powerful computers. This democratizes production capabilities across different hardware setups.
While cloud solutions offer convenience, they typically provide fewer advanced features than dedicated DAW software. Many producers use them to generate initial ideas or collaborate before finalizing projects in traditional DAWs.
Internet connection quality directly impacts the usability of cloud-based platforms. Producers should ensure stable connectivity when relying on these tools for important recording sessions.

5
Recording Techniques For Different Instruments
Each instrument requires specific recording approaches to capture its unique characteristics. The right microphone placement, room acoustics, and processing techniques can dramatically improve the quality of your recordings.
Vocal Recording Secrets
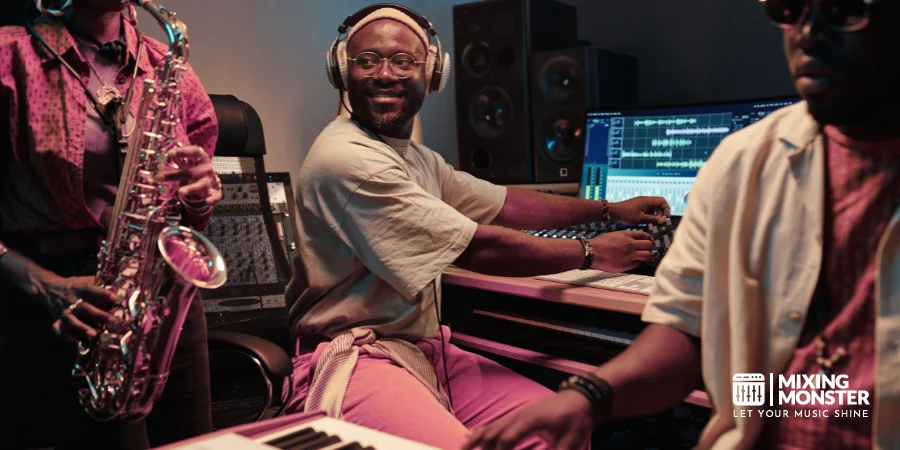
Vocals form the centerpiece of most modern music productions. When recording vocals, it is helpful to use a metronome to keep your timing consistent. To achieve professional results, start with a quiet recording environment using acoustic treatment to minimize reflections.
Position the vocalist 6-8 inches from a large-diaphragm condenser microphone with a pop filter to reduce plosives. Cardioid polar patterns work best for most vocal recording scenarios.
Consider using a reflection filter behind the microphone to reduce room reflections further. This creates a drier signal that's easier to process later.
Minimizing EQ and compression during tracking allows for more flexibility during mixing. Record at conservative levels (-10dB to -15dB peak) to avoid digital clipping.
For harmonies and backing vocals, maintain consistent microphone positioning. This helps create a cohesive blend when layering multiple vocal tracks.
Capturing Acoustic Instruments
Acoustic instruments shine when their natural resonance and tonal characteristics are preserved. The key is finding the sweet spot where the instrument sounds most balanced.
For acoustic guitars, position a small-diaphragm condenser microphone 6-12 inches from where the neck meets the body. This captures a balanced tone with both body resonance and string definition.
Piano Recording Tips:
- Use two microphones in an X/Y configuration for stereo imaging
- Position them 6-12 inches above the strings
- Adjust the lid position based on the desired brightness
String instruments benefit from careful room selection. Recording in rooms with natural ambiance adds depth and character that's difficult to replicate with digital reverb.
Record woodwinds with the microphone positioned slightly off-axis to reduce breath noise while capturing the full tonal range.
Electronic Instrument Recording
Electronic instruments offer both direct recording options and amplified paths. For synthesizers and digital keyboards, direct connections via balanced outputs provide the cleanest signal path.
When recording electronic instruments with onboard effects, capture both the wet and dry signals simultaneously. This provides flexibility during mixing without permanently committing to effects.
Bass guitars can be recorded through DI boxes for clean, direct sound or through amplifiers for added character. Many professional engineers record both simultaneously, blending the signals during mixing.
Virtual instruments require proper MIDI implementation. Use a click track to maintain rhythmic consistency when recording MIDI performances. This helps ensure tight timing with other recorded elements.
For loop-based productions, maintain consistent tempo settings throughout the recording process. This simplifies the arrangement and editing later in production.
Drum Recording For Beginners
Drums present unique challenges due to their dynamic range and multiple components. Even simple setups can produce professional results with the right techniques.
Basic Drum Miking Setup:
- Kick drum: Dynamic mic inside the drum, near the beater
- Snare: Small-diaphragm condenser 1-2 inches above the rim
- Overhead: Stereo pair of condensers capturing the entire kit
- Room mic: Optional distant microphone for ambiance
For home studios, consider using a focused approach with fewer microphones. A well-placed stereo pair of overheads with a kick and snare mic can capture a balanced drum sound.
Digital drum replacement and augmentation can enhance drum recordings. Record through a DI box while using an electronic kit to maintain the option for sample replacement.
Rhythm section coherence depends on solid tracking. Recording drums to a click track provides a stable foundation for bass, guitars, and other rhythm instruments to lock into.

6
Post-Recording Process
Once you've captured your performance, the real magic happens in post-production. This phase transforms raw recordings into polished, professional tracks through mixing and mastering. Proper editing and file management also play critical roles in the final sound.
Editing Your Recordings
The process to edit audio is your first step after recording. Begin by reviewing your raw recordings to identify any issues that need to be addressed.
Start with trimming unwanted sections and learn how to remove background noise. Tools like noise-reduction plugins can clean up hiss, hum, and room noise that might distract from your performance.
Fix timing problems by aligning off-beat elements. Modern DAWs offer quantization features that automatically align notes to your project's tempo.
Address pitch issues with correction tools, but use them subtly. Heavy-handed pitch correction often sounds unnatural and can diminish a performance's emotional impact.
Compile the best parts from multiple takes ("comping") to create one perfect performance. This might involve selecting the best chorus from one take and the best verse from another.
Mixing Basics For Beginners
Mixing blends all individual tracks into a cohesive whole. Start with gain staging – setting appropriate volume levels for each track to prevent clipping and distortion.
Use panning to create a sense of space by positioning elements across the stereo field. Effective panning allows you to separate the rhythm section from the vocals. You can also experiment with stereo widening to make your mix feel larger and more immersive. Precise panning prevents frequency masking where similar sounds compete for attention.
Equalization (EQ) shapes the tonal balance of each element:
- Cut problematic frequencies before boosting good ones
- Remove low rumble from vocals and high instruments
- Create space for each element in the frequency spectrum
Apply compression to control dynamic range and add punch. Start with a 3:1 ratio and adjust the threshold until you see 3-6dB of gain reduction on peaks.
Add depth with reverb and delay effects, but use them sparingly. Consider creating an effects bus to send multiple tracks to the same reverb, creating cohesion.
Mastering Your Final Product
Mastering is the final polish that prepares your mix for distribution. This process focuses on balancing frequencies across the entire song and maximizing loudness without sacrificing dynamics.
Apply subtle EQ to address any overall tonal issues. This might include a slight high-frequency boost for clarity or the management of problematic bass frequencies.
Multi-band compression allows independent control of specific frequency ranges, creating a more balanced sound across the spectrum.
Limiting prevents peaks from exceeding 0dB while increasing perceived loudness. Aim for a true peak level of 1dB to avoid clipping during format conversion.
Compare your master against reference tracks in your genre to ensure your sound quality meets industry standards. This helps identify areas where your track might need adjustment.
Professional mastering often involves specialized equipment and trained ears, so consider using automated services or hiring a mastering engineer for important projects.
Exporting And File Management
Export your finished tracks at the appropriate bit depth and sample rate for their intended use. For digital distribution, 16-bit/44.1kHz WAV files are standard, while higher resolutions work best for further editing.
Create multiple versions of your export:
- Full-quality WAV for archiving
- MP3 at 320kbps for digital platforms
- Lower bitrate MP3s for streaming services with specific requirements
Implement a consistent file naming convention that includes the song title, version number, and date. This prevents confusion when revising or returning to projects later.
Back up your projects in multiple locations. Creating regular backups ensures that your hard work is protected from hardware failure. Store session files separately from exported masters to ensure you can revisit and revise your work if needed.
Document your process, including plugin settings and automation choices, to maintain consistency across future projects or when returning to finish an album.

7
Publishing And Sharing Your Recordings
Once you've recorded and mixed your music, the next crucial step is getting it out into the world. Effective publishing strategies can help your music reach wider audiences while protecting your creative work and generating income.
Digital Distribution Platforms
Digital distribution platforms serve as the primary gateway for independent musicians to release music on major streaming services. Companies like DistroKid, CD Baby, and TuneCore offer affordable ways to get your music on Spotify, Apple Music, Amazon, and other platforms.
Most distributors charge either an annual fee or take a percentage of royalties. When self-publishing your music, compare pricing structures based on your release schedule and revenue expectations.
Each platform offers different features:
- DistroKid: Unlimited uploads for an annual fee
- CD Baby: One-time payment per release
- TuneCore: Annual fee per release with 100% royalties
Before submitting, ensure your audio files meet quality standards (typically 16-bit WAV files) and prepare professional cover art. Most platforms require artwork in 3000×3000 pixels and clean metadata.
Building An Online Presence For Your Music
Creating a cohesive online presence is essential for connecting with fans and industry professionals. Start by securing consistent usernames across platforms such as Instagram, TikTok, YouTube, and Bandcamp.
Your artist website serves as your digital headquarters. Include streaming links, upcoming shows, contact information, and an email signup form. WordPress and Wix offer musician-specific templates with music players and event calendars.
Social media strategy should focus on platform strengths:
- Instagram: Visual content and stories
- TikTok: Short-form video clips and trends
- YouTube: Full songs, music videos, behind-the-scenes
- Twitter: News, release announcements, fan engagement
Content calendars help maintain regular posting schedules. Plan content around releases, creating teasers, snippets, and behind-the-scenes material from single recording sessions.
Monetization Strategies For Indie Musicians
Diversifying income streams is crucial for sustainable music careers. Beyond streaming royalties, consider merchandise sales (t-shirts, vinyl, limited editions), which typically yield higher profit margins than digital music.
Live performances remain a primary source of revenue. Start with local venues and gradually expand your performance radius. Consider hosting house concerts and private events to generate additional income.
Music licensing opportunities can generate significant revenue. Submit your tracks to placement libraries like Epidemic Sound or Artlist for potential use in commercials, films, and videos.
Fan subscription platforms offer stability:
- Patreon: Monthly supporter tiers with exclusive content
- Bandcamp: Subscription and direct sales models
- YouTube Channel Memberships: For creators with 1,000+ subscribers
Teaching your instrument, production techniques, or songwriting can supplement income while building your network within the music community.
Copyright And Royalties Basics
Protecting your creative work starts with understanding copyright. In most countries, copyright exists automatically upon creation, but formal registration provides stronger legal protection and is necessary for infringement lawsuits.
Before releasing music, register with a performance rights organization (PRO) like ASCAP, BMI, or SOCAN. These organizations collect performance royalties when your music is played publicly.
Two primary royalty streams exist:
- Mechanical royalties: Paid for physical or digital reproduction
- Performance royalties: Generated when music is performed or broadcast
For songwriters, joining a publishing company or registering as your own publisher with your PRO maximizes royalty collection. This allows you to receive both the songwriter's and the publisher's shares of performance royalties.
Digital distributors handle mechanical royalties from streaming, but consider services like Songtrust to collect global publishing royalties that might otherwise go unclaimed.
8
Key Takeaways For Recording Music
Equipment Essentials:
- Computer or laptop with sufficient processing power
- Digital Audio Workstation (DAW) software
- Quality microphone appropriate for your instrument/voice
- Audio interface to connect instruments and microphones
- Headphones for monitoring during recording
Setting up your recording space properly is crucial for capturing clean sound. A quiet room with some basic acoustic treatment will significantly improve your recordings, even if you're starting.
Recording Best Practices:
- Always monitor your recording in real-time with headphones
- Record at appropriate levels (avoid clipping)
- Use the pause button instead of stopping when taking breaks to maintain track continuity
You don't need expensive equipment to begin recording music. Even a smartphone can work for basic recordings, especially if you're testing ideas or creating demos.
Software Considerations:
- Choose a DAW that matches your workflow and skill level
- Popular options include GarageBand (free with iPhone/Mac), Audacity, FL Studio, and Ableton Live
- Your DAW selection will influence your creative process and workflow efficiency
Start with a rough mix focusing on the main instruments and vocals before refining your recording. This approach helps lay the foundation for your track before you get lost in the details.
Remember that successful home recording depends on properly understanding your tools and correctly setting up your studio space—even if that "studio" is just a corner of your bedroom.
Happy recording!

Frequently Asked Questions
1
What equipment do I need to record music at home?
To start recording music at home, you'll need some essential gear. The core equipment includes a computer, a digital audio workstation (DAW), an audio interface, and at least one microphone.
Headphones or studio monitors are crucial for accurate listening during recording and mixing. Additional accessories, such as XLR cables, a pop filter, and a microphone stand, will improve your recording quality and workflow.
For beginners, a USB microphone can serve as both a microphone and an interface, simplifying the setup while still delivering good results.
2
Can I record music on my iPhone, and what app should I use?
Recording music on an iPhone is entirely possible with the right apps. GarageBand comes pre-installed on most iOS devices and offers a comprehensive recording studio experience with virtual instruments and effects.
For more advanced projects, apps like Cubasis, BandLab, and AudioShare provide professional-level recording capabilities. These apps support multiple tracks, effects processing, and can even connect to external microphones through adapters.
The iPhone's built-in microphone works for rough demos, but connecting an external microphone via the Lightning port significantly improves recording quality.
3
What are the best ways to record music on a laptop?
Recording music on a laptop requires a DAW such as Ableton Live, FL Studio, Logic Pro (Mac only), or free options like GarageBand or Audacity. These programs serve as the foundation of your digital studio.
Pairing your laptop with an audio interface allows you to connect professional microphones and instruments. USB interfaces from brands like Focusrite, PreSonus, and Behringer offer excellent quality at various price points.
Ensure your laptop has sufficient RAM (8GB minimum) and processing power to handle multitrack recording sessions without latency issues.
4
How can I record high-quality music without any professional equipment?
Creating high-quality recordings without professional gear requires making the most of what you have. A quiet recording environment is crucial—consider using blankets and soft furnishings to reduce room reflections and background noise.
Proper microphone placement significantly affects sound quality, even with basic microphones. Experiment with distance and angles to find the sweet spot for your voice or instrument.
Free DAWs like Audacity, combined with audio editing tools, can yield impressive results. Learning to remove background noise and applying basic compression will help you record a song that sounds professional, even without expensive gear.
5
Is there a way to capture music from YouTube legally?
Capturing music from YouTube for personal use exists in a legal gray area. For educational purposes, YouTube Premium allows offline viewing, while YouTube Music enables offline listening of songs.
For creators needing royalty-free music, YouTube's Audio Library offers free tracks for use in projects. Services like Epidemic Sound and Artlist provide subscription-based access to licensed music.
Recording copyrighted music from YouTube for commercial use or distribution violates the terms of service and copyright laws, potentially resulting in legal consequences.
6
Which platforms offer free music recording capabilities?
Several free platforms provide robust music recording capabilities. Audacity stands out as a comprehensive, open-source DAW available for all major operating systems with multitrack recording and editing tools.
GarageBand offers Mac and iOS users a free, professional-grade recording studio with virtual instruments and loops. For online collaboration, BandLab provides free cloud-based recording and sharing options accessible from any browser.
Cakewalk by BandLab (Windows only) delivers a fully-featured DAW that was once premium software, now available at no cost, with professional mixing and mastering capabilities.
Related Articles
You Might Also Be Interested In