


Recording guitar on your PC transforms your computer into a powerful home studio without requiring expensive equipment or technical expertise. Whether you're a beginner capturing your first riff or an experienced player tracking full songs, understanding how to record guitar on PC opens up creative possibilities. Learning how to record guitar effectively is the first step toward building your own home studio.
To record guitar on PC, you need an audio interface that converts your guitar's analog signal to digital, along with Digital Audio Workstation (DAW) software to capture and edit your recordings. The audio interface connects to your computer via USB and provides specialized instrument inputs. This setup ensures proper signal levels and sound quality.
Most modern recording setups include monitor headphones to hear your playing without delay. The process works identically whether you're using Windows or macOS.
You'll discover multiple approaches to capture your guitar sound, from plugging directly into an interface to miking up your amplifier for an authentic tone. This guide covers everything from selecting the right hardware and software to avoiding common recording mistakes that compromise your sound.
You'll learn practical techniques for both electric and acoustic guitars, plus how to use multi-effects pedals and amp modelers that double as recording interfaces.
Key Takeaways / TL;DR
- You need an audio interface and DAW software to record guitar on your PC properly
- Multiple recording methods exist, including direct connection, microphone placement, and USB-enabled pedals
- Choosing appropriate monitoring equipment and avoiding common setup errors ensures quality recordings

1
Record Guitar On PC – Complete Beginner Overview
Recording guitar on your computer requires specific hardware to convert your instrument's analog signal into digital data, software to capture and edit that audio, and an understanding of how these components work together to produce clean recordings.
Essential Equipment You Need To Get Started
You need an audio interface to connect your guitar to your computer properly. This device converts the analog signal from your guitar into digital information that your PC can process. Never plug your guitar directly into your computer's standard inputs, as they aren't designed for instrument-level signals and can produce poor-quality audio or even damage your equipment.
A set of monitor headphones or studio monitors allows you to hear your recordings accurately. Standard computer speakers add coloration to the sound, making it difficult to judge your actual tone. Monitor headphones like the Audio-Technica ATH-M50x provide a flat frequency response, meaning you hear your guitar signal without artificial bass boost or treble enhancement.
Required Equipment Checklist:
- Audio interface with instrument input
- USB cable (usually included with the interface)
- Monitor headphones or studio speakers
- Guitar cable (1/4" instrument cable)
- Computer with USB port
If you're recording an acoustic guitar without a pickup, you'll need a microphone in addition to your audio interface. Many interfaces include combo inputs that accept both instrument cables and microphones.
Understanding Audio Interfaces And Sound Cards
An audio interface serves as the bridge between your guitar and computer by handling analog-to-digital conversion (ADC) and digital-to-analog conversion (DAC). The quality of these converters directly impacts your recorded tone. Budget interfaces typically provide 24-bit/48kHz conversion, which is sufficient for most home recording needs.
The preamp in your audio interface amplifies your guitar signal to line-level before conversion. Higher-quality preamps introduce less noise and preserve more of your original tone. Popular options include the Focusrite Scarlett series, PreSonus AudioBox USB 96, and IK Multimedia iRig HD 2 for portable recording.
Most audio interfaces are plug-and-play, meaning you can connect them via USB and start recording immediately. Your computer's built-in sound card isn't suitable for guitar recording because it lacks proper instrument inputs, has higher latency, and produces inferior audio quality compared to dedicated interfaces.
Latency refers to the delay between playing a note and hearing it through your headphones. Audio interfaces minimize this delay through specialized drivers, keeping latency under 10 milliseconds for comfortable playing and recording.
Choosing The Right DAW For Guitar Recording
A Digital Audio Workstation (DAW) is software designed to record, edit, and mix audio on your computer. Choosing the best DAWs for guitar depends on your specific workflow and computer specs.
While FL Studio is often associated with electronic production, its flexible mixer makes it a capable choice for recording guitar on pc. A DAW provides the most versatile platform for capturing your recordings. Free options like Reaper, Audacity, and GarageBand (Mac) offer robust features for beginners. Higher-end software like Ableton Live offers a different workflow optimized for creative arrangement and performance.
Your DAW handles multiple functions, including track recording, loop creation, effects processing, and final mixdown. Most DAWs include basic plugins for EQ, compression, and reverb that you can apply to your guitar tracks. You can also use amp simulation plugins to create a range of guitar tones without physical amplifiers.
Popular DAW Options:
| DAW | Cost | Best For |
|---|---|---|
| Reaper | $60 | Windows/Mac flexibility |
| GarageBand | Free (Mac) | Mac users starting out |
| Audacity | Free | Simple recording tasks |
| Cakewalk | Free | Windows users |
Choose a DAW based on your operating system, budget, and intended use. Most offer trial versions so you can test the interface before committing.
Basic Signal Chain Explained For Clean Audio
Your signal chain represents the path audio travels from your guitar to your final recording. The standard chain flows: guitar → cable → audio interface → computer → DAW. Each link affects your final sound quality, so using a good instrument cable and setting proper input levels prevents noise and distortion.
Set your interface's input gain so your loudest playing reaches approximately -12 dB to -6 dB on your DAW's meters. This provides headroom for unexpected peaks while maintaining a strong signal above the noise floor. The gain knob on your interface controls how much the preamp amplifies your guitar signal before it is converted to digital.
Monitor your signal through your audio interface's headphone output rather than your computer's built-in jack. This reduces latency and provides direct monitoring, letting you hear your playing in real-time without the delay caused by computer processing. Many interfaces include a direct monitoring switch or blend knob that lets you mix your input signal with playback from your DAW.
Keep your signal chain simple when starting. Add effects and processing after you've recorded a clean signal, as this gives you more flexibility during editing and mixing. You can always add distortion or reverb later, but you can't remove them from a recorded track.

2
Method 1 – Record Guitar Directly With An Audio Interface
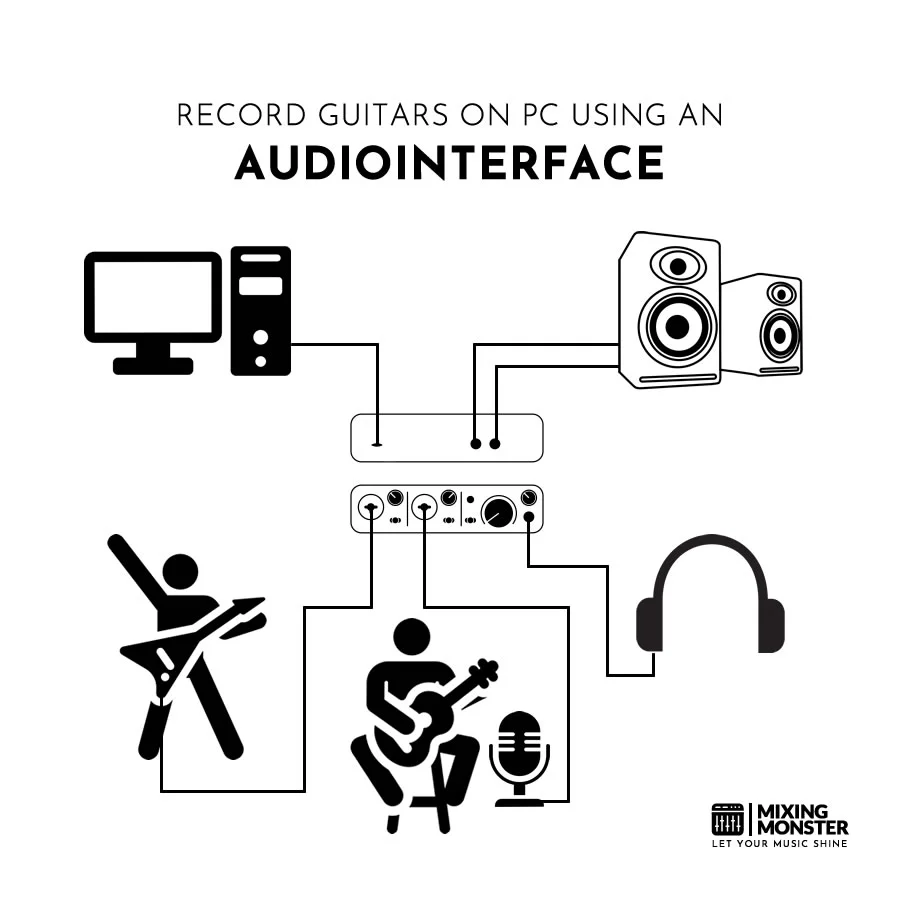
Recording guitar directly through an audio interface gives you the cleanest signal path and maximum flexibility for shaping your tone later. This method captures your guitar's raw signal, allowing you to add amp simulations and effects using software plugins after recording.
Connecting Your Electric Guitar Via Instrument Input
You'll need a USB audio interface with a dedicated instrument input, sometimes labeled as "Hi-Z" or "Inst." These inputs are designed to handle the high-impedance signals produced by electric guitars. Standard line inputs won't work properly because they're built for different impedance levels.
Use a high-quality guitar lead to connect your instrument's output jack to the interface. This method of recording di provides the most flexibility for later editing and tone shaping.
Proper recording di techniques ensure your raw signal is captured with maximum clarity. If you are using a standard mixer instead of an interface, a DI box is essential to match levels and impedance correctly.
Most budget interfaces have one or two instrument inputs on the front panel. Connect the USB cable from your interface to your computer, then install any required drivers from the manufacturer's website. Your DAW (Digital Audio Workstation) software should automatically detect the interface once it's properly connected.
Turn on phantom power only if you're using a condenser microphone. Never enable phantom power when recording an electric guitar directly, as it's unnecessary and could potentially damage your equipment.
Setting Proper Gain And Avoiding Clipping
Input gain controls how loud your guitar signal is when it enters the interface. Start with the gain knob turned completely down, then gradually increase it while playing your guitar at the loudest volume you'll use during recording.
Watch the level meters on your interface or in your DAW. You want the signal to peak around -12 dB to -6 dB during your loudest playing. This range provides enough headroom to prevent clipping while maintaining a strong, clean signal.
Clipping occurs when the signal exceeds 0 dB, resulting in digital distortion that sounds harsh and cannot be corrected in post-production. If you see red lights on your interface or meters hitting 0 dB, reduce the gain immediately.
Your guitar's volume knob also affects the input level. Keep it at full volume for recording to capture the most dynamic range, then adjust the interface gain accordingly.
Discover Best Audio Gear & Equipment


Using Amp Simulator Plugins For Realistic Tone
When you record an electric guitar directly into an audio interface, the raw signal sounds thin and lifeless. Using amp sims allows you to experiment with thousands of virtual tones at any volume.
These plugins recreate the sound of real guitar amplifiers and speaker cabinets. Guitar Rig and other similar tools are perfect for finding the right tone when you record an electric guitar.
Popular free amp simulations include Amplitube Custom Shop, LePou plugins, and Ignite Amps. Professional options like Neural DSP, Amplitube 5, and Positive Grid Bias FX 2 offer more realistic tones and additional features.
Load the amp simulator plugin on your guitar track in your DAW. Most plugins offer preset tones for different styles, such as clean, crunch, or high-gain. You can customize these presets by adjusting gain, EQ, and effects parameters.
Record with amp simulators as insert effects rather than during tracking when possible. This approach preserves your clean DI (Direct Input) signal, so you can later completely change your amp tone without re-recording.
Best Budget And Pro Audio Interfaces For Guitarists
The Focusrite Scarlett Solo and Scarlett 2i2 dominate the budget category for guitarists. Both feature solid instrument inputs, decent preamps, and reliable USB connectivity starting around $120-180.
For mid-range options, the Universal Audio Volt 276 ($299) includes built-in analog compression, while the SSL 2+ ($250) offers legacy SSL preamp sound. The PreSonus Studio 24c offers two instrument inputs at a competitive price.
Professional guitarists often choose the Universal Audio Apollo Twin ($799+) for its real-time UAD amp simulations and superior conversion quality. The Audient iD14 MKII ($299) delivers exceptional preamps and monitoring features at a lower price.
| Interface | Price Range | Key Features |
|---|---|---|
| Focusrite Scarlett Solo | $120 | 1 instrument input, basic functionality |
| SSL 2+ | $250 | SSL preamps, 2 inputs, monitoring control |
| Universal Audio Volt 276 | $299 | Built-in compression, vintage tone |
| Audient iD14 MKII | $299 | Class-A preamps, JFET instrument input |
| Universal Audio Apollo Twin | $799+ | Real-time UAD plugins, premium conversion |
Choose your interface based on how many inputs you need, your budget, and whether you value included software plugins. Any external audio interface listed here will deliver significantly better results than recording through your computer's built-in sound card.
3
Method 2 – Mic Your Guitar Amp For Authentic Tone
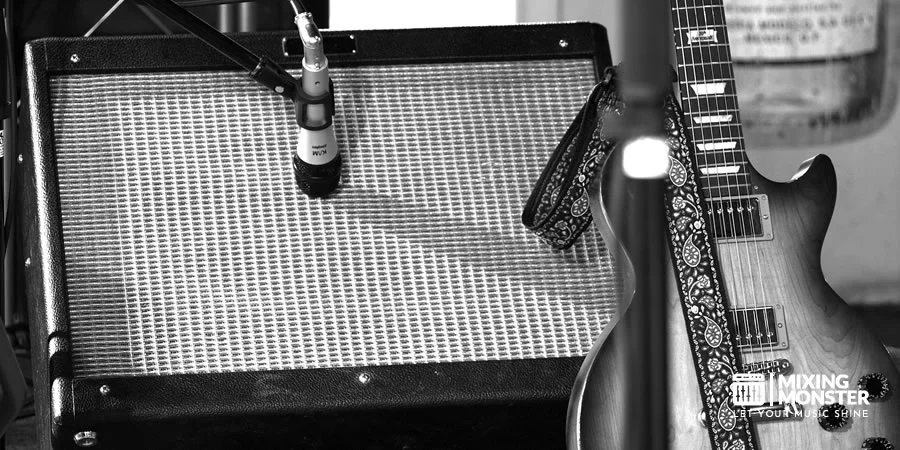
Successful recording amp setups involve capturing the speaker's natural sound and the room's acoustic characteristics. The art of miking an amp involves moving the microphone capsule incrementally to find the perfect frequency balance. The microphone type, placement position, and your recording environment all significantly impact the final recorded tone.
Choosing The Right Microphone For Guitar Amps
Dynamic microphones are the industry standard for guitar amp recording because they handle high sound pressure levels without distortion. The Shure SM57 is the most widely used option in professional studios, valued for its durability and ability to capture midrange frequencies that define electric guitar tone. This microphone costs around $100 and delivers consistent results across different amp types.
Condenser microphones offer broader frequency response and capture more detail than dynamic mics. They work well for clean tones and jazz recordings where you want to preserve subtle overtones. These mics require phantom power from your audio interface and are more sensitive to room acoustics.
Ribbon microphones provide a warm, vintage character that smooths harsh high frequencies. They're fragile and expensive but excel at capturing the natural warmth of tube amplifiers. Many engineers use ribbon mics for blues and classic rock tones where a darker sound is desirable.
Mic Placement Techniques For Different Sounds
Position your microphone one to three inches from the speaker grille for the most direct sound. Pointing the mic at the center of the speaker cone produces a bright tone with emphasized treble frequencies, while aiming toward the edge of the cone yields a warmer sound with more bass response.
Off-axis placement involves angling the microphone 45 degrees away from the speaker. This technique reduces harsh high frequencies and captures a more balanced tone. Moving the mic further back from the amp incorporates more room sound and natural reverb.
Using two microphones simultaneously provides more tonal options during mixing. Place one mic close to the speaker cone and another three to four feet away to capture room ambiance. You can blend these signals or use them separately, depending on the song's requirements.
Your Song Mixed & Mastered By Mixing Monster


Recording High-Gain Vs Clean Amp Settings
Clean amp settings require careful mic placement to capture clarity and detail without muddiness. Position your microphone slightly off-center from the speaker cone to balance brightness with warmth. Clean tones benefit from condenser microphones that capture the full frequency spectrum and subtle dynamics.
High-gain amp settings produce more volume and aggressive frequencies. The Shure SM57 handles these loud signals without distortion while naturally filtering some harsh high frequencies. Place the mic closer to the speaker edge when recording distorted tones to reduce excessive brightness.
Your recording levels should peak between -12 dB and -6 dB, leaving headroom for mixing. High-gain settings compress the signal naturally, so you need less input gain on your audio interface compared to clean tones.
Reducing Room Noise And Echo In Home Studios
Untreated rooms create reflections that muddy your guitar recordings. Hang thick blankets or acoustic foam panels on walls near your amp to absorb sound reflections. Focus treatment on the walls behind and to the sides of the amplifier, where the most direct reflections occur.
Close-miking your amp naturally reduces room noise by capturing more direct sound than reflected sound. Keep the microphone within six inches of the speaker grille to minimize the room's acoustic influence. This technique works well in less-than-ideal recording spaces.
Background noise from computer fans, air conditioning, or outside traffic will be audible in your recordings. Turn off unnecessary equipment and choose the quietest room available in your home. Record during times when external noise is minimal, such as late evening or early morning hours.

4
Method 3 – Record Acoustic Guitar With A Microphone
Using a microphone captures the natural resonance and tonal character of your acoustic guitar more authentically than any pickup system. This method requires an audio interface with an XLR microphone input, the right type of microphone, and careful attention to placement for optimal results.
Condenser Vs Dynamic Mics For Acoustic Guitar
Condenser microphones are the standard choice for recording acoustic guitar because they capture high-frequency detail and subtle nuances that define the instrument's character. These mics require 48V phantom power from your audio interface, which all modern interfaces provide through the XLR microphone input.
Large-diaphragm condensers work well for single-mic setups, delivering warmth and body. Small-diaphragm condensers excel in stereo configurations due to their accurate transient response and consistent polar patterns.
Dynamic microphones offer a more robust alternative with less sensitivity to room noise and reflections. While they lack the crisp detail of condensers, dynamics can work effectively in untreated spaces or when you need a warmer, less bright tone. They also don't require phantom power, though most interfaces provide it automatically through the XLR connection.
The trade-off is straightforward: condensers provide superior detail and air but demand better room acoustics, while dynamics sacrifice some clarity for durability and room noise rejection.
Ideal Mic Positioning For Natural Sound
Position your microphone 6-12 inches from the 12th fret for a balanced capture of both body resonance and string articulation. This placement avoids the boomy low-end buildup that occurs when pointing directly at the sound hole.
Never aim your microphone straight at the sound hole. The proximity effect creates excessive bass frequencies that sound muddy and unnatural in recordings.
Angling the mic slightly toward the neck emphasizes string clarity and brightness. Pointing it more toward the body increases warmth and fullness. Start at the 12th fret position and make small adjustments while monitoring through headphones to find the sweet spot for your specific guitar.
Connect your microphone to the audio interface using an XLR cable. Keep cable runs under 20 feet when possible to maintain signal integrity, though quality cables can handle longer distances without degradation.
Related Articles
Capturing Stereo Acoustic Recordings
The X-Y technique places two small-diaphragm condenser mics at 90-degree angles with their capsules nearly touching, typically aimed at the 12th fret. This approach minimizes phase issues while creating a focused stereo image.
Spaced pair configurations use two mics positioned at different locations on the guitar. Place one near the 12th fret and another near the bridge, spacing them according to the 3:1 rule: the second mic should be three times farther from the first mic than the first mic is from the guitar.
Mid-side recording combines a cardioid mic pointed at the guitar with a figure-8 mic placed perpendicular to it to capture room ambience. This technique offers adjustable stereo width during mixing.
Both microphones need separate XLR cables running to individual inputs on your interface. Pan the two channels left and right in your recording software to create the stereo field.
Avoiding Boomy Or Thin Acoustic Tone
Boomy recordings result from the proximity effect when placing your microphone too close to the guitar body or sound hole. Maintain at least 6 inches of distance and avoid aiming directly at the sound hole opening.
Thin, brittle recordings occur when the mic sits too far from the guitar or points exclusively at the upper frets. Move the microphone closer or angle it to capture more body resonance alongside the string attack.
Room reflections color your tone significantly. Hard surfaces behind or beside the guitar create harsh reflections that muddy the sound. Position yourself away from walls or add soft furnishings like blankets and cushions to absorb reflections.
Test your positioning by recording short samples at different distances and angles. Compare the results and note which position delivers the fullness and clarity you need. Fresh strings make a substantial difference in tone quality, so replace old strings before important recording sessions.

5
Method 4 – Use Multi-Effects Pedals Or Amp Modelers Via USB
Modern multi-effects units and amp modelers with USB connectivity let you record guitar directly into your computer while accessing professional-grade effects processing. These devices handle both your tone-shaping and audio-interface duties in a single unit, eliminating the need for separate hardware.
Recording With USB-Enabled Guitar Processors
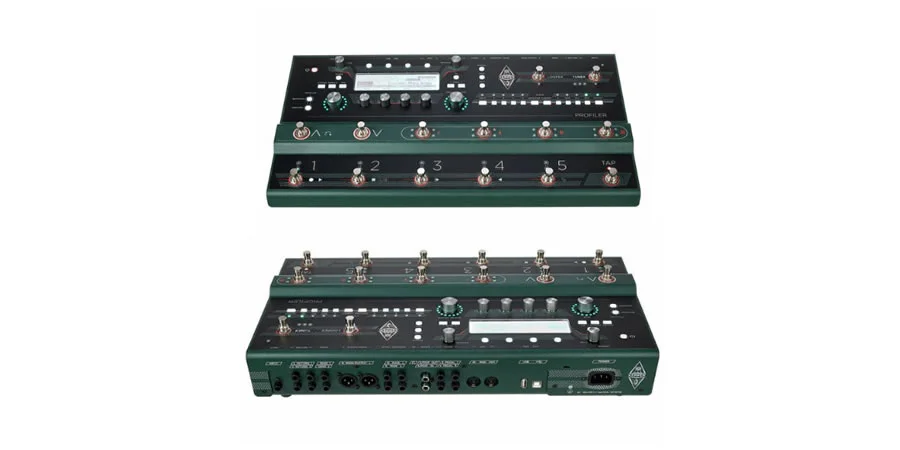
You can connect your guitar to a USB-enabled processor and route the signal directly to your DAW without needing a separate audio interface. Popular options include Line 6 Helix, Boss GT-1000, and Kemper Profiler, all of which function as audio interfaces when connected via USB.
The setup process involves plugging your guitar into the processor's input, connecting the USB cable to your computer, and selecting the device as your audio input in your DAW. Many multi-effects units come with dedicated software that provides deeper control over parameters and signal chain arrangement.
Software like Amplitube, Bias FX 2, and Guitar Rig can work alongside your hardware processor or replace it entirely if you prefer a purely software-based approach. When using hardware processors, you benefit from dedicated DSP chips that handle all processing without taxing your computer's CPU. This approach also gives you a physical interface with knobs and switches for quick adjustments during recording sessions.
Configuring Built-In Cabinet Simulations
Cabinet simulation replicates the sound of guitar speaker cabinets and is essential when recording directly into your DAW. Your processor likely includes numerous cabinet models representing different speaker configurations, from vintage 1x12 combos to modern 4x12 stacks.
Disable cabinet simulation only when you plan to use a separate IR loader or cabinet simulator plugin in your DAW. Most processors let you assign different cabinet models to individual presets, allowing you to match speakers with specific amp models. For example, pairing a Fender amp model with an open-back cabinet simulation produces authentic clean tones.
Pay attention to microphone placement options within your cabinet simulator. Many units offer multiple mic positions (center, edge, rear) that dramatically affect your tone's brightness and presence. Experiment with mixing two different mic positions to create a fuller, more dimensional sound in your recordings.
Latency Settings For Smooth Monitoring
Latency is the delay between playing a note and hearing it through your monitoring system. The buffer size in your audio driver settings directly affects latency—smaller buffers reduce latency but increase CPU load.
Start with a buffer size of 128 or 256 samples for recording. If you experience crackling or dropouts, increase the buffer incrementally. Most USB processors offer zero-latency direct monitoring, which routes your processed signal directly to your headphones before it reaches the computer.
ASIO drivers (Windows) or Core Audio (Mac) provide the lowest latency performance. Always use the manufacturer's dedicated ASIO driver rather than generic Windows audio drivers. Monitor through your processor's headphone output rather than your DAW to avoid the round-trip delay through your computer entirely.
When To Choose Modelers Over Traditional Amps
Digital gear offers advantages when recording in noise-sensitive environments, such as apartments or home studios with thin walls. You can record at any time without disturbing neighbors while still accessing high-gain tones that would require significant volume from a real amplifier.
Modelers excel when you need consistent, repeatable tones across multiple recording sessions. You save presets that recall exact settings instantly, unlike traditional amps, which require you to recreate settings each time manually. Many processors also let you record an unprocessed dry signal alongside your wet tone, so you can reamp later with different settings if needed.
Choose traditional amps when you prioritize tactile response and dynamic feel over convenience. Some guitarists find that real tube amps respond more naturally to picking dynamics and volume knob adjustments. Budget also matters—quality amp modeling typically requires a higher initial investment than entry-level tube combos.

6
Method 5 – Record Guitar Without An Audio Interface
You can record guitar on your PC without purchasing an audio interface by using alternative input methods. These approaches range from USB microphones to direct line-in connections, each offering different levels of convenience and sound quality for home recording.
Using USB Microphones For Quick Recording
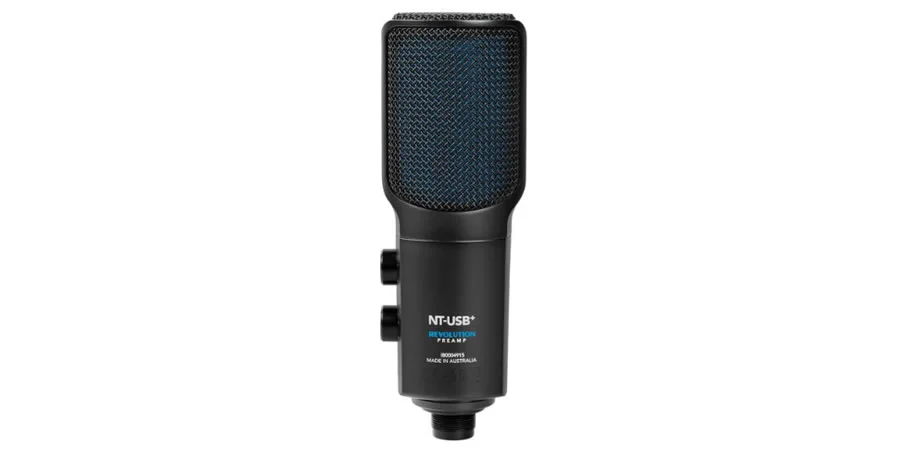
USB microphones provide a straightforward solution for recording a guitar without dedicated audio gear. These microphones include built-in analog-to-digital converters, eliminating the need for external interfaces.
Position the USB microphone 6-12 inches from your acoustic guitar's soundhole or 1-2 feet from your amplifier's speaker cone. This distance strikes a balance that doesn't overwhelm the microphone's capsule.
USB microphones work particularly well for acoustic guitars since they produce lower volumes than amplified electric guitars. You'll need to carefully adjust the gain settings when recording an electric guitar through an amp to prevent distortion and clipping.
Key advantages of USB microphones:
- Plug-and-play operation with no driver installation required
- Direct monitoring capabilities on many models
- Reasonable audio quality for demos and practice recordings
- Budget-friendly compared to full audio interfaces
Background noise presents the main challenge with microphone-based recording. Any sounds in your environment will be captured alongside your guitar performance, making post-production cleanup difficult or impossible.
Recording Through Your PC Line-In Port
Your computer's line-in port offers another option for connecting your guitar directly to your PC. You'll need a 1/4-inch-to-3.5 mm adapter cable to connect your guitar or amplifier's output to the line-in jack.
Two connection approaches:
- Guitar to PC: Connect your electric guitar directly using the adapter cable
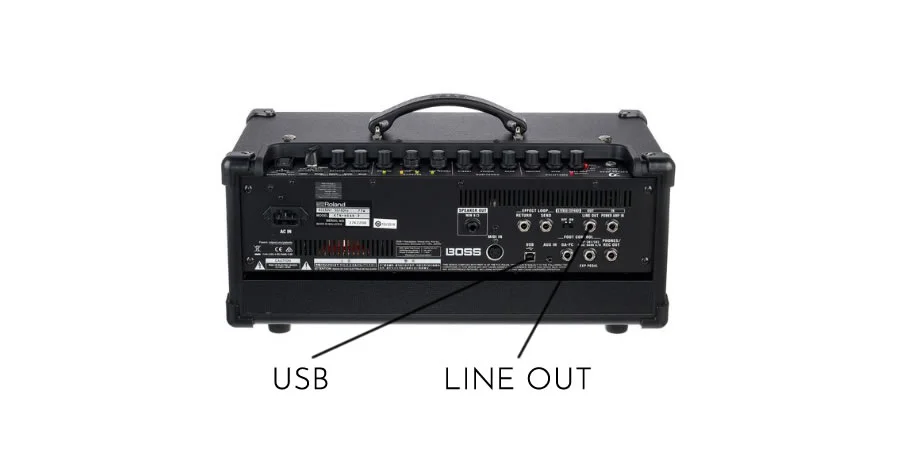
- Amp to PC: Use your amplifier's headphone or line-out jack for better tone control
The direct guitar connection relies on your computer's built-in sound card, which wasn't designed for instrument recording. This typically produces thin, unprocessed audio that requires significant software processing to become usable.
Connecting through your amplifier's line-out or headphone jack delivers better results. Many modern amplifiers feature USB outputs that provide superior audio quality compared to analog connections.
Keep your expectations realistic with this method. Built-in sound cards introduce noticeable latency between when you play and when you hear the sound, making real-time monitoring challenging during recording sessions.
Smartphone-To-PC Recording Workflows
Your smartphone's microphone can capture guitar recordings, which you can then transfer to your PC for editing. This method works best for acoustic guitar and quick idea capture rather than polished productions.
Modern iPhones and high-end Android devices contain surprisingly capable microphones. Position your phone 12-18 inches from your acoustic guitar or amplifier, then record using your device's voice memo or dedicated recording app.
Transfer methods:
- Email the audio file to yourself
- Use cloud storage services (Google Drive, Dropbox, iCloud)
- Connect via USB cable and copy files directly
- Use AirDrop for Apple devices
The audio quality of smartphone recordings varies significantly depending on your device's age and model. Newer flagship phones produce acceptable results for demos and songwriting reference tracks.
This approach struggles with electric guitars played at higher volumes. Your phone's microphone may distort or capture muddy audio when it's overwhelmed by a loud amplifier.
Limitations Of Interface-Free Recording
Recording without an audio interface introduces several technical constraints you need to understand. Latency becomes your primary obstacle, as built-in sound cards introduce delays of 50-200 milliseconds between when you play and when you hear the processed sound.
Technical limitations:
| Issue | Impact | Severity |
|---|---|---|
| Latency | Delayed monitoring makes timing difficult | High |
| Sound Quality | Lower bit depth and sample rates | Medium |
| Input Options | Limited to one or two channels maximum | Medium |
| Preamp Quality | Weak signal amplification | High |
Your computer's sound card lacks the specialized preamps that boost guitar signals to appropriate recording levels. This results in weak, noisy recordings that require excessive gain compensation in your recording software.
You cannot create multitrack recordings efficiently without an interface. Recording multiple takes, layering guitar parts, or adding vocals becomes cumbersome when limited to basic computer inputs.
These methods work adequately for practice recordings and quick demos, but serious recording projects will expose their limitations. Consider interface-free recording as a temporary solution while you build your home studio setup.

7
Best Software And Plugins For Guitar Recording On PC
Choosing the right digital audio workstation and plugins determines the quality and flexibility of your guitar recordings. Free options provide solid starting points for beginners, while premium software offers advanced features that professionals need for complex productions.
Top Free DAWs For Beginners
Cakewalk by BandLab stands out as a completely free option that includes advanced mixing and mastering tools with unlimited audio and MIDI tracks. The software runs only on Windows but provides professional-grade features without cost limitations.
Reaper offers an extended free trial with full functionality and costs only $60 for a personal license. You get a lightweight program that handles large projects efficiently and supports extensive customization through its scripting capabilities.
GarageBand comes pre-installed on Mac computers and provides an intuitive interface for recording guitar tracks. The software includes built-in amp simulators and effects that let you shape your tone immediately after recording.
BandLab's web-based platform requires no installation and offers cloud storage for your projects. You can access your recordings from any device and collaborate with other musicians online.
Premium Digital Audio Workstations For Professionals
Pro Tools remains the industry standard for professional recording studios. It offers integration with UAD hardware and multitrack recording capabilities.
Using Pro Tools is often the preferred way to record guitar on pc in professional environments. The software costs $99 annually for the Artist version or $599 for perpetual Pro licenses.
Ableton Live excels at both recording and live performance. Its unique session view lets you trigger loops and samples in real time, which is helpful when learning to record guitar.
The Suite version ($749) includes Max for Live integration and extensive sound libraries. It is a highly creative platform for any guitarist.
Logic Pro provides Mac users with a complete production environment for $199.99. It is arguably the best value for anyone who wants to record an electric guitar on a Mac.
Logic Pro offers a comprehensive collection of virtual instruments and effects. Many professionals consider it the most intuitive way to record guitar on pc.
Cubase delivers a powerful mixer, comprehensive editing tools, and popular guitar plugins, though its shortcuts require time to memorize. Pricing ranges from $99.99 for Elements to $559.99 for Pro.
Best Amp Simulation Plugins
Neural DSP plugins ($99-$129 each) offer the most realistic tube amp simulations available, with artist-signature models from Plini, Gojira, and Petrucci. Each plugin includes matching cabinets, microphone positions, and effects chains.
Amplitube 5 offers over 400 pieces of virtual gear, including amps, cabinets, stomps, and rack effects. The software uses dynamic interaction modeling that responds to your playing dynamics like physical hardware.
BIAS FX 2 combines amp simulation with a comprehensive pedalboard interface where you drag and drop effects in any order. You can create custom signal chains and share presets with other users through the ToneCloud platform.
STL Tones AmpHub provides free access to multiple high-gain amp models, with additional premium content available through a subscription—the platform updates regularly with new amp models and effects.
Essential Guitar Recording Plugins (EQ, Compression, Reverb)
FabFilter Pro-Q 3 ($179) gives you surgical EQ control with spectrum analysis that shows exactly which frequencies need adjustment in your guitar tracks. The plugin includes dynamic EQ modes that respond to signal level changes.
Universal Audio 1176 emulation captures the classic compressor's fast attack times that work perfectly for controlling pick transients and sustaining notes. You can drive the input harder for added harmonics and character.
Valhalla VintageVerb ($50) delivers lush reverb tails that place your guitar in realistic acoustic spaces without muddying your mix. The plugin uses minimal CPU resources while providing dense, smooth decays.
iZotope Neutron Elements (included with many interfaces) provides AI-assisted mixing that analyzes your guitar track and suggests EQ and compression settings. You maintain full manual control while benefiting from intelligent starting points.
8
Common Mistakes To Avoid When Recording Guitar On PC
Recording guitar on your PC involves technical considerations that directly impact your final sound quality. Poor gain staging, latency issues, excessive processing, and inadequate monitoring can turn an otherwise solid performance into an unusable recording.
Ignoring Proper Gain Staging
Gain staging is the process of optimizing signal levels at each point in your recording chain to achieve the best sound without distortion. When recording guitar digitally, you need to balance your input levels so they're strong enough to capture detail without clipping.
Set your audio interface input gain so your loudest playing peaks are around -12 dB to -6 dB in your DAW. This gives you headroom for processing while maintaining a clean signal. If you're using amp simulator plugins, check both the input and output levels on each plugin in your chain.
Clipping at any stage cannot be fixed later. Your guitar tone will sound thin and weak if your input is too quiet, forcing you to add excessive gain during mixing. Watch your meters consistently throughout the recording process to maintain proper levels.
Recording With High Latency
Latency is the delay between when you play a note and when you hear it through your headphones. High latency makes timing difficult and creates a disconnected gameplay experience, affecting your performance.
Lower your audio interface buffer size to reduce latency during tracking. A buffer setting of 128 or 64 samples typically provides acceptable latency for most guitarists. You can increase the buffer size later during mixing when low latency isn't needed.
Common buffer size guidelines:
- 256-512 samples: Mixing and editing (latency not critical)
- 128 samples: Standard recording (5-10ms latency)
- 64 samples or lower: Critical for tight rhythm playing (under 5ms)
Enable direct monitoring on your audio interface if latency remains problematic. This routes your input signal directly to your headphones, bypassing your computer entirely.
Overprocessing Your Guitar Tone
Adding excessive effects and processing during recording limits your mixing options and often degrades your tone. Many guitarists use too much distortion, which clouds articulation and makes individual notes harder to distinguish in a mix.
Record with the core tone you want, but keep it relatively dry. You can always add reverb, delay, or additional saturation later.
Effects like overdrive and compression should be committed during tracking. Also, consider using a noise gate at the beginning of your chain to remove unwanted hiss from your pickups. Ambient effects usually work better when added during mixing.
Avoid relying entirely on presets without adjustment. Your specific guitar, pickups, and playing style require tweaking even the best factory settings to sit properly in your particular mix.
Skipping Proper Monitoring Setup
Your monitoring setup determines how accurately you hear what you're recording. Poor monitoring leads to flawed mixing decisions that only become apparent when you play your tracks on other systems.
Position studio monitors at ear level, forming an equilateral triangle with your listening position. Each speaker should be angled toward you at roughly 60 degrees from the center. Keep monitors away from walls and corners to minimize bass buildup and reflections.
Use quality headphones as a secondary reference point, but don't rely on them exclusively. Headphones exaggerate stereo width and bass response differently from speakers. Check your recordings on multiple playback systems, including earbuds, car speakers, and consumer-grade speakers, to ensure translation.
Your room acoustics matter more than expensive monitors. Basic acoustic treatment with absorption panels at reflection points significantly improves monitoring accuracy.
9
Key Takeaways For Recording Guitar On PC
You need an audio interface to convert your guitar's analog signal into a digital format that your computer can process. This is the most critical piece of equipment for recording guitar on a PC.
Essential Equipment:
- Audio interface with instrument input
- Digital Audio Workstation (DAW) software
- Quality headphones or monitor speakers
- USB cable to connect the interface to the computer
- A microphone for recording an acoustic guitar without a pickup
Your computer doesn't need to be extremely powerful, but it should run your chosen DAW smoothly. A PC typically handles heavy processing better, while a laptop offers portability for recording guitar tracks anywhere.
Some multi-effects pedals and modern guitar amplifiers include built-in USB audio interfaces. If you own equipment like a Line 6 HX Stomp, Boss GT1, or Yamaha THR amp, you may already have what you need to connect directly to your computer.
Recording Options:
- Dedicated audio interface (most versatile)
- Multi-effects pedal with USB output
- Guitar amplifier with USB connectivity
- Microphone setup for acoustic instruments
Happy guitar recording!

Frequently Asked Questions
1
What equipment do I need to record guitar on a PC?
You need an audio interface to convert your guitar's analog signal into a digital format that your computer can process. The interface connects to your PC via USB and provides an input jack for your guitar cable.
You also need Digital Audio Workstation (DAW) software to record, edit, and mix your guitar tracks. For monitoring your recordings, you should use studio monitor headphones or speakers that provide accurate sound reproduction.
If you play acoustic guitar without a pickup, you'll need a microphone. Make sure your computer meets the minimum system requirements for your chosen DAW software.
2
What are the best free guitar recording software options for PC?
Audacity is a popular free option that works on Windows and provides basic recording and editing capabilities. While it lacks the advanced features of paid DAWs, it's suitable for simple recording projects.
Cakewalk by BandLab offers professional-level features for Windows users at no cost. It includes virtual instruments, effects plugins, and multitrack recording capabilities.
Reaper offers an unlimited free trial with full functionality, though it requires payment after 60 days. LMMS is another free alternative focused on beat-making and production, though it can handle guitar recording tasks.
3
How can I record my electric guitar using an amplifier and a PC?
You can use an amplifier with a built-in USB interface to connect directly to your computer. Modern modeling amps with USB ports function as audio interfaces, letting you record your amp's tone without additional gear.
Alternatively, you can place a microphone in front of your amplifier's speaker and connect the mic to an audio interface. Position the microphone close to the speaker cone, slightly off-center from the dust cap, for a balanced tone.
This microphone method captures your amp's true sound, including room acoustics. Experiment with microphone placement to find the sweet spot for your desired tone.
4
Is it possible to record a guitar on a laptop without an audio interface?
You can technically plug your guitar into your laptop's microphone input, but this approach produces poor results and may damage your computer. Laptop inputs aren't designed to handle instrument-level signals properly.
A more practical solution is to use a USB guitar cable with a built-in audio interface. These cables are affordable and provide better sound quality than a direct connection to a mic input.
Multi-effects pedals with USB connectivity offer another interface-free option if you already own one. Your laptop needs sufficient processing power to run recording software smoothly, though most modern laptops handle basic recording tasks adequately.
5
How do I use GarageBand to record guitar tracks on my computer?
GarageBand is only available for Mac computers and iOS devices, not Windows PCs. If you have a Mac, connect your guitar through an audio interface, then launch GarageBand and create a new project.
Select the audio track option and choose your interface as the input source. Enable input monitoring to hear yourself play through your computer's output.
Click the record button and start playing to capture your performance. You can add multiple takes, apply built-in amp simulators and effects, and layer additional guitar tracks over your recording.
6
Can I connect my guitar directly to my PC, and if so, how?
You should not plug your guitar directly into standard PC inputs, such as the microphone or line-in jacks. These connections aren't designed for instrument signals and will produce distorted, low-quality audio or potentially damage your equipment.
The proper method is to connect via an audio interface that bridges your guitar and computer. Plug your guitar cable into the interface's instrument input, then connect the interface to your PC via USB.
Some guitarists use multi-effects processors or amplifiers with USB outputs as alternatives to dedicated interfaces. These devices include the necessary conversion circuitry to safely transfer your guitar signal to your computer while maintaining sound quality.
You Might Also Be Interested In