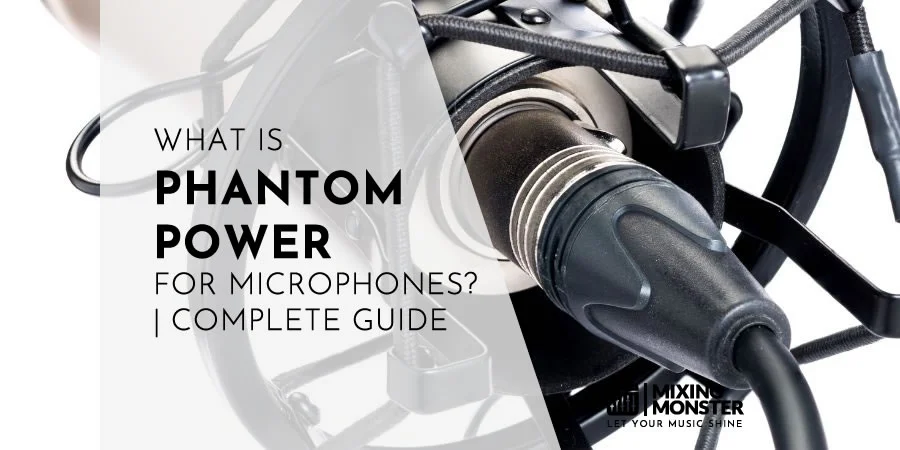



If you've ever wondered why some microphones need to be plugged into equipment with a special switch labeled "48V," you're dealing with phantom power.
Phantom power is a method of delivering DC electrical current through standard microphone cables to power condenser microphones and other active audio equipment that require electricity to function. The technique applies 48 volts equally to both signal wires in a balanced XLR cable, with the current flowing back through the ground pin.
This system was standardized in the 1960s when companies like Neumann and Schoeps developed transistorized microphones for broadcasting applications. Most modern mixing consoles, audio interfaces, and preamps include built-in phantom power supplies that deliver the necessary voltage without requiring separate power adapters or batteries.
Understanding phantom power becomes essential when working with professional audio gear, from high-end studio condensers like the Shure KSM series to live sound setups. While dynamic microphones such as the SM58 don't require phantom power, accidentally applying it won't typically cause damage if cables are properly wired.
The real risks arise when connecting unbalanced equipment or using faulty cables, which can cause equipment malfunction.
This guide covers everything from identifying which microphones require phantom power to troubleshooting common problems, ensuring optimal performance whether recording vocals that demand accurate sound-pressure-level handling or setting up headphone monitoring in professional environments.
Key Takeaways / TL;DR
- Phantom power supplies 48 volts DC through microphone cables to operate condenser microphones and active audio devices.
- Most professional audio interfaces and mixers include phantom power switches, while dynamic microphones typically don't require it.
- Proper cable connections and equipment matching prevent phantom power-related damage and ensure reliable audio performance.

1
Phantom Power For Microphones Explained
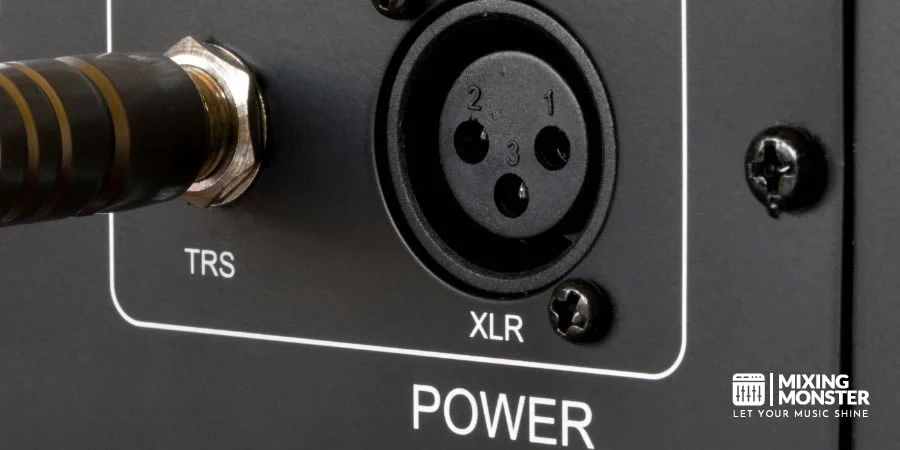
Phantom power delivers electrical current through microphone cables to power condenser microphones and other audio equipment that requires external voltage. The standard voltage is 48 volts DC, transmitted via XLR cables on pins 2 and 3, with pin 1 serving as ground.
What Phantom Power Is And Why It Exists
Phantom power is the standard method for powering professional condenser microphones through balanced XLR cables without requiring separate power supplies or batteries. The name "phantom" refers to its invisibility when connecting balanced microphones that don't need external power, such as dynamic microphones.
Neumann invented phantom power in 1966 for a delivery to Norwegian Broadcasting, where 48 volts were already available for a lighting system. This innovation eliminated the need for bulky external power supplies that tube microphones required.
All condenser microphones need power to operate their internal electronics and to polarize the capacitor element that converts sound into electrical signals. Specific dynamic microphones with built-in electronics, including certain ribbon mics, also utilize phantom power for their active circuitry.
How Phantom Power Works In Audio Systems
The phantom power system carries both DC voltage and AC audio signals simultaneously through the same cable. Pins 2 and 3 of the XLR connector both carry +48 volts DC, while pin 1 remains at 0 volts. The audio signal travels back to the input through the same wiring.
Resistors play a critical role in the phantom power circuit. The DC voltage passes through resistors to each of the two signal pins, allowing the microphone to draw current while preventing the DC from reaching the audio input circuitry. The IEC 61938 standard specifies that the rated available current is 7 mA, with a maximum of 10 mA.
The DC voltage acts like a baseline water level, modulated by waves representing the AC audio signal. Audio interfaces, mixing consoles, and preamps typically supply phantom power through their microphone inputs. Most devices feature switches to turn phantom power on or off, either individually per channel or simultaneously for all channels.
Standard Phantom Power Voltage Levels
The international standard IEC 61938:2018 specifies 48 volts as the official phantom power voltage, designated as P48. This standard replaced the earlier DIN 45596 German specification and ensures compatibility across all brands and equipment types. The voltage tolerance is ±4 volts.
Older equipment may provide alternative voltages:
- P24 (24 volts)
- 12 volts
- 15 volts
- 18 volts
Some devices only indicate phantom power application without specifying the actual voltage. When phantom power voltage drops below 48 volts, microphone performance typically degrades. The maximum SPL handling decreases, and distortion increases. If the voltage falls too low, the microphone stops functioning entirely.
A few microphone brands can operate across wider voltage ranges, such as 9-52 volts or 11-52 volts. Miniature microphones often operate on lower voltages, 12-48 volts, when connected via appropriate adapters.
Phantom Power Vs Other Microphone Power Sources
Dynamic microphones with moving-coil designs require no external power and generate voltage by electromagnetic induction. They connect directly to microphone inputs without phantom power, though enabling P48 won't damage properly balanced dynamic microphones.
Battery-powered condenser microphones contain internal batteries that supply the necessary voltage to the microphone's electronics. These microphones operate independently of phantom power but may offer it as an alternative power option.
Tube microphones require dedicated external power supplies that provide higher voltages than phantom power. These supplies connect via multi-pin cables and deliver both heater voltage for the tube and polarization voltage for the capsule.
Plug-in power (also called bias voltage) provides lower voltages, typically 1-10 volts, through unbalanced connections like 3.5mm jacks. Computer sound cards and portable recorders often supply this power for small electret condenser microphones. This differs fundamentally from P48, which uses balanced connections and higher voltages.
USB microphones draw power directly from the USB connection at 5 volts. The USB interface handles both power delivery and digital audio transmission, eliminating the need for phantom power or separate audio interfaces.

2
Types Of Microphones That Use Phantom Power
Different microphone types have distinct power requirements: condenser microphones are the primary users of phantom power, while dynamic and ribbon microphones operate on different principles. Understanding these differences prevents equipment damage and ensures optimal audio performance.
Condenser Microphones And Phantom Power Needs
Condenser microphones require phantom power to function because their internal components need an electrical current to operate. The capsule in a condenser microphone contains a capacitor that requires a voltage to maintain the diaphragm's polarization. Most condenser microphones use 48 volts of phantom power, which is the industry-standard P48.
These microphones cannot produce audio signals without this external power source—the electrical current powers both the capacitor element and the internal preamplifier circuitry built into the microphone body.
Studio condenser microphones deliver detailed sound reproduction and high sensitivity. They excel at capturing vocals, acoustic instruments, and ambient room sounds in professional recording environments. Some older equipment uses 24-volt or 12-volt phantom power levels, so checking the manufacturer's specifications ensures compatibility and prevents performance issues.
Dynamic Microphones And Power Requirements
Dynamic microphones do not need phantom power because they generate their own electrical signal through electromagnetic induction. A small coil attached to the diaphragm moves within a magnetic field when sound waves hit it, generating an electrical current. This self-powered design makes dynamic microphones reliable for live performances and situations where phantom power may be unavailable.
Accidentally enabling phantom power on dynamic microphones typically does not cause damage because their balanced output design rejects the DC voltage. The phantom power flows equally through both signal conductors and cancels out at the microphone's output transformer.
Dynamic microphones are durable and can withstand high sound pressure levels without distortion. They work well for amplified instruments, drums, and live vocal applications where ruggedness matters more than extreme sensitivity.
Discover Best Audio Gear & Equipment


Ribbon Microphones And Phantom Power Risks
Ribbon microphones operate similarly to dynamic microphones but use a thin metal ribbon suspended in a magnetic field instead of a coil. These microphones generate their own signal and do not require phantom power. The ribbon element is extremely delicate and can be damaged or destroyed if phantom power is applied incorrectly.
Older ribbon microphone designs are particularly vulnerable because their output transformers may not be center-tapped, allowing phantom power voltage to reach the fragile ribbon element directly. Modern ribbon microphones often include protection circuitry that makes them safe to use with phantom power.
Key differences between vintage and modern ribbon microphones:
- Vintage models: No phantom power protection, direct damage risk to ribbon element
- Modern models: Built-in protection circuits, safe with phantom power enabled
- Active ribbon microphones: Actually require phantom power for internal amplification
Users should always verify the manufacturer's specifications before connecting any ribbon microphone to a phantom-powered input. When uncertain, keeping phantom power disabled protects the microphone from potential harm.
USB Microphones Compared To XLR Microphones
USB microphones receive power directly from a computer via the USB connection, eliminating the need for separate phantom power supplies. These microphones contain built-in analog-to-digital converters and preamplifiers, making them complete recording solutions. The USB cable delivers approximately 5 volts, which is sufficient for the microphone's internal electronics.
XLR microphones connect to audio interfaces, mixers, or preamps that supply phantom power through standard microphone cables. Professional condenser microphones with XLR connections offer superior sound quality and flexibility in professional environments.
Comparison of power delivery methods:
| Feature | USB Microphones | XLR Microphones |
|---|---|---|
| Power source | Computer USB port | Audio interface or mixer |
| Voltage | 5V from USB | 12V, 24V, or 48V phantom power |
| Portability | High, plug-and-play | Needs extra gear |
| Professional use | Home recording, podcasting | Studio recording, live sound |
XLR microphones provide better signal quality over longer cable runs and allow equipment upgrades without replacing the microphone. USB microphones offer convenience for beginners and portable recording setups where minimal equipment is preferred.
3
When And How To Use Phantom Power Safely
Proper phantom power usage involves following a specific connection sequence and understanding which equipment requires it. Most damage occurs from improper activation timing or using incompatible cables with the phantom power switch.
How To Turn Phantom Power On And Off
The phantom power switch should always be activated after connecting the microphone and before adjusting the preamplifier's gain levels. Most audio interfaces and mixers label this switch as "+48V" or "phantom power" near each channel's input section.
Users should power down the entire system before connecting any condenser microphone to the XLR connector. Once the connection is secure, they can power on the audio interface or mixer, then engage the phantom power switch. This sequence prevents voltage surges that damage sensitive microphone components.
When phantom power is disabled, the process reverses. Users should first turn off the phantom power switch, wait 10-15 seconds for the capacitors to discharge, and then power down the equipment. Only after the system is completely off should they disconnect the microphone from the XLR connector. This waiting period protects both the microphone and the microphone preamp from electrical transients.
Safe Connection Order To Avoid Audio Damage
The correct connection sequence starts with all equipment powered off. Users first connect the balanced microphone cable from the microphone to the audio interface or mixer's XLR connector. Power should remain off during all physical connections to prevent electrical damage.
After securing all cable connections, users power on the audio interface or mixer with volume levels set to minimum. The preamp gain should be at its lowest position. Only then should they activate the phantom power switch for channels with condenser microphones.
Monitor headphones should be removed or volume reduced during this process. Sudden pops or clicks can occur when phantom power is activated, potentially damaging hearing or speakers. Once phantom power stabilizes after a few seconds, users can gradually increase the microphone preamp gain to appropriate recording levels.
Your Song Mixed & Mastered By Mixing Monster


Phantom Power With Audio Interfaces And Mixers
Audio interfaces typically provide phantom power globally across all inputs or per individual channel, depending on the model. Professional interfaces often include dedicated phantom power switches for each channel, allowing users to mix different microphone types simultaneously.
Mixers usually feature either a master phantom power switch that affects all channels or individual per-channel switches. Users must verify which configuration their mixer uses before connecting multiple microphones. Balanced cables with proper XLR connections are essential for phantom power delivery through the preamplifier section.
Ground lift switches on some interfaces and mixers help eliminate hum when phantom power is used. These switches disconnect the cable shield at one end while maintaining phantom power delivery. However, ground lift switches should be used only for troubleshooting noise issues, as proper grounding is the primary safety mechanism.
Common Phantom Power Safety Myths
Myth: Dynamic microphones are always damaged by phantom power. Most dynamic microphones tolerate phantom power without issues when connected via balanced cables. The balanced design prevents voltage from reaching the microphone's internal components.
Myth: All ribbon microphones fail instantly when phantom power is applied. While older ribbon designs are vulnerable, many modern ribbon microphones handle phantom power safely. Users should always verify their specific ribbon microphone's specifications.
Myth: Phantom power drains the battery of battery-powered audio interfaces faster. The 48V supply draws minimal current, typically 10mA per channel or less. This consumption has a negligible impact on battery life compared to the preamplifier and analog-to-digital conversion circuitry.
Myth: Phantom power quality varies significantly between devices. Professional audio interfaces and mixers deliver standardized 48V phantom power within tight tolerances. The microphone preamp quality affects sound more than variations in phantom power implementation.

4
Phantom Power Problems And Troubleshooting
Phantom power issues typically stem from faulty cables, incorrect voltage supply, or equipment compatibility problems. Understanding how to identify and resolve these problems ensures reliable microphone performance and prevents potential equipment damage.
What Happens If Phantom Power Is Missing
When phantom power is absent from a condenser microphone setup, the microphone produces no sound or extremely weak signals. Condenser microphones require an external power supply to charge their internal capacitor plates and power their built-in preamplifiers. Without this voltage supply, the microphone cannot convert sound waves into electrical signals.
The most common cause of phantom power being missing is simply forgetting to activate the 48V switch on the audio interface or mixer. Other causes include a faulty XLR cable that cannot transmit phantom power, dead batteries in battery-powered phantom power supplies, or internal failures in the audio interface's power circuitry.
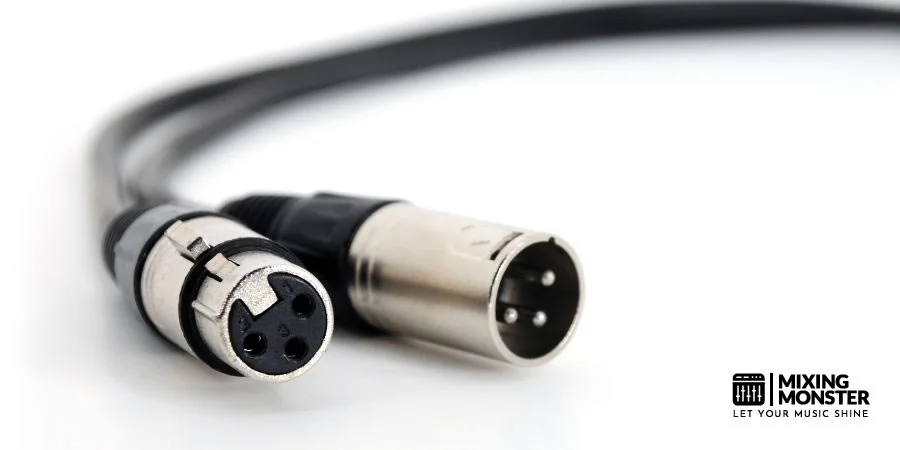
Users should verify that their microphone cable is a balanced XLR cable with all three pins intact. Phantom power requires pins 2 and 3 to deliver voltage while pin 1 provides ground. A damaged pin prevents proper voltage delivery to the microphone.
Audio Noise, Hiss, And Signal Issues
Unwanted noise and hissing sounds often indicate problems with grounding or electromagnetic interference in the phantom power circuit. Poor grounding creates a pathway for electrical noise to enter the audio signal, resulting in audible hum or buzz. These common phantom-power noise issues can significantly degrade recording quality.
Interference from nearby electronic devices, such as computers, mobile phones, or power supplies, introduces high-frequency noise into the signal path. Keeping the microphone cable away from these sources reduces interference. Using high-quality balanced cables helps reject electromagnetic interference due to their twisted-pair design.
Inconsistent performance manifests as fluctuating audio levels or intermittent dropouts. This problem typically relates to poor-quality mic cables or corroded connectors. Replacing low-quality cables with professional-grade XLR cables eliminates resistance and capacitance issues that affect phantom power delivery.
Related Articles

Phantom Power Not Working On Interfaces
Audio interfaces sometimes fail to deliver phantom power due to power supply limitations or internal circuit faults. The interface must supply 48 volts DC consistently to each channel, typically at 10 to 15 milliamps per channel. Insufficient power from USB bus-powered interfaces can cause phantom power to engage inconsistently or fail.
Testing with a different condenser microphone helps determine whether the problem lies with the interface or the original microphone. If multiple microphones fail to work, the interface's phantom power circuit is likely defective. Checking connections and testing with known working equipment isolates the faulty component.
Some interfaces turn off phantom power when detecting certain connection issues or short circuits as a protective measure. Inspecting the microphone cable for damage and ensuring secure connections at both ends often resolves these engagement problems.
How To Test Phantom Power Properly
A multimeter provides the most accurate method for testing phantom power output. Set the multimeter to measure DC voltage and connect the probes to pins 2 and 3 of the XLR connector while phantom power is engaged. The reading should measure approximately 48 volts, though some equipment operates between 12 and 52 volts.
Testing steps without a multimeter:
- Verify the 48V LED indicator illuminates on the interface or mixer
- Connect a known working condenser microphone
- Monitor input signal levels while speaking into the microphone
- Test with a different mic cable to rule out cable faults
- Try the microphone on a different phantom power source
Cable testing is critical since most phantom power problems stem from faulty cables. A cable tester can identify broken pins, shorts, or intermittent connections in the XLR cable. Visual inspection should check for bent pins, loose solder joints, or damaged cable jackets near the connectors.

5
Phantom Power In Home Studios And Live Sound
Different recording and performance environments require specific approaches to phantom power implementation. Home studio setups typically rely on audio interface phantom power, while live sound systems demand careful consideration of stage conditions and equipment compatibility.
Phantom Power For Podcasting And Streaming
Most podcasters and streamers use condenser microphones that require phantom power (+48V) on their audio interfaces. USB audio interfaces typically include built-in phantom-power switches that supply power to individual XLR inputs or to all inputs simultaneously.
Content creators should verify their microphone type before activating phantom power. Dynamic microphones commonly used for podcasting don't require phantom power, though engaging it typically won't damage them. Condenser microphones need the power to operate their active electronics.
Key setup considerations include:
- Connecting the microphone before activating phantom power
- Turning down monitor levels to avoid pops when engaging power
- Checking interface specifications to confirm 48V output
- Using balanced XLR cables for proper power delivery
Many popular podcast microphones, such as the Audio-Technica AT2020 and Rode NT1, require phantom power. Streamers using these microphones must ensure their interface or mixer provides adequate voltage.
Studio Recording Best Practices
Home recording environments benefit from understanding proper phantom power management across multiple microphones. Audio interfaces and mixing consoles allow engineers to power various condenser microphones simultaneously while protecting equipment that doesn't need it.
Professional home recording practices include:
- Activating phantom power only on channels with condenser microphones
- Maintaining phantom power throughout recording sessions
- Disabling power before connecting or disconnecting microphones
- Labeling channels that require phantom power
Most modern audio interfaces provide individual phantom power switches per channel, offering flexibility when recording with multiple microphone types. Some budget interfaces apply phantom power globally to all inputs, requiring careful planning when combining dynamic and condenser microphones.
Ribbon microphones present a special concern in home studios. Older ribbon designs can suffer permanent damage from phantom power, though many modern ribbons include protection circuits. Engineers should always verify manufacturer specifications before powering ribbon microphones.
Live Sound And Stage Microphone Considerations
Live sound environments pose unique challenges for phantom power management, particularly due to stage conditions and equipment complexity. Mixing consoles in live settings typically provide phantom power to multiple channels supporting various condenser microphones for vocals, acoustic instruments, and overhead drums.
Sound engineers must account for power requirements during soundcheck and performance. Stage boxes and snake cables deliver phantom power from the mixing console to stage microphones, so proper cable maintenance and connection integrity are essential.
Live sound phantom power management includes:
- Activating phantom power during soundcheck before performers arrive
- Monitoring for interference or noise issues
- Keeping spare cables available for power delivery problems
- Coordinating with performers about microphone types
Wireless microphone systems with external condenser capsules may require phantom power at the transmitter pack. Engineers should consult equipment specifications to determine power requirements for each wireless system.
Using External Phantom Power Supplies
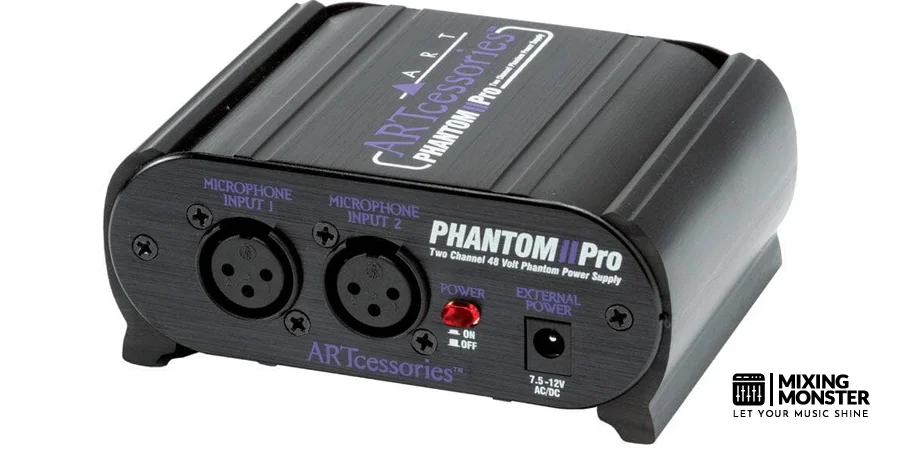
External phantom power supplies are used when audio interfaces or mixing consoles lack sufficient power or channels. These dedicated units provide clean 48V power through XLR connections, offering solutions for expanded setups or equipment limitations.
A phantom power supply connects between the microphone and recording device, injecting power into the signal path without affecting audio quality. Single-channel and multi-channel units accommodate different studio configurations and microphone counts.
Benefits of external phantom power supplies:
- Clean power delivery independent of interface quality
- Additional channels beyond interface capabilities
- Backup power options for critical recordings
- Compatibility with vintage equipment lacking phantom power
Recording engineers sometimes choose external supplies when the interface's phantom power introduces noise or provides insufficient voltage. High-quality external units maintain a stable 48V output even when multiple microphones draw power simultaneously, ensuring consistent performance across all channels.

6
Phantom Power Vs Plug-In Power And Other Alternatives
While phantom power remains the industry standard for professional condenser microphones, several alternative powering methods exist with distinct voltage levels and delivery systems. Plug-in power and phantom power differ in voltage, supply method, and connection terminals, making them incompatible even with adapters.
Differences Between Phantom Power And Plug-In Power
Phantom power delivers 48 volts of DC voltage through pins 2 and 3 of an XLR cable, using a balanced connection that separates the power source from the audio signal. This method supplies electricity to professional condenser microphones without interference.
Plug-in power, also called bias power, operates at much lower voltages, typically between 1.5 and 5 volts. In some condenser microphones, plug-in power must be supplied on the same conductor as the audio signal, particularly in condenser elements with built-in JFETs that use single-conductor, shielded cables.
The voltage difference makes these systems fundamentally incompatible. Plug-in power commonly appears in consumer devices like portable recorders and camera inputs, while phantom power dominates professional studio equipment. The connection types also differ: plug-in power uses 3.5mm jacks, and phantom power requires XLR connections.
Battery-Powered Microphones Explained
Some condenser microphones can run on battery power instead of phantom power, offering complete independence from external power supplies. These microphones have internal battery compartments that usually accept AA or 9-volt batteries.
Battery operation eliminates the need for DC power from mixers or interfaces. This makes battery-powered microphones ideal for field recording, location work, or situations where phantom power isn't available. The microphone generates its own voltage internally to power the capsule and electronics.
However, batteries require monitoring and replacement. A dying battery can introduce noise or cause performance degradation before complete failure. Professional battery-powered models often include LED indicators showing battery status.
When External Power Supplies Make Sense
Dedicated power supplies, including T-power and A-B powering systems, serve specific microphone designs that cannot use standard phantom power. T-power delivers 12 volts via different pin configurations than phantom power, as seen in certain European microphone designs.
External power supply units provide stable, isolated DC power separate from the audio interface or mixer. These dedicated power supplies can deliver cleaner power with less noise than phantom power from budget interfaces. Tube microphones always require external power supplies because they need higher voltages to heat the tube element.
A-B powering is another alternative method in which voltage appears between specific pins rather than being balanced across the cable. These systems remain less common but are found in vintage equipment and specialized applications where standard 48-volt phantom power is unsuitable.

7
Key Takeaways For Phantom Power
Phantom power delivers 48 volts of electricity through XLR microphone cables to power audio equipment. The term "phantom" refers to the power delivery's invisibility, as it travels through the same cable that carries the audio signal without interfering with sound quality.
Microphones That Require Phantom Power:
- Condenser microphones (won't function without it)
- Active DI boxes for instruments
- Certain professional audio equipment
Microphones That Don't Need Phantom Power:
- Dynamic microphones like the Shure SM58
- Passive audio equipment
- Battery-powered devices
Most audio interfaces and mixing consoles include a built-in phantom power switch labeled +48V. Users flip this switch to activate the power supply through their XLR cables.
Phantom power requires balanced XLR cables to function properly and should not be used with standard 1/4" instrument cables. Condenser microphones contain active circuitry that relies on this external power source to operate their sensitive components.
Safety considerations include avoiding phantom power with older ribbon microphones unless specifically designed for it. Users should turn off phantom power before plugging or unplugging microphones to prevent loud pops or potential speaker damage.
The technology eliminates the need for batteries or separate power supplies for compatible microphones. This streamlined approach has become standard in professional and home recording setups, making phantom power essential for audio recording with condenser microphones.
Happy recording!

Frequently Asked Questions
1
What is the purpose of phantom power in audio equipment?
Phantom power provides power to microphones via an XLR cable, eliminating the need for batteries or separate power cords. It powers the internal electronics and preamplifiers inside condenser microphones that cannot function without external voltage.
The system also provides a polarization charge to the capacitor element in condenser microphones. Active DI boxes and some powered dynamic microphones also rely on this power delivery method.
2
How does phantom power work with condenser microphones?
Condenser microphones require voltage to operate their internal circuitry and maintain the charge on their capacitor plates. The phantom power system sends DC voltage down the same cable that carries the audio signal back to the recording device.
The power travels through the microphone cable alongside the audio signal, which is why it's called "phantom" power. The condenser microphone's internal electronics use this voltage to amplify the signal from the capsule before sending it back through the cable.
3
Can phantom power damage dynamic microphones if used incorrectly?
Most modern dynamic microphones are designed to ignore phantom power when it's applied safely. The balanced design of XLR connections prevents the voltage from affecting standard dynamic microphones.
Ribbon microphones present a different situation and should generally be avoided with phantom power. Older ribbon designs can be damaged by phantom power, though many modern ribbon microphones include protective circuitry. Users should always check their ribbon microphone's specifications before applying phantom power.
4
Is a separate phantom power supply necessary for a mixer that doesn't provide it?
A standalone phantom power supply becomes necessary when using condenser microphones with mixers or recording devices that lack built-in phantom power. These external units connect between the microphone and the mixer to provide the required voltage.
Many portable recorders and budget mixers omit phantom power to reduce costs and complexity. In these cases, an external phantom power supply provides the only way to use condenser microphones with such equipment.
5
What are the differences between 48V and 12V phantom power standards?
Phantom power ranges between 12 and 52 volts, with 48 volts being the most common standard. Professional audio equipment typically uses 48V because it provides the most consistent performance and lowest noise floor for condenser microphones.
Some equipment provides 12V phantom power, which works with certain microphones but may reduce headroom and performance. Studio-grade condenser microphones almost always require the full 48V to achieve their specified performance characteristics. Lower voltage options exist primarily for compatibility with older equipment or battery-powered devices where higher voltages are impractical.
6
How can I tell if my audio interface provides sufficient phantom power for my microphone?
Audio interfaces that include phantom power typically display a button or switch labeled "48V" or "+48V" on their front panel or in their control software. The interface's specifications sheet will list phantom power availability and voltage if the feature is included.
Users can test phantom power functionality by enabling it and checking if their condenser microphone produces a signal. Insufficient phantom power typically manifests as low signal levels, distortion, or no audio output. The microphone's manual specifies the minimum voltage required, which should match or be lower than the interface's output voltage.
Related Articles
You Might Also Be Interested In