


Mix bus compression is a powerful technique that can significantly improve your music mixes. It's the secret sauce that many professional mix engineers use to create cohesive, polished tracks. It is a form of so-called glue compression that brings every element of your song together.
Mix bus compression is the process of applying compression to the entire mix of a song, typically on the master channel or mix bus. This technique helps glue individual elements together, control dynamics, and maintain a consistent mix balance. As a cornerstone of bus processing, it ensures all parts of your song feel like a single performance.
Mix bus compression can be particularly effective in genres like rock, EDM, and drum and bass, where a cohesive and punchy mix is crucial. Digital audio workstations (DAWs) and various digital processors have made it easier than ever for both amateur and professional sound engineers to experiment with this technique.
Whether you're working on your latest rock anthem or crafting the perfect EDM banger, mastering mix bus compression can be the key to achieving that professional sound you've been chasing. In this article, we'll explore the ins and outs of mix bus compression, offering practical tips and techniques to enhance your mixing and create tracks that truly shine.
Key Takeaways / TL;DR
- Mix bus compression enhances cohesion and controls dynamics in a mix
- Subtle settings are crucial for effective mix bus compression
- Proper use of mix bus compression can elevate the overall quality of your productions

1
What Is Mix Bus Compression?
Mix bus compression is a powerful technique used in audio production to enhance the overall sound of a mix. It involves applying compression to the entire mix, helping to create cohesion and balance across all tracks.
Mix Bus Compression Definition And Purpose
Mix bus compression is the process of applying a compressor to the main output channel of a mix. This technique is used to control dynamics, add glue, and improve a mix's overall balance. The mix bus, also known as the stereo bus or master bus, is where all individual tracks converge before final output.
The purpose of mix bus compression is multifaceted. It helps to:
- Create a more cohesive sound
- Control dynamic range
- Add character and color to the mix
- Increase perceived loudness
- Improve mix translation across different playback systems
By applying subtle compression to the entire mix, producers can achieve a more polished and professional sound.
The Difference Between Mix Bus And Mastering Compression
While mix bus compression and mastering compression may seem similar, they serve different purposes in the audio production process. Mix bus compression is applied during mixing, focusing on blending individual tracks and creating cohesion. Mastering compression, on the other hand, is used during the final stage of production to prepare the mix for distribution.
Key differences include:
- Timing: Mix bus compression is applied earlier in the process
- Intensity: Mix bus compression is generally more subtle
- Focus: Mix bus compression aims to blend tracks, while mastering compression focuses on overall tonality and loudness
Mastering compression often involves more precise adjustments and may include multiband compression techniques.
When To Use Mix Bus Compression
Deciding when to use mix bus compression depends on your mix's specific needs. It's often beneficial to apply mix bus compression:
- Early in the mixing process to shape the overall sound
- When tracks lack cohesion or feel disconnected
- To add subtle character or color to the mix
- When dealing with dynamic range issues across the entire mix
It's important to use mix bus compression judiciously. Start with gentle settings, using low ratios between 1.5:1 and 2:1. This approach allows for subtle control without over-compressing the mix. Remember, the goal is to enhance the mix, not to alter its natural dynamics drastically.

2
Setting Up Your Mix Bus Compressor
Properly configuring your mix bus compressor is crucial to achieving a cohesive, polished sound. The right settings can add punch, smooth dynamics, and create a sense of "glue" in your mix.
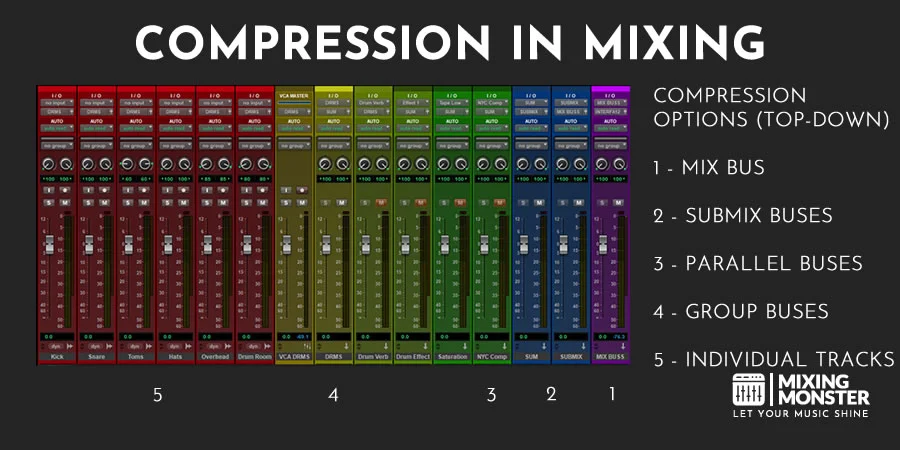
Choosing The Right Compressor Plugin
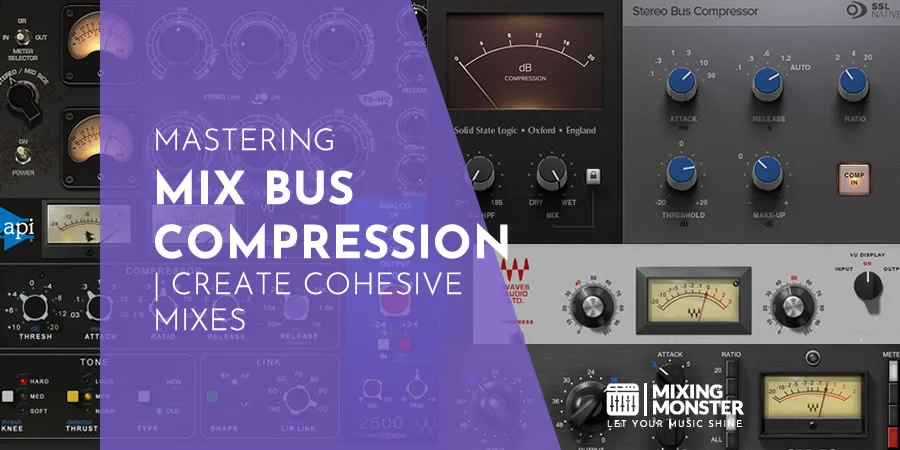
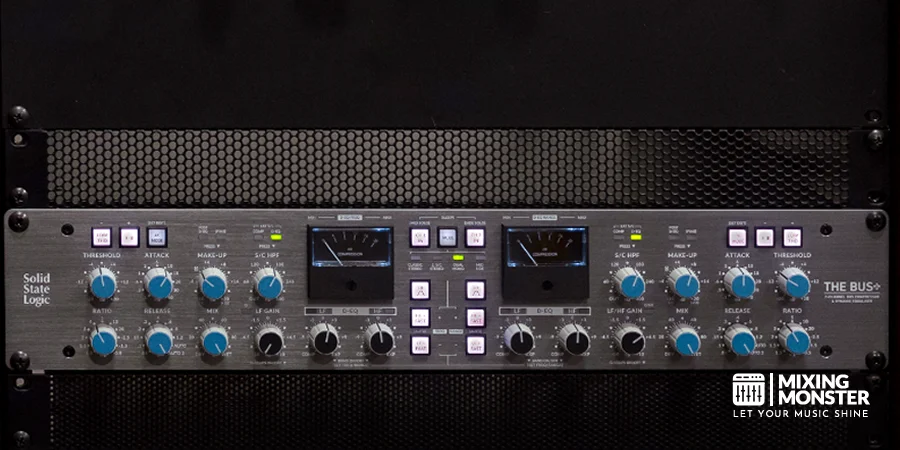
Selecting an appropriate compressor for your mix bus is essential. Digital emulations of classic analog hardware compressors are popular choices. You might explore bus compressor plugins modeled after the SSL G-Bus, the API 2500, or the Fairchild 670. The API 2500 is a versatile VCA compressor that is widely used for its ability to add punch and clarity to the master bus.
You might also choose a modern compressor, such as iZotope Neutron or Ozone, for its advanced features. A tube compressor is another great option for adding vintage warmth to a digital mix. Hardware units like the Manley Variable Mu or the Pendulum ES8 are legendary for providing this type of musical richness.
Most engineers will reach for a dedicated stereo compressor to handle both channels simultaneously. A stereo compressor ensures that both sides of your mix receive the same gain reduction, maintaining a stable image. Learning how to use bus compression often involves testing legendary hardware like the Neve 33609 or specialized tools like Neutron.
VCA-style compressors offer clean, transparent compression, making them versatile across various genres. An optical compressor can provide a smoother, more musical response for slower tracks. An optical compressor often feels more natural because its release is non-linear and reacts to the program material. The Avalon AD2044 is frequently praised for its ability to add a luxurious, polished feel to the mix bus.
A FET compressor will add color and attitude, making it especially suitable for rock and high-energy music. Using a FET compressor can add aggression and harmonic saturation to your bus chain. This processing style often introduces a subtle harmonic distortion that helps the mix feel more cohesive. Because of their circuitry, these compressors can achieve a fast attack that instantly clamps down on peaks. For tracks that need more vibe, the Joemeek SC2 offers a classic photo-optical sound that can add a unique sense of movement.
When choosing a compressor, consider its features, CPU usage, and how it complements your mixing style. Many engineers prefer compressors with a blend knob, allowing parallel compression directly on the bus.
Ideal Signal Chain Placement
The mix bus compressor should be inserted as the last plugin in your master output channel. This ensures the entire mix is processed before the final output. Building a consistent mix bus chain is a vital step in creating a signature sound across an entire album.
Some engineers prefer placing the compressor before other processing, like EQ. Using a sidechain filter is a great way to prevent heavy low-end energy from triggering the compressor too early.
In a hardware setup, connect the compressor to the insert of your mixing console's master bus. For maximum flexibility, consider using both hardware and software compressors in series.
Discover Best Audio Gear & Equipment


Key Parameters For Mix Bus Compression To Consider
When setting up mix bus compression, start with conservative settings and adjust as needed. The goal is subtle compression that enhances cohesion without squashing the mix's dynamics. Selecting proper compressor settings often depends on the specific compressor types you have chosen for your chain.
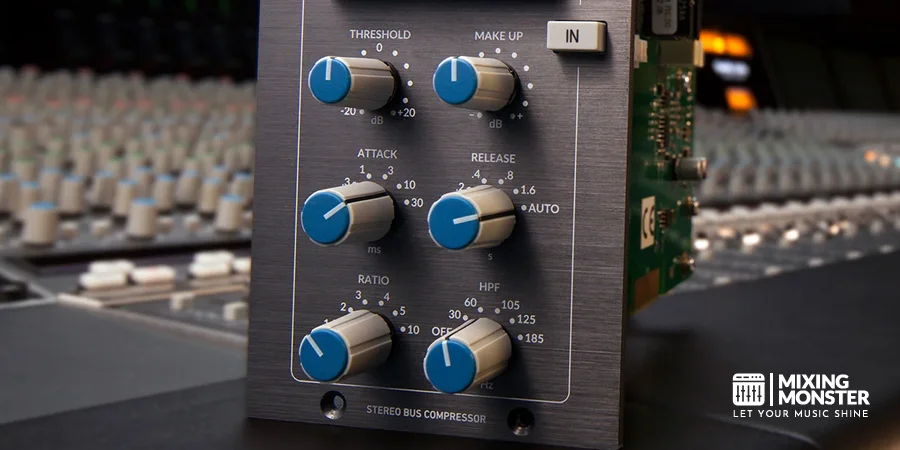
Ratio: Begin with a gentle ratio between 1.5:1 and 2:1. Your ratio setting determines how much the signal is squashed once it passes the threshold. This provides light compression without being too aggressive.
Threshold: Set the threshold while watching your gain reduction meter. Aim for 1-3 dB of gain reduction on average, with peaks hitting 4-6 dB.
Attack and Release: Use a slower attack time (10-30 ms) to preserve transients. Set the release time to match the song's tempo, typically between 30 and 100 ms.
|
Parameter |
Typical Range |
Notes |
|
Ratio |
1.5:1 - 2:1 |
Start gentle |
|
Threshold |
-10 to -6 dB |
Aim for 1-3 dB reduction |
|
Attack |
10-30 ms |
Preserve transients |
|
Release |
30-100 ms |
Match song tempo |
|
Knee |
Soft |
Smoother transition |
Experiment with these settings and trust your ears. Always remember to use makeup gain to level-match your processed signal with the original. The ideal configuration will vary depending on the genre and specific needs of each mix.
3
Techniques For Effective Mix Bus Compression
Mix bus compression involves carefully applying compression to enhance cohesion and dynamics. Proper settings and techniques can significantly improve a mix's overall sound quality.
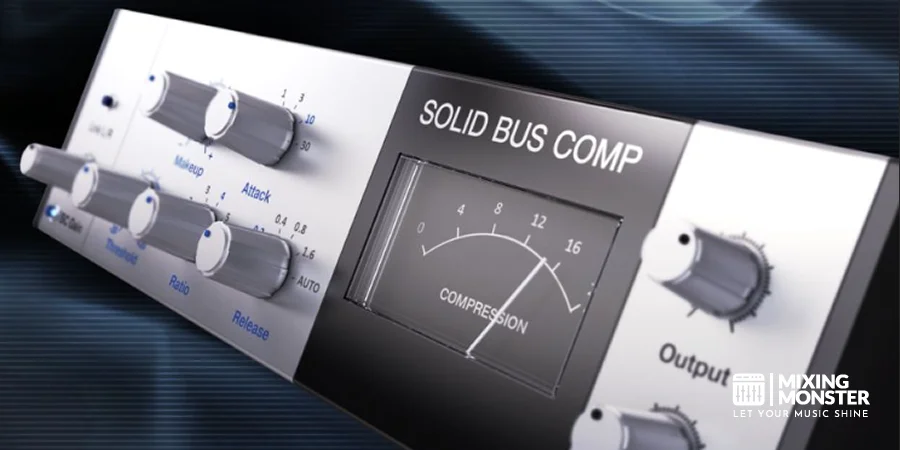
Gentle Compression Vs. Heavy Compression
Gentle compression typically utilizes low ratios (1.5:1 to 2:1) and subtle gain reduction (1-3 dB). This approach maintains transparency while applying effective glue compression to the mix.
This ensures that the individual tracks feel like part of a single performance. Engineers often use a slow attack (10-30 ms) to preserve transients. A slow attack allows the initial drum crack to pass through untouched before the compression begins to engage.
Heavy compression, on the other hand, employs higher ratios (4:1 to 8:1) and more aggressive gain reduction (4-8 dB). This technique can add density and excitement but risks over-compression if not carefully applied. Using a fast attack can sometimes lead to an unwanted pumping effect by cutting off the front of your transients.
While a fast attack is rare on a master bus, it can be used effectively in parallel to add weight. Fine-tuning your attack and release settings is essential to avoid this and keep the track sounding natural. A 2:1 ratio is a common starting point for achieving a balanced sound without making the signal pump.
The choice between gentle and heavy compression depends on the genre and desired sound. Many engineers apply subtle processing to a vocal bus before it ever reaches the master fader. Rock often benefits from heavier compression, while jazz requires a more transparent approach.
Parallel Compression On The Mix Bus
Parallel compression involves blending the compressed signal with the uncompressed original. This technique allows for aggressive compression without sacrificing dynamics.
To implement parallel compression:
- Create a duplicate of the mix bus
- Apply heavy compression to the duplicate
- Blend the compressed signal with the original
Engineers often use parallel compression to add punch and excitement while preserving the mix's natural dynamics. This technique works well in genres like EDM and hip-hop, where impact is crucial.
VCA compressors are popular for parallel compression due to their fast response and clean sound. Adjusting the wet/dry blend allows for fine-tuning the effect's intensity.
Your Song Mixed & Mastered By Mixing Monster


Using Multiple Compressors In Series
Applying multiple compressors in series can provide more control over dynamics and tonal shaping. This technique involves using two or more compressors with different settings, each handling a specific task.
A common approach:
- First compressor: Gentle settings for overall glue (2:1 ratio, 2-3 dB reduction)
- Second compressor: More aggressive for peak control (4:1 ratio, faster attack)
This method allows for more transparent compression while still achieving significant dynamic control. Engineers can use different compressor types (FET, optical, tube) in series to impart various sonic characteristics to the mix.
When using multiple compressors, it's crucial to monitor the cumulative gain reduction to avoid over-compression. Each compressor should typically not exceed 2-3 dB of gain reduction for optimal results.

4
Common Mix Bus Compression Pitfalls
Mix bus compression can significantly impact a track's overall sound, but it requires careful application. Several common mistakes can degrade the quality of the mix. A frequent concern for beginners is exactly how much gain reduction to apply without damaging the song's energy.
Over-Compression And Loss Of Dynamics
Over-compression on the mix bus can lead to a flat, lifeless sound that lacks punch and excitement. When the threshold is set too low or the ratio too high, it squashes the dynamic range excessively.
This results in a loss of transient material and can make the mix sound dull and fatigued. To avoid this, engineers should aim for subtle compression, typically applying only 1-3 dB of gain reduction.
It's crucial to preserve the music's natural dynamics. A good practice is to periodically bypass the compressor and compare the processed and unprocessed signals to ensure the compression enhances rather than diminishes the mix.
Improper Attack And Release Settings
Attack and release times play a critical role in shaping the sound. Incorrect attack and release settings can lead to undesirable effects such as an audible pump or loss of impact. A heavy pump occurs when the compressor clamps down and releases in a rhythmic but distracting manner. This pumping effect occurs when the compressor breathes against the rhythm. It is usually a sign to rethink the amount of gain reduction you are applying to the signal.
An attack time that's too fast can clip transients, reducing the punch of drums and other percussive elements. However, in certain modern pop styles, a fast attack is intentionally used to control aggressive peaks before the signal reaches the limiter. Conversely, a slow attack might allow too much initial transient through, failing to control peaks effectively.
Release times that are too quick can cause distortion or an unnatural, choppy sound. If set too slow, they can reduce the overall level and energy of the mix. Engineers should adjust these parameters in context, listening for a natural, cohesive sound. Many units include an auto-release function that helps the compression adapt to the tempo. This enhances the groove and maintains clarity throughout the track.
Related Articles
Neglecting Proper Gain Staging
Proper gain staging is essential for effective mix bus compression. Failing to maintain appropriate levels can lead to unintended distortion or insufficient headroom.
Engineers should ensure the input to the mix bus compressor is set to an optimal level, typically around -18 dBFS for most digital systems. This provides enough headroom for the compressor to work effectively without introducing unwanted harmonic distortion.
After compression, it's important to use makeup gain to restore your levels. Applying proper makeup gain allows you to compensate for the volume lost during the reduction process without introducing unwanted noise.
Using makeup gain correctly ensures simple changes in loudness don't fool your ears. This keeps your levels consistent. This allows for accurate A/B comparison and prevents the louder signal from being mistaken for better.

5
Advanced Mix Bus Compression Strategies
Mix bus compression techniques can be refined to achieve precise control over the final sound. These strategies allow for targeted processing of specific frequency ranges and stereo field elements.
Mid-Side Mix Bus Compression Techniques
Mid-side compression offers enhanced control over the stereo image. This technique separates the mono (mid) and stereo (side) information for independent processing. Applying more compression to the mid channel can increase focus on centered elements, such as vocals and kick drums. Conversely, compressing the side channel can widen the stereo image and add excitement to the mix.
Engineers often use gentler settings on the mid channel to maintain clarity, while being more aggressive on the sides. This approach can add depth and dimension to the mix. It's particularly effective for genres that rely on wide, immersive soundscapes.
Frequency-Dependent Mix Bus Compression
Frequency-dependent compression allows for targeted dynamic control across the frequency spectrum. This technique involves using multiband compressors or dynamic EQ to address specific frequency ranges independently. It's especially useful for taming problematic frequencies without affecting the entire mix.
For instance, a mastering engineer might apply more compression to the low-mids to control muddiness, while leaving the high-end relatively untouched to preserve air and brilliance. This approach can significantly improve a mix's tonal character without sacrificing overall dynamics.
Dynamic EQ As An Alternative For Mix Bus Compression
Dynamic EQ combines the precision of equalization with the dynamic response of compression. It allows frequency-specific processing to engage only when certain amplitude thresholds are met. This technique can be less intrusive than traditional mix bus compression, offering a more transparent way to shape the final sound.
Engineers use dynamic EQ to address resonances or harsh frequencies that only occur during louder passages. It can also enhance low-end punch by boosting bass frequencies only when they exceed a certain threshold. This method preserves the natural dynamics of quieter sections while providing targeted control where needed.

6
Integrating Mix Bus Compression With Other Mixing Techniques
Mix bus compression works synergistically with other mixing techniques to enhance the overall sound. Balancing individual track compression, considering EQ, and incorporating saturation and limiting can significantly impact the effectiveness of mix bus compression.
Balancing Individual Track Compression
Mix bus compression affects the entire mix, so it's crucial to balance it with compression on individual tracks. Start by applying gentle compression to individual elements, focusing on controlling dynamics without over-compressing.
Reserve more aggressive compression for problematic tracks that need tighter control. This approach allows the mix bus compressor to work more subtly, gluing the mix together without squashing its life.
Consider applying parallel compression to specific elements to retain transients while adding sustain and density. This technique can help individual tracks sit better in the mix without relying solely on the mix bus compressor.
EQ Considerations Before And After Compression
EQ plays a vital role in shaping the sound before it hits the mix bus compressor. Apply corrective EQ to individual tracks to address frequency imbalances and create space for each element.
Use a high-pass filter on the mix bus before compression to remove unnecessary low-end rumble. This prevents the compressor from overreacting to sub-bass frequencies.
After compression, subtle EQ adjustments can help fine-tune the tonal balance. Boost or cut frequencies in small increments to enhance clarity and definition in the compressed mix.
Pay attention to how the compressor affects different frequency ranges. You may need to adjust the EQ to compensate for any unwanted emphasis or de-emphasis caused by compression.
Using Saturation And Limiting In Conjunction With Compression
Saturation can add harmonic richness and character to a mix. This process essentially introduces controlled harmonic distortion to fill out the frequency spectrum. Apply subtle saturation before the mix bus compressor to enhance cohesion and create a more polished sound.
Experiment with different saturation types, such as tube or tape emulations, to find the right flavor for your mix. Be careful not to overdo it, as excessive saturation can lead to distortion and clarity loss.
A limiter placed after the compressor can help control peaks and increase loudness. You should always keep an eye on your master fader to ensure you aren't clipping your output. Set the limiter threshold carefully to catch peaks.
Use a mix bus compressor with a moderate ratio and gentle gain reduction, followed by a limiter for final peak control. This combination can create a powerful, cohesive mix while maintaining dynamics and avoiding distortion.

7
Key Takeaways For Mastering Mix Bus Compression
Mix bus compression is a powerful tool for enhancing the cohesiveness and overall sound of a mix. When applied correctly, it can glue elements together and control dynamics across the entire mix.
Start with subtle settings. Use a low ratio (e.g., 2:1) and a gentle threshold to avoid over-compression. This approach allows for smoother integration of mix elements.
Pay attention to attack and release times. Slower attack times preserve transients, while faster release times maintain energy. Experiment to find the right balance for your mix.
Be mindful of gain reduction. Aim for an average reduction of 1-3 dB. Excessive compression can lead to a loss of dynamics and impact.
Consider using parallel compression to blend compressed and uncompressed signals. This technique can add depth and character while preserving the original dynamics.
Monitor your mix critically. A/B test with and without compression to ensure you're enhancing, not degrading, the mix.
Remember that mix bus compression is different from mastering compression. It's applied during the mixing stage and affects all tracks simultaneously.
Adjust individual track levels and processing as needed after applying mix bus compression. This ensures optimal balance and prevents any unwanted artifacts.
Happy mix bus compressing!

Frequently Asked Questions
1
What are the optimal settings for a mix bus compressor?
Optimal mix bus compressor settings typically involve a low ratio between 1.5:1 and 2:1. The threshold should be set to achieve 1-3 dB of gain reduction. A low to moderate attack time around 30ms and a release time of 100-300ms often work well.
Mix bus compression requires subtlety to avoid over-compressing the mix. Some professionals prefer even gentler ratios, such as 1.5:1, to create a small yet noticeable effect.
2
How should attack and release times be set when using mix bus compression?
Attack times are typically set between 10 and 50ms. This allows transients to pass through while still catching the body of the sound. While a fast attack might be useful for catching sudden peaks, it can often suck the life out of a master channel if set too aggressively. The compressor release is often set between 50 and 300ms, depending on the tempo and feel of the music.
Faster release times can add energy, while slower release times can smooth out the mix. Adjusting these parameters to match the track's rhythm can enhance groove and cohesion.
3
In what ways does mix bus compression affect the mastering process?
Mix bus compression can impact the mastering process by altering dynamics and tonal balance. It reduces the overall dynamic range, potentially limiting the mastering engineer's options.
However, well-applied mix bus compression can create a more cohesive mix, making the mastering process smoother. It's often recommended to provide both compressed and uncompressed versions to the mastering engineer.
4
What characteristics define the best mix bus compressor for a particular project?
The best mix bus compressor for a project depends on the musical genre and desired outcome. Transparent compressors work well for subtle glue, while more colored options can add character.
Key characteristics include low-ratio capability, flexible attack and release times, and clean gain reduction. Some engineers prefer analog-modeled plugins for their warmth, while others opt for digital precision.
5
How can one determine the appropriate amount of compression to apply to a mix bus?
Determining the right amount of mix bus compression involves careful listening and metering. Generally, aim for 1-3 dB of gain reduction on the loudest parts of the mix.
A/B testing between compressed and uncompressed versions helps identify improvements in cohesion and energy. If the mix sounds squashed or loses impact, reduce the compression amount.
6
Are there scenarios in which mix bus compression should be avoided?
Mix bus compression should be avoided when dealing with already heavily compressed tracks or genres that prioritize extreme dynamics. Classical music and certain acoustic recordings often benefit from minimal or no mix bus compression.
In cases where individual tracks lack proper dynamic control, it's better to address those issues first before applying mix bus compression. Overuse can lead to a loss of punch and clarity in the final mix.