


Getting your mixing levels right can make the difference between a professional-sounding track and an amateur recording that lacks punch, clarity, and definition.
Mixing levels refer to the careful balance of volume relationships between all instruments and vocal elements in a song, creating depth, cohesion, and proper hierarchy within the stereo field. Proper volume balancing forms the foundation of any successful mix, determining which elements sit in the foreground, middle ground, and background of the sonic landscape.
This process involves more than simply adjusting faders - it requires an understanding of frequency separation, dynamic range, and how different genres demand specific approaches to level setting.
Engineers also need to consider mix depth, stereo width, and the psychological impact of volume relationships on listeners. This comprehensive guide explores proven techniques for achieving professional mixing levels, from basic volume balancing to advanced strategies used in commercial productions.
Learn to use specialized tools and meters for precise level control, troubleshoot common problems that plague amateur mixes, and adapt your approach to musical genre requirements. The article provides step-by-step methods for creating that elusive "glue" that makes all elements feel like they belong together in the same sonic space.
Key Takeaways / TL;DR
- Volume balancing is the most critical foundation skill that determines whether a mix sounds professional or amateur.
- Different genres require specific level relationships, with pop vocals sitting "on top" while rock vocals blend "within" the mix.
- Professional mixing establishes an accurate volume balance across front, middle, and back layers rather than making every element equally loud.

1
Understanding Mixing Levels And Their Importance
Proper level management forms the foundation of professional audio production, affecting everything from signal clarity to final loudness standards. Gain staging and level setting directly impact mix quality, headroom management, and the ability to achieve commercial-ready results.
What Mixing Levels Are And Why They Matter
Mix levels determine how different audio elements blend to create cohesive sound. These levels represent the amplitude relationship between instruments, vocals, and other sonic elements within a production.
Signal-to-noise ratio improves when engineers maintain appropriate levels throughout the mixing chain. Clean signals give processors more headroom and prevent unwanted artifacts during compression or EQ application.
Level setting remains subjective, and different engineers prefer different balances based on artistic vision. Still, technical standards help maintain optimal signal integrity across different playback systems.
Preserving dynamic range requires careful attention to peak levels and RMS values. Engineers must balance loudness with musical dynamics to retain emotional impact while meeting technical specifications.
The Role Of Gain Staging In Clean Audio
Gain staging involves setting appropriate input and output levels at each processing stage to maintain signal quality. This mixing technique prevents digital clipping and analog saturation throughout the signal chain.
Optimal input levels typically range between -18dBFS to -12dBFS for digital systems. This range gives plugins sufficient headroom while keeping the signal comfortably above the noise floor.
Plugin gain structure significantly affects processing quality. Each processor needs appropriate input levels to function within its intended operating range, preventing distortion or weak signal processing.
Bus and submix levels require attention to prevent cumulative gain buildup. Engineers route multiple tracks through buses, so careful level management helps prevent overloads at mix bus stages.
Common Mistakes When Balancing Levels
Mixing too loud represents the most frequent error in modern production. Engineers often push levels too high during the creative process and lose perspective on the actual balance between elements.
Ignoring headroom requirements can complicate mastering. Mixes should peak around -6dB to -3dB, leaving sufficient space for mastering processing without digital clipping.
Inconsistent monitoring levels create a deceptive sense of balance. The Fletcher-Munson curves show how human hearing responds differently to frequencies at various volume levels.
Key mixing mistakes include:
- Setting individual track levels before establishing a drum and bass foundation
- Comparing mix levels at different monitoring volumes
- Neglecting to mix in mono to verify level relationships
- Using visual meters exclusively without trusting ear-based decisions
How Loudness Normalization Impacts Your Mix
Streaming platform normalization automatically adjusts playback levels based on integrated loudness measurements. Spotify, Apple Music, and YouTube use LUFS (Loudness Units relative to Full Scale) standards for consistent playback levels.
Target loudness values vary between platforms but generally range from -14 LUFS to -16 LUFS. Mixes exceeding these targets face automatic volume reduction, while quieter content receives an upward adjustment.
Dynamic range considerations become crucial under normalization systems. Overly compressed mixes may sound quieter than dynamic productions when normalized to identical LUFS values.
Platform-specific optimization requires understanding different normalization approaches:
|
Platform |
Target LUFS |
Peak Limit |
Adjustment Method |
|
Spotify |
-14 LUFS |
-1 dBTP |
Limiter if above target |
|
Apple Music |
-16 LUFS |
-1 dBTP |
Both up and down |
|
YouTube |
-14 LUFS |
-1 dBTP |
Peak normalization backup |
Engineers need to consider how their mixing techniques will translate across these different loudness standards during production.

2
Tools And Meters For Perfect Level Balancing
Professional level balancing requires the right measurement tools and monitoring plugins to achieve accurate results. Modern mixing engineers rely on several meter types and reference techniques to create balanced mixes that translate across different playback systems.
Using VU Meters, Peak Meters, And LUFS Readouts
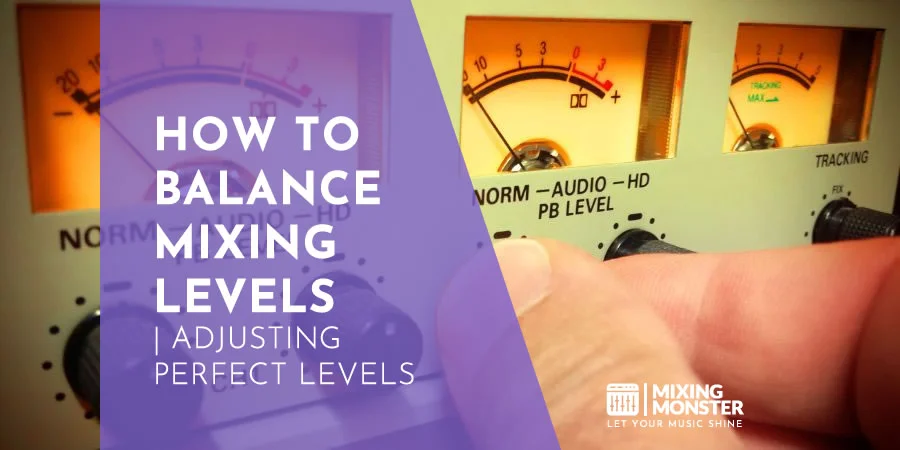
VU meters display average signal levels over time, making them ideal for monitoring the perceived loudness of individual tracks and bus groups. These analog-style meters respond slowly to transients, showing sustained energy levels that often correlate with how listeners perceive volume.
Peak meters capture instantaneous signal peaks to prevent digital clipping and distortion. They display the highest amplitude levels in real time, helping engineers maintain proper headroom throughout mixing.
LUFS meters measure perceived loudness according to broadcasting standards and streaming platform requirements. These meters account for frequency weighting and temporal integration, providing loudness measurements that align more closely with human hearing.
Most modern DAWs include built-in metering options. Third-party plugins like FabFilter Pro-L 2, iZotope Insight, and Waves WLM Plus offer comprehensive metering suites with multiple display formats.
Visual Vs. Aural Mixing — Finding The Right Balance
Visual metering provides objective measurements, but it can't replace critical listening skills. Meters help identify level imbalances and technical issues that ears might miss during extended mixing sessions.
Aural mixing relies on trained ears to judge musical balance, frequency relationships, and emotional impact. The human auditory system processes complex interactions between instruments that meters can't fully capture.
Effective mixing combines both approaches strategically. Use meters to establish consistent technical standards and prevent common problems like clipping or phase issues.
Trust your ears for creative decisions about musical balance and emotional dynamics. Visual feedback works best as a guide, not the primary decision-making tool.
Discover Best Audio Gear & Equipment


How To Use Reference Tracks For Level Matching
Reference tracks provide professional benchmarks for overall loudness, frequency balance, and dynamic range in your target genre. Choose commercially released songs with instrumentation and production styles similar to your mix.
Load reference tracks into your DAW session and match their playback level to your mix using LUFS metering. Most streaming platforms target -14 LUFS integrated loudness for optimal playback levels.
A/B compare specific elements like kick drum level, vocal prominence, and stereo width against your reference material. Focus on one element at a time rather than making broad comparisons.
Use reference tracks throughout the mixing process, not just at the end. Regular comparison keeps you from drifting away from professional standards as your ears adapt to the mix.
Best Plugins For Level Monitoring
Comprehensive Metering Suites:
- iZotope Insight 2: Multi-panel interface with spectrum, loudness, and stereo imaging
- FabFilter Pro-Q 3: Built-in spectrum analyzer with adjustable resolution
- Waves WLM Plus: Broadcast-standard loudness monitoring
Specialized Level Tools:
- Klanghelm VUMT: Analog VU meter modeling with multiple ballistics
- TBProAudio dpMeter 5: Peak and RMS monitoring with extensive customization
- PSP TripleMeter: Three-way metering display for input, output, and gain reduction
Many plugins combine level monitoring with processing capabilities. Compressors like FabFilter Pro-C 2 and Waves Renaissance Compressor include detailed gain-reduction metering alongside their audio-processing functions.
Free options include Voxengo SPAN for spectrum analysis and TBProAudio mvMeter2 for basic level monitoring needs.
3
Step-By-Step Guide To Balancing Mixing Levels
Proper level balancing requires a systematic approach that starts with establishing correct gain structure and progresses through strategic placement of each element. The process involves setting initial fader positions, balancing key elements like vocals and drums, implementing automation for dynamic control, and verifying results across multiple playback systems.

Setting Initial Fader Positions And Gain Structure
Engineers should establish proper gain structure before touching any faders. Set input gains so each track peaks between -18dB and -6dB, which provides adequate headroom while maintaining a good signal-to-noise ratio.
Initial Fader Setup Process:
- Set all faders to unity gain (0dB)
- Adjust input gains to achieve proper levels
- Check for any clipping or distortion
- Ensure mix bus has at least 6dB of headroom
The rough mix starts with all faders pulled down to -∞, then brings up the most important element first. Most engineers begin with either the kick drum or lead vocal, establishing the foundation level around -6dB to -3dB.
Use channel strip gain controls for major level adjustments instead of pushing faders to extreme positions. This keeps control resolution precise and helps prevent accidental level changes during mixing.
Balancing Vocals, Drums, Bass, And Instruments
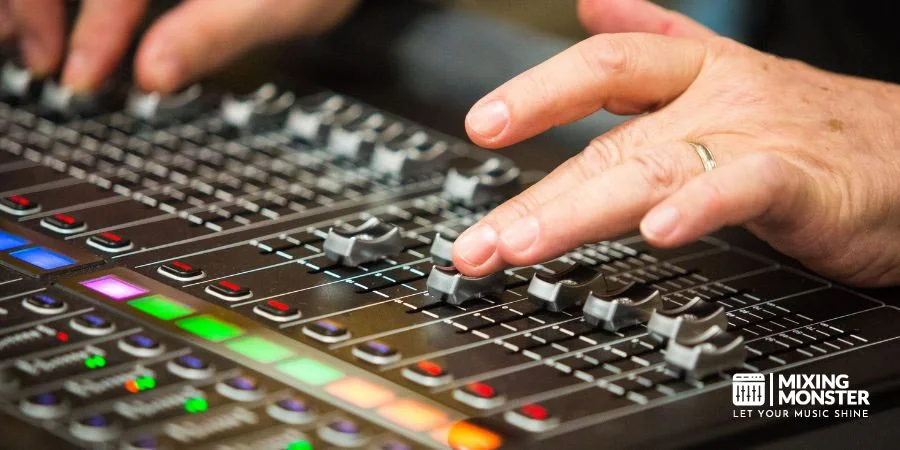
The balance between core elements determines the mix's overall character and impact. Start by establishing the relationship between kick, snare, bass, and vocals before adding other instruments.
Element Priority Order:
- Lead Vocal - Primary focus, typically the loudest element
- Kick Drum - Foundation of rhythm section
- Snare Drum - Provides punch and attack
- Bass - Low-end foundation and groove
- Supporting Instruments - Fill remaining space
Vocals should sit prominently in the mix without overpowering the other elements. The kick and bass require careful balancing to avoid frequency conflicts while preserving both punch and low-end warmth.
Setting levels involves constant A/B comparison between elements. Engineers often solo instrument pairs to check their relative balance before hearing them in the full mix context.
Supporting instruments like guitars, keyboards, and backing vocals should complement, not compete with, the primary elements. Each instrument needs enough level to contribute its part while leaving room for the more important elements.
Your Song Mixed & Mastered By Mixing Monster


Creating Dynamic Balance With Automation
Static fader positions rarely provide an optimal volume balance throughout an entire song. Automation helps engineers maintain the right element relationships as the arrangement and energy shift between sections.
Key Automation Applications:
- Vocal Rides - Maintain consistent presence over varying instrumental levels
- Drum Fills - Temporarily boost fills for impact
- Guitar Solos - Bring lead lines forward during solo sections
- Bridge Sections - Adjust overall balance for different arrangement densities
Volume automation should follow musical phrasing and song structure instead of correcting every small level variation. Overly detailed automation can sound unnatural and distracting.
Engineers typically automate in passes, focusing on one element at a time. This methodical approach helps each automation move serve the song, rather than adding unnecessary complexity.
Automation curves should follow natural musical dynamics. Gradual fades and swells generally sound more musical than abrupt level changes, unless a sudden change serves a specific creative purpose.
Checking Levels Across Different Playback Systems
Mix translation requires testing on multiple playback systems to ensure consistent balance. Professional studios use near-field monitors, far-field speakers, headphones, and consumer-grade systems for reference.
Essential Playback System Tests:
- Studio Monitors - Primary mixing environment
- Headphones - Detail checking and stereo imaging
- Car Speakers - Consumer environment simulation
- Phone/Laptop Speakers - Worst-case scenario testing
Each playback system reveals a different aspect of the mix balance. It is also helpful to mix in mono periodically, exposing masked midrange tracks that stereo width can conceal.
Proper mixing levels should translate reasonably well across all systems, though some variation is expected. Major balance shifts between systems point to fundamental mixing problems that need correction.
Check levels at multiple volume settings, from quiet background listening to moderate loudness. Elements that disappear at low volumes or become overwhelming at higher volumes need adjustment.

4
Advanced Techniques For Professional-Level Mixes
Professional mixing requires sophisticated level-control methods that go beyond basic fader adjustments. These techniques combine traditional mixing principles with modern technology to achieve precise tonal balance and dynamic control across complex arrangements.
Using VCA Groups For Efficient Level Control
VCA (Voltage Controlled Amplifier) groups provide centralized control over multiple channels without changing individual processing chains. Engineers can adjust entire instrument groups while preserving their relative balance and individual EQ settings.
VCA groups excel in these applications:
- Controlling drum kit levels as a single unit
- Managing backing vocal stacks
- Adjusting string section dynamics
- Balancing multiple guitar layers
The key advantage is that VCA groups preserve the mix engineer's carefully crafted relationships between individual tracks. When a VCA fader moves, it scales all assigned channels proportionally without disrupting compression ratios or EQ curves.
Modern DAWs implement VCAs differently from analog consoles. Digital VCAs maintain precise gain scaling across all frequencies, making them useful for complex arrangements where multiple instruments occupy similar frequency ranges.
Parallel Compression And Its Role In Level Balancing
Parallel compression blends heavily compressed signals with dry signals to control dynamics without sacrificing natural transients. This technique addresses level inconsistencies while preserving musical expression.
The process sends audio along two paths: one stays unprocessed while the other receives aggressive compression. Engineers typically apply ratios between 4:1 and 10:1 on the compressed path, with fast attack times.
Parallel compression settings for different sources:
|
Source |
Ratio |
Attack |
Release |
Blend Level |
|
Drums |
8:1 |
1ms |
100ms |
20-40% |
|
Vocals |
6:1 |
3ms |
200ms |
15-25% |
|
Bass |
4:1 |
10ms |
150ms |
25-35% |
This approach maintains peak transients while raising average levels. The compressed signal fills gaps during quieter passages without over-controlling louder sections, allowing engineers to achieve consistent levels without the pumping artifacts common in traditional compression.
Related Articles


EQ And Panning As Level Management Tools
Strategic EQ adjustments create perceived level changes without altering actual amplitude. Boosting presence frequencies (2-5kHz) makes instruments appear louder in the mix without increasing peak levels.
Frequency-based level perception:
- 60-200Hz: Creates weight and power
- 400-800Hz: Adds warmth but can cause muddiness
- 2-5kHz: Increases presence and clarity
- 8-12kHz: Adds air and sparkle
Panning works as a three-dimensional level-control tool. Wide panning creates room for individual elements to occupy distinct stereo positions. That separation lets each instrument retain its full frequency spectrum without competing directly.
The advanced mixing techniques approach combines surgical EQ cuts with complementary panning positions. When instruments share similar frequency content, panning them to opposite sides prevents masking and preserves clarity at lower individual levels.
Complementary EQ works alongside panning to create a natural level balance. Engineers boost one instrument's fundamental frequency while cutting the same range in competing elements.
De-Mix Technology And AI-Assisted Leveling
AI-powered de-mixing tools analyze mixed audio and separate individual elements for independent level adjustment. These systems use machine learning algorithms trained on large audio datasets to identify and isolate specific instruments or vocal parts.
Modern de-mixing technology operates in real time during mixing sessions. Engineers can adjust drums, bass, vocals, and other elements within stereo tracks without accessing the original stems. This capability proves especially useful when working with pre-mixed elements or samples.
Current AI mixing applications:
- Vocal level adjustment in full mixes
- Drum enhancement without affecting other elements
- Bass frequency management in dense arrangements
- Harmonic content isolation for tonal balance
The technology also supports predictive level balancing, where AI systems suggest fader positions based on genre conventions and psychoacoustic principles. These tools analyze frequency distribution and dynamic range to recommend adjustments that align with professional mixing standards.
Machine learning algorithms can identify problematic frequency buildups and suggest corrective EQ moves. This technology speeds up the mixing process while preserving the creative control professional engineers need for artistic expression.

5
Mixing Levels Across Different Genres
Each musical genre demands specific level-setting approaches that align with listener expectations and industry standards. Hip-hop prioritizes punchy drums and prominent bass, while pop focuses on vocal clarity and EDM emphasizes dynamic builds and drops.
Balancing Levels In Hip-Hop Beats
Hip-hop mixing centers around creating powerful drum presence and substantial low-end weight. The kick drum typically sits at -6 to -3 dB, forming the foundation of the mix.
Snare drums demand attention at -8 to -6 dB, cutting through dense arrangements with sharp transients. Hi-hats occupy the -15 to -12 dB range, providing rhythmic texture without overwhelming other elements.
Bass frequencies require careful management in hip-hop production. Sub-bass elements often peak around -6 dB, while mid-bass sits slightly lower to avoid frequency conflicts.
Mixing levels vary significantly depending on the specific track arrangement. Vocals typically range from -8 to -6 dB, ensuring clear delivery over instrumental elements.
Modern hip-hop embraces compressed dynamics with limited dynamic range. This approach maintains energy across streaming platforms and club sound systems.
Leveling Techniques For Pop And EDM Productions
Pop productions prioritize vocal prominence above all other elements. Lead vocals consistently sit in the -6 to -3 dB range, with backing vocals 6-10 dB lower.
EDM builds require strategic level automation throughout song sections. Breakdown segments often reduce overall levels by 6-12 dB before explosive drop sections restore full energy.
|
Element |
Typical Level Range |
|
Lead Vocal |
-6 to -3 dB |
|
Kick Drum |
-8 to -5 dB |
|
Bass Synth |
-10 to -6 dB |
|
Lead Synth |
-12 to -8 dB |
Electronic music benefits from extreme dynamic contrast between quiet verses and powerful choruses. That contrast creates emotional impact and keeps listeners engaged throughout extended arrangements.
Pop mixing emphasizes clarity through frequency separation rather than volume competition. Each element occupies distinct frequency spaces, allowing moderate levels to achieve maximum impact.
Achieving Clarity In Rock And Metal Mixes
Rock and metal genres demand careful level management to prevent frequency masking between distorted guitars and aggressive drums. Rhythm guitars typically sit at -12 to -10 dB, creating sonic width without overpowering lead elements.
Bass guitar levels hover around -10 to -8 dB, providing foundation while avoiding conflicts with kick drums. This balance preserves clarity in busy arrangements with multiple guitar layers.
Multi-mic drum kits and layered guitars can also suffer from phase cancellation. Correcting phase relationships before setting final levels prevents hollow tones and sudden volume drops.
Metal productions often sacrifice dynamic range for sustained intensity. Limited dynamic range keeps energy consistent across all playback systems.
Vocal levels in rock mixing require 3-6 dB of headroom above instrumental elements. This separation becomes crucial during dense chorus sections with full band arrangements.
Recording and mixing techniques must accommodate the aggressive nature of distorted instruments. Proper level staging prevents digital clipping while maintaining aggressive character.
Film And Game Audio — Dynamic Range Considerations
Film audio mixing preserves extensive dynamic range to support narrative storytelling. Dialogue levels remain consistent around -20 to -18 dB, allowing dramatic music and effects to create emotional peaks.
Sound effects span enormous level ranges, from subtle ambiances at -40 dB to explosive impacts reaching -6 dB. This variation supports immersive storytelling through audio contrast.
Game audio requires adaptive level management based on player interactions. Background music sits at -25 to -20 dB, automatically ducking during important dialogue or action sequences.
Interactive media benefits from careful dynamic range preservation. Wide level variation maintains player engagement while preventing listener fatigue during extended play sessions.
Modern streaming platforms compress film audio for home viewing, but theatrical mixes retain full dynamic-range capabilities. This dual-standard approach serves different consumption environments effectively.

6
Troubleshooting And Common Leveling Problems
Level-related issues can derail even the most carefully crafted mix, requiring systematic identification and correction. The most critical problems involve clipping distortion, insufficient headroom, frequency conflicts, and timing decisions for mix rebalancing.
Fixing Clipping And Distortion Issues
Clipping occurs when audio signals exceed 0 dBFS, causing harsh digital distortion that damages mix quality. Start by identifying clipped tracks by visually inspecting waveforms for flattened peaks.
Digital clipping indicators include:
- Flat-topped waveforms in the DAW
- Red clip lights on channel meters
- Harsh, brittle sound character
- Loss of transient detail
Producers should reduce input gain at the source rather than applying makeup gain after clipping occurs. This preserves the original signal integrity and prevents cascading distortion through the mix chain.
Analog-style saturation plugins can add controlled harmonic distortion when applied before clipping occurs. However, they can't repair already clipped audio signals.
Prevention strategies:
- Set initial recording levels between -12 dB and -6 dB peak
- Use input attenuation on hot signals
- Monitor peak levels during tracking
- Apply gentle limiting on unpredictable sources
Managing Headroom For Mastering
Proper headroom management gives the mastering engineer sufficient dynamic range to work with during the final processing stage. Professional mixes typically maintain peak levels between -6 dB and -3 dB.
Headroom requirements vary by genre:
- Electronic music: -6 dB to -4 dB
- Rock and pop: -5 dB to -3 dB
- Classical and jazz: -10 dB to -6 dB
- Hip-hop and rap: -4 dB to -2 dB
The RMS-to-peak relationship indicates mix density and dynamic range. Dense mixes with heavy compression show smaller gaps between RMS and peak measurements.
Excessive headroom below -10 dB can force mastering engineers to apply aggressive makeup gain. This amplifies noise floors and reduces the effective resolution of quiet mix elements.
Bus compression affects headroom requirements by reducing peak-to-RMS ratios. Mixes using heavy bus processing need less headroom than dynamically wide arrangements.
Identifying Frequency Masking Through Level Adjustments
Frequency masking occurs when louder elements obscure quieter sounds occupying similar spectral ranges. Subtle phase cancellation between overlapping tracks can also cause specific frequencies to drop out, complicating level judgments.
The most common masking issues involve kick drums and bass guitars competing in the 60-120 Hz range. Temporarily mute or solo these elements to reveal their individual frequency footprints.
Masking identification technique:
- Solo the suspected masking element
- Gradually raise its level while monitoring other tracks
- Note where other instruments become inaudible
- Apply level or EQ adjustments accordingly
Vocal masking typically occurs between 1-4 kHz where consonants and presence frequencies overlap with guitars and keyboards. Small level adjustments often solve these conflicts without requiring surgical EQ cuts.
Mid-range instruments like guitars, pianos, and synthesizers frequently mask each other between 200-800 Hz. Level-based separation prevents the aggressive filtering that can thin out individual sounds.
When To Rebalance Your Mix
Mix rebalancing becomes necessary when initial level relationships no longer serve the song's arrangement or emotional impact. Key indicators include listener fatigue, lack of focus on lead elements, or genre-inappropriate balance.
Rebalancing triggers include:
- Lead vocals sitting too far back in dense sections
- Rhythm section overpowering melodic elements
- Dynamic sections feeling flat or compressed
- Reference comparisons revealing balance issues
The most effective rebalancing approach involves starting from scratch with all faders down. This prevents level creep from previous mixing sessions and gives you a fresh perspective on element relationships.
Different song sections often require different balance approaches. Verses may emphasize vocals and rhythm section, while choruses need fuller arrangements with elevated background elements.
Professional mixers often create multiple balance versions before committing to final levels. This allows A/B comparison between different approaches and helps identify the most effective arrangement support.

7
Key Takeaways For Mixing Levels
Headroom management forms the foundation of professional mixing. Engineers should maintain 3 to 6 dB of headroom in their mixes to provide flexibility during mastering without introducing distortion.
Peak levels must stay well below 0 dBFS to prevent digital clipping. When peaks exceed recommended thresholds, producers can lower overall levels using gain plugins or individual track adjustments.
Proper gain staging requires recording at optimal levels between -18dB to -12dBFS. This prevents distortion and maintains clarity throughout the signal chain.
Balance remains subjective across different genres and styles. Mix-level preferences vary by musical context and artistic vision rather than fixed technical rules.
K-System metering provides standardized monitoring for consistent level management. The K-20, K-14, and K-12 scales help engineers maintain appropriate average levels while preventing peaks from clipping.
Crest factor affects the character and energy of mixes. Higher crest factors around 12 dB create snappy, dynamic sounds, while moderate factors near 10 dB produce more balanced, bass-driven results.
|
Level Target |
Purpose |
Range |
|
Recording Input |
Prevent clipping |
-18dB to -12dBFS |
|
Mix Headroom |
Mastering flexibility |
3-6 dB |
|
Master Bus |
Processing space |
-6dB minimum |
LUFS measurements ensure consistent loudness across playback systems. Different genres require specific loudness targets, with modern pop typically aiming for -10 to -8 LUFS.
Happy mixing!

Frequently Asked Questions
1
What are the standard mixing levels for various instruments in a full mix?
Drums typically sit between -18dB to -12dB for kick and snare, with hi-hats around -20dB to -15dB. Bass guitar should sit between -18dB and -15dB, providing a solid foundation without overwhelming other elements.
Lead vocals generally perform best at -12dB to -6dB, depending on the genre and arrangement. This range keeps vocals clear while leaving dynamic headroom for processing.
Electric guitars work well between -15dB to -12dB for rhythm parts, while lead guitars can push slightly higher during solos. Acoustic instruments like piano and strings typically sit in the -18dB to -12dB range.
These ranges offer useful starting points, not rigid rules. The song's arrangement, genre conventions, and relationship between elements ultimately determine the actual levels.
2
Where can I find a reliable mixing levels chart for reference during sessions?
Professional mixing level guides provide detailed charts that show optimal dB ranges for different instruments. These resources often include genre-specific recommendations and frequency considerations.
Many digital audio workstations include built-in metering tools that display recommended level ranges. Third-party plugins also offer visual guides, including color-coded meters for different instrument types.
Audio engineering schools and professional forums maintain updated charts that reflect current industry standards. These resources often include both peak and RMS level recommendations for a more complete reference.
3
How do you achieve optimal mixing levels within a music production?
Proper gain staging forms the foundation: set appropriate input levels before applying any processing. This prevents clipping and keeps signal paths clean throughout the mix chain.
Start with drums and bass as the rhythmic foundation, then add instruments one by one. Solo each track to set its individual level, but check how it sits within the full mix too.
Use compression to control dynamic range and EQ to create frequency space between instruments. Use volume automation to manage level changes across song sections and keep the balance steady.
Reference your mix against professionally mixed tracks in similar genres. A/B comparisons reveal level imbalances and can help you calibrate your monitoring environment.
4
Can you provide guidelines for maintaining proper audio levels during mixing?
Keep individual track peaks below -6dB to leave headroom for mix bus processing and mastering. Keep mix levels between -9dB and -6dB at the master output for optimal mastering results.
Monitor levels with both peak and RMS meters to understand instantaneous peaks and perceived loudness. RMS readings give you a better sense of how loud elements actually sound to listeners.
Avoid pushing faders above unity gain (0dB) during mixing. If tracks need more level, reduce other elements or use gentle compression instead of boosting individual channels too aggressively.
Check mix translation by listening at different volume levels and through various speaker systems. The level relationships should hold together across different playback situations.
5
What are some mixing tips for achieving a balanced sound across different playback systems?
Test mixes on several speaker systems, including studio monitors, headphones, car speakers, and consumer earbuds. Balanced mixing approaches help the mix translate across different listening environments.
Focus on midrange frequencies, where most consumer playback systems perform fairly consistently. Elements that sound balanced from 200Hz to 5kHz usually translate well across different speakers.
Use high-pass filtering to remove unnecessary low-end content from non-bass instruments. This prevents muddy buildup and improves clarity on smaller speakers with limited bass response.
Create mixes that work at both low and high playback volumes. Important elements should remain audible at low volumes, while the mix shouldn't turn harsh at louder levels.
6
What fundamental mixing rules should be followed to ensure a clean and dynamic mix?
Balance mix elements according to their importance in the arrangement, rather than making everything equally loud. Give lead vocals and primary instruments the right level placement so they hold the listener's attention.
Keep level relationships consistent between verses, choruses, and other song sections. Use automation to smooth out dramatic jumps that might distract from the musical flow.
Leave enough headroom throughout the signal chain to prevent digital clipping and distortion. A clean gain structure, from recording through the final mix, helps deliver professional sound quality.
Apply EQ cuts before boosts to make room for important elements. Removing competing frequencies often works better than boosting the sounds you want, especially when you're trying to create clear, separated instrument placement.