


The digital revolution has transformed how music gets mixed, and mixing in the box has become the standard approach for countless producers worldwide. If you've wondered whether you can achieve professional results without expensive analog hardware, you're asking the right question.
Mixing in the box refers to the complete process of mixing audio entirely within your computer using a digital audio workstation and software plugins, without relying on external analog hardware or mixing consoles. This approach means that every aspect of your mix—from equalization and compression to reverb and final processing—is handled in software within your DAW. In-the-box mixing stands in contrast to traditional analog workflows that required physical mixing consoles and outboard gear.
The method has gained widespread adoption among Grammy-winning engineers and bedroom producers alike because it eliminates the need for thousands of dollars in equipment while offering flexibility that analog workflows cannot match.
Throughout this guide, you'll learn the fundamental differences between mixing in the box versus analog approaches, discover the essential tools you need to get started, and understand proven techniques that top producers use to create professional mixes entirely within their DAW.
You'll also learn how to avoid common pitfalls that degrade digital mixes and explore whether hybrid approaches might benefit your workflow.
Key Takeaways / TL;DR
- Mixing in the box uses only your computer and software plugins to create complete mixes without external hardware
- Digital mixing offers unlimited flexibility and recall at lower costs compared to traditional analog console workflows
- Success requires understanding digital headroom management, strategic saturation use, and proper gain staging techniques

1
Mixing In The Box Explained: Definition And Core Concepts
Mixing in the box involves completing your entire mix within a digital audio workstation using only software tools and plugins, eliminating the need for external hardware. Your DAW becomes the central hub for all audio processing, routing, and effects, powered by virtual instruments and digital signal processing.
What "In The Box" Means In Music Production
The term "in the box" refers to mixing using only your computer and software, rather than external analog hardware. The "box" is your computer system running a DAW.
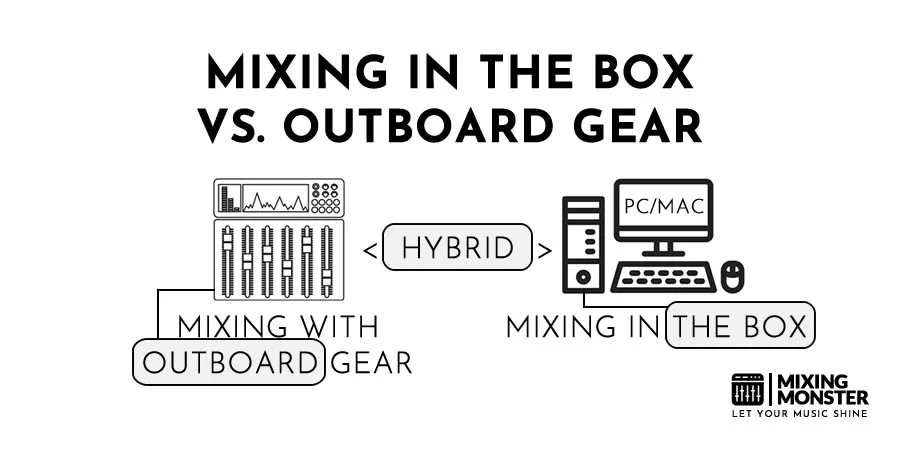
This approach contrasts with traditional analog mixing, which requires physical mixing consoles, outboard compressors, equalizers, and other hardware units. When you work in the box, every aspect of your mix takes place in the digital domain.
You handle all processing through software plugins installed in your DAW. This includes equalizers, compressors, reverbs, delays, and specialized effects. Your entire signal chain exists as digital code rather than electrical circuits passing through physical equipment.
How Digital Audio Workstations Handle Mixing
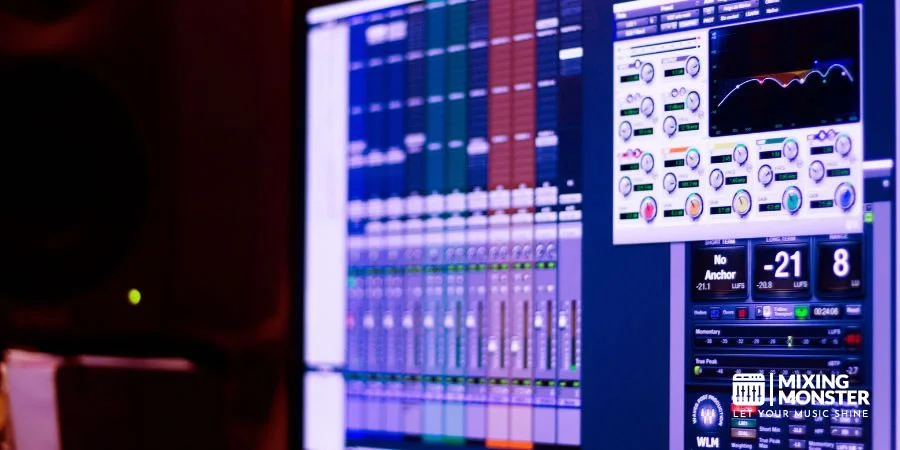
Your DAW processes audio by converting it into digital samples that can be manipulated mathematically. Each track in your session contains audio data that flows through a virtual mixer with adjustable parameters.
The software provides you with:
- Virtual faders for controlling track volume
- Pan controls for stereo placement
- Insert slots for adding plugins
- Send/return channels for parallel processing
- Automation lanes for dynamic parameter changes
- Bus routing for grouping and submixing
Your DAW calculates all these processes in real-time or during bounce/export. The mixing engine combines multiple tracks, applies plugin processing, and outputs a stereo or multichannel file. Modern DAWs support 32-bit or 64-bit floating-point processing, providing sufficient headroom and precision for professional results.
The Role Of Plugins, Virtual Effects, And Software Processing
Plugins replace traditional hardware processors in your mixing workflow. You insert them directly onto tracks or buses within your DAW to shape your sound.
Common plugin categories include:
- EQs for frequency adjustment
- Compressors for dynamic control
- Reverbs for spatial effects
- Delays for timing-based effects
- Saturation and distortion for harmonic enhancement
- Limiters for peak control
Each plugin processes the digital audio signal according to its algorithm. Some plugins model analog hardware using complex mathematical formulas, while others offer purely digital processing capabilities not possible with physical equipment. You can stack multiple plugins on a single track to create complex processing chains.
The lower plugin cost compared to analog hardware makes this approach more accessible. You can build a comprehensive plugin library for a fraction of the cost of equivalent hardware.
Signal Flow Inside A DAW Environment
Your audio signal follows a specific path through your DAW session. Understanding this flow helps you make better mixing decisions.
The typical signal path operates as follows:
- Audio enters from your recorded track or virtual instrument
- Signal passes through any insert plugins in order from top to bottom
- Track fader adjusts the level
- Pan control positions the signal in the stereo field
- Send controls route copies to auxiliary channels for effects
- Signal reaches the master bus or submix groups
- Master bus processing applies the final polish
- The output stage delivers the finished mix
You control this entire chain digitally without physically patching cables. Your DAW saves every routing decision, plugin setting, and automation move. This allows you to recall sessions instantly with all parameters exactly as you left them.

2
Analog Mixing Vs Mixing In The Box: Key Differences
The primary distinctions between these approaches involve the physical equipment used, the inherent sonic characteristics of each method, how you interact with your mix, and practical considerations such as budget and workspace requirements.
Hardware Consoles Vs Digital Mix Engines
When you mix on an analog console, your audio signal flows through physical circuits, transformers, and amplifiers. Each channel strip contains actual capacitors, resistors, and transistors through which the electrical signal passes. This physical signal path means you're working with voltage changes on real hardware components.
Digital mix engines process audio as numerical data within your computer's CPU. Your DAW's mixer uses mathematical algorithms to combine, route, and process audio streams. The signal never leaves the digital domain until it reaches your monitoring output.
Analog consoles require calibration and maintenance. You need to manage signal levels carefully to avoid noise floors and maintain headroom. Digital systems operate with consistent precision every time you open a session.
The recall capabilities differ dramatically. With analog gear, you have to reset all faders, EQ settings, patch bay connections, and outboard equipment to recreate a previous mix. Digital sessions automatically save every parameter and recall them instantly.
Sound Character: Analog Warmth Vs Digital Precision
Analog equipment introduces harmonic distortion and saturation as your signal passes through physical components. This creates what many describe as warmth or color in the sound. Transformers, tube circuits, and even the impedance of different components add subtle harmonics that weren't in the original recording.
Some engineers find mixing on actual mixers provides better saturation built into the hardware itself. These non-linearities can add perceived depth and cohesion to your mix.
Digital processing maintains mathematical accuracy. When you set an EQ at precisely 2.3 kHz with a Q of 1.4, that's exactly what you get every time. There's no drift, no temperature-related variation, and no component aging affecting your sound.
Modern plugin developers model analog characteristics digitally. You can add saturation, harmonic excitement, and transformer coloring through software if you want those qualities in your digital mix.
Discover Best Audio Gear & Equipment


Workflow Differences Between Outboard Gear And Plugins
Physical mixing means turning actual knobs and moving real faders. You interact with your mix through tactile controls that provide immediate feedback. Many engineers value this hands-on experience and find it more intuitive than mouse-based control.
Working entirely in a DAW lets you automate every parameter with precision. You can draw in volume rides, create complex EQ movements, and save multiple automation passes. Comparing different mix versions is instantaneous via session duplication or snapshot toggling.
Routing flexibility differs significantly. Digital systems let you create parallel processing chains, complex bus structures, and intricate sends with a few clicks. Analog routing requires physical patch cables and available hardware units.
You gain speed with digital revisions. When an artist requests changes, your entire mix sits exactly where you left it. Grammy-winning engineers report that clients couldn't tell the difference between console mixes and digital mixes, making the workflow advantages decisive.
Cost, Space, And Accessibility Comparison
A professional analog mixing console costs between $50,000 and $300,000 for high-end models. You also need outboard compressors, EQs, reverbs, and effects processors. Each piece of quality hardware adds thousands to your investment.
A high-end plugin collection costs significantly less than equivalent analog hardware while delivering professional results. You can access world-class emulations of legendary equipment for a fraction of the cost of the original hardware.
Space requirements favor digital dramatically. A professional analog setup needs a dedicated room with proper ventilation, electrical capacity, and climate control. Your plugin collection exists on a hard drive.
Maintenance costs add up with analog gear. You'll pay for regular calibration, component replacement, and occasional repairs. Digital plugins require no maintenance beyond software updates.
Accessibility changes your opportunities. You can take your entire digital mixing setup with you wherever you go with a laptop. Analog installations are fixed in place, limiting where you can work.
3
Benefits Of Mixing In The Box For Modern Producers
Digital mixing offers practical advantages that directly impact your workflow efficiency and budget. You gain complete session recall, flexible project management, and precise control over every parameter without the overhead costs of physical equipment.
Lower Cost And Minimal Equipment Requirements
Mixing in the box eliminates the need for expensive analog consoles, outboard gear, and large studio spaces. You can achieve professional results with a computer, audio interface, and quality monitoring setup. Plugin bundles that emulate classic hardware cost a fraction of their physical counterparts, often hundreds or thousands of dollars less per unit.
Your studio maintenance expenses drop significantly without analog equipment. You don't need to worry about component degradation, repair costs, or humidity control that analog gear requires to function optimally. Plugin updates and bug fixes arrive digitally at no additional charge.
The barrier to entry for professional mixing has never been lower. You can start with free or affordable plugins and gradually expand your toolkit as your skills and budget grow. This accessibility allows you to focus your resources on acoustic treatment and quality monitoring rather than hardware acquisition.
Total Recall And Project Portability
Every parameter in your mix is saved automatically in your DAW session. You can return to a project months later and find every fader position, plugin setting, and routing configuration exactly as you left it. This instant session recall eliminates the time-consuming process of photographing console settings or manually documenting hardware positions.
Your entire studio fits on a portable drive. You can work on projects across different locations, collaborate remotely with clients, and send sessions to other engineers without scheduling studio time. Multiple mix versions can be saved and compared instantly without losing your original work.
Client revisions become straightforward rather than complicated. You can quickly adjust specific elements, create alternate versions, and A/B-test changes without rebuilding your entire mix setup.
Your Song Mixed & Mastered By Mixing Monster


Unlimited Tracks And Flexible Routing
Your track count is limited only by your computer's processing power. Modern systems handle hundreds of simultaneous tracks, something physically impossible with traditional mixing consoles. You can layer vocals, stack instruments, and create complex arrangements without track bouncing or premature commitment.
Routing flexibility exceeds what's practical in the analog domain. You can send any track to multiple buses simultaneously, create parallel processing chains, and build intricate effect networks with a few mouse clicks. Changing your signal flow takes seconds rather than rewiring physical patch bays.
Parallel processing capabilities let you blend compressed and uncompressed signals, layer different reverb types, and add depth without destroying your original recordings. You maintain complete control over every blend ratio and can adjust these relationships at any point in your mixing process.
Automation, Editing Precision, And Non-Destructive Processing
Sample-accurate automation lets you program precise volume rides, filter sweeps, and effect parameter changes. You can draw automation curves visually, edit individual points, and create movements that would require multiple hands on an analog console. Your automation data remains editable throughout the entire project lifecycle.
Non-destructive processing preserves your original recordings. You can audition extreme processing, change your approach entirely, and revert to your raw tracks without any loss of quality. Plugin parameters are adjusted in real time without affecting audio file printing.
Detailed editing capabilities extend beyond traditional mixing. You can time-align drums to the sample, tune individual notes within chords, and correct performance issues that would otherwise require complete retakes. This precision translates to cleaner mixes with less masking and phase issues between elements.

4
Essential Tools Needed To Start Mixing In The Box
Starting with the right digital tools makes the difference between frustration and productivity when mixing in the box. Your DAW, core plugins, audio interface, and monitoring equipment form the foundation of your mix environment.
Choosing The Right DAW For Your Workflow
Your digital audio workstation serves as the central hub for all mixing activities. Popular options include Pro Tools, Logic Pro X, Ableton Live, FL Studio, and Reaper, each with distinct strengths.
Pro Tools remains the industry standard in professional studios, offering robust editing capabilities and widespread session compatibility. Logic Pro X provides Mac users with an extensive built-in plugin library and intuitive interface at a one-time cost. Ableton Live excels at electronic music production thanks to its unique session view and workflow.
Most modern DAWs include automatic latency compensation and support for 24-bit recording with 32-bit float processing. This gives you sufficient headroom to avoid clipping and maintain audio quality throughout the mixing process.
The best DAW for you depends on your budget, operating system, and the type of music you produce. Many DAWs offer free trials, allowing you to test workflows before committing. Focus on learning one DAW thoroughly rather than switching between multiple platforms.
Must-Have Plugins: EQ, Compression, Reverb, And Delay
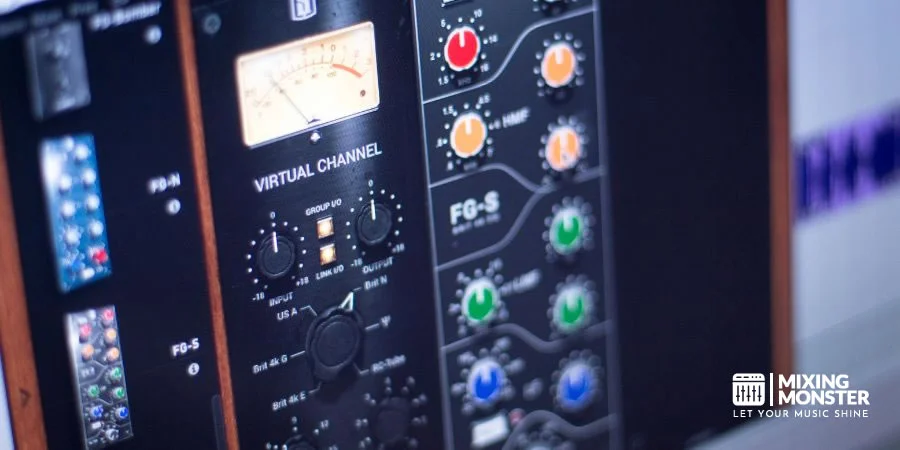
Essential mixing plugins include equalizers, compressors, reverbs, and delays. These four processor types handle the majority of mixing tasks you'll encounter.
Equalizers shape the frequency content of individual tracks and help elements sit together in the mix. You need both parametric EQs for surgical cuts and musical EQs for tone shaping. Stock DAW equalizers often provide everything necessary for professional results.
Compressors control dynamics and add punch or sustain to recordings. Having access to different compression styles matters: transparent compression for buses, character compression for individual instruments, and limiting for peak control.
Reverb plugins create spatial depth and place sounds in virtual acoustic environments. You should have at least one algorithmic reverb for flexibility and potentially a convolution reverb for realistic spaces.
Delay plugins add dimension through rhythmic or ambient repetition. Basic tempo-synced delays and tape delay emulations cover most mixing scenarios. Many producers create templates with these processors pre-loaded on channels to streamline their workflow.
Related Articles

Audio Interface And Monitoring Setup
Your audio interface converts digital audio from your computer into analog signals for your monitors and headphones. It also determines the quality of your monitoring chain and recording capabilities.
Entry-level interfaces from Focusrite, PreSonus, and Universal Audio offer clean conversion at 24-bit/96kHz or higher. These specifications exceed what you need for professional mixing. More important than specifications are the quality of the digital-to-analog converters and the monitor's output transparency.
Connection type matters for your workflow. USB interfaces work for most home studios, while Thunderbolt options provide lower latency for larger track counts. Make sure your interface has enough outputs for your monitoring setup.
The interface should include a monitor controller with easy volume adjustment. Balanced outputs reduce noise when connecting to studio monitors. Direct monitoring capabilities help during recording sessions but have less impact on the actual mixing process.
Headphones Vs Studio Monitors For Accurate Mixing
Studio monitors provide the most accurate representation of your mix and should be your primary reference tool. Monitors let you hear stereo imaging, depth, and low-frequency content that headphones struggle to reproduce correctly.
Position the monitors in an equilateral triangle around your listening position, keeping the tweeters at ear height. Place them away from walls when possible to minimize bass buildup from boundary reflections. Even budget monitors like JBL 305P or Kali LP-6 deliver reliable results in treated rooms.
Headphones serve as essential secondary references and allow mixing when monitor use isn't practical. Open-back headphones like the Sennheiser HD 600 or Beyerdynamic DT 990 Pro offer more natural soundstages than closed-back designs. However, headphones exaggerate stereo width and alter bass perception.
Professional mixers typically use both monitors and headphones to check mixes across multiple systems. Your monitors reveal the overall balance and spatial relationships, while headphones expose subtle details and potential issues. Neither tool alone provides the complete picture needed for polished, professional mixes.

5
Step-By-Step Basics Of Mixing In The Box
Successful digital mixing requires a methodical approach that addresses session organization, proper signal levels, spatial placement, and strategic processing. Following these foundational steps ensures your mix translates well across different playback systems while maintaining clarity and professional polish.
Organizing And Preparing Your Session
Start by color-coding and clearly naming all tracks. Group similar instruments together, such as all drum tracks, all vocals, or all guitars. This visual organization saves time when you need to locate specific elements quickly during the mixing process.
Create a consistent track order that works for your workflow. Many engineers place drums at the top, followed by bass, guitars, keys, and vocals. Delete unused tracks and mute any takes you won't use in the final mix.
Set up auxiliary tracks for reverb, delay, and other time-based effects before you begin. Route multiple tracks to these shared effects using sends rather than inserting the same plugin multiple times. This approach conserves CPU resources and creates a more cohesive sound.
Establish group buses for major track categories. A drum bus, vocal bus, and instrument bus allow you to process entire sections together and make level adjustments more efficiently.
Gain Staging In A Digital Environment
Set appropriate input levels for each track using trim or gain plugins at the beginning of your signal chain. Aim for peak levels around -12 dB to -6 dB on individual tracks. This provides adequate headroom while keeping your signal strong enough to work with effectively.
Unlike analog systems, where pushing levels creates pleasant saturation, digital clipping produces harsh distortion that damages your mix. Monitor your master fader and ensure it never reaches 0dBFS. Leave approximately 6dB of headroom on your master bus for the mastering stage.
Check gain levels between plugins in your processing chain. Some EQs and compressors add gain, causing subsequent plugins to receive a hotter signal than intended. Use output gain controls or additional trim plugins to maintain consistent levels throughout your chain.
Balancing Levels And Panning
Begin with all faders down and bring up your most important element first, typically the lead vocal or main melodic instrument. Add the foundational rhythm elements like drums and bass next. Build your mix incrementally, adding tracks in order of importance.
Use panning to create width and separation between instruments. Hard pan doubled rhythm guitars left and right. Place backing vocals slightly off-center. Keep bass, kick drum, snare, and lead vocals centered for maximum impact and compatibility with mono playback systems.
Make level adjustments based on the song's arrangement. Vocals should sit on top of the instrumental during verses and choruses. Automate levels during instrumental breaks where other elements can come forward.
Reference your mix at different volume levels. Elements that seem balanced at loud volumes may reveal problems when played quietly. Your mix should maintain clarity and balance across various listening levels.
Applying EQ, Compression, And Effects Strategically
Use EQ to remove problematic frequencies before boosting. Apply high-pass filters to remove unnecessary low-end rumble from non-bass instruments. Cut harsh frequencies in the 2-5kHz range on vocals and guitars when needed.
Apply compression to control dynamic range and add sustain. Set attack times based on the instrument—faster attacks for controlling peaks, slower attacks to preserve transients. Start with moderate ratio settings between 2:1 and 4:1 for most sources.
Add saturation plugins to inject warmth and character that mimics analog processing. Apply subtle amounts across multiple tracks rather than heavy processing on individual sources. This recreates the cumulative effect of signal passing through analog hardware.
Use time-based effects like reverb and delay sparingly. Send multiple instruments to the same reverb to create a cohesive space rather than placing each element in its own reverb environment. Apply shorter reverb times to maintain clarity in busy arrangements.

6
Common Mistakes When Mixing In The Box
Digital mixing offers unlimited tracks and instant recall, but these advantages can lead to predictable errors that compromise your final mix. Understanding where most engineers go wrong helps you develop better habits from the start.
Overusing Plugins And Processing
The unlimited plugin racks available in digital audio workstations create a temptation to add processing on every track. This approach quickly leads to a cluttered, phase-incoherent mix where individual elements lose their natural character.
Each plugin you insert adds latency and CPU load while potentially introducing artifacts. More importantly, stacking multiple EQs, compressors, and saturators on a single track often creates competing processes that work against each other rather than enhancing the sound.
Overusing effects is one of the most common pitfalls in digital mixing. You should focus on using fewer, more intentional processing choices that serve the song.
Start with subtractive techniques before adding color. A high-pass filter often does more for clarity than three different EQ plugins. When you reach for a compressor, make sure you can articulate exactly what problem you're solving rather than applying it because it's expected.
Ignoring Gain Staging And Headroom
Proper gain staging ensures clean signal flow throughout your entire mix chain. Many engineers working in the box assume digital systems handle levels automatically, leading to distortion, plugin misbehavior, and limited dynamic range.
Your tracks should peak around -18 to -12 dBFS before hitting any processing. This range gives plugins the optimal input level they're designed to handle while leaving sufficient headroom for additional processing. When signals hit plugins too hot, even digital processors can introduce unwanted distortion or compress in unintended ways.
Ignoring gain staging results in clipping and distortion, degrading your mix quality. Monitor your master bus to ensure it never exceeds -6 dBFS during mixing, providing room for mastering processing.
Adjust input gains at the beginning of each channel strip rather than relying solely on fader positions. This approach maintains proper signal levels through your entire processing chain and prevents your faders from sitting in awkward positions.
Mixing Only On Headphones Without Reference Checks
Headphones provide detail and eliminate room acoustics, making them valuable tools for checking specific elements. However, relying solely on headphones results in mixes that translate poorly to speakers and real-world listening environments.
The stereo image you hear through headphones differs dramatically from that of speakers. Panning decisions, reverb depths, and spatial effects that sound perfect in headphones often collapse or become exaggerated when played through monitors.
Headphones also emphasize bass frequencies differently than speakers, leading to mixes that are either too low-end or too low. The lack of physical air movement means you miss important information about how bass frequencies interact in actual listening spaces.
You should cross-reference your headphone work on multiple playback systems throughout the mixing process. Check your mix on studio monitors, car speakers, laptop speakers, and earbuds to identify translation issues early. Even affordable desktop speakers reveal problems that remain hidden in headphones.
Failing To Reference Professional Tracks
Using reference tracks helps maintain perspective and ensures your mix remains competitive within your genre. Without these comparisons, you lose objectivity about tonal balance, dynamics, and overall polish.
Import professionally mixed tracks in your genre directly into your DAW session. Match their playback level to your mix using a gain plugin to ensure fair comparisons. This prevents you from being fooled by the loudness bias that makes louder mixes seem better.
Focus on specific elements when referencing rather than trying to compare everything at once. Listen to how the kick and bass relate in frequency and volume. Check where vocals sit in relation to the instrumental elements. Notice the amount of high-frequency energy and how much reverb creates the sense of space.
Reference tracks also reveal when your monitoring environment colors your decisions. If your mixes consistently lack high end compared to references, your room or headphones likely emphasize those frequencies, causing you to compensate incorrectly.

7
Hybrid Mixing: Combining Analog Gear With In-The-Box Workflow
Hybrid mixing blends the precision of digital audio workstations with the tonal character of analog hardware, allowing you to route specific tracks or busses through physical gear while maintaining the editing flexibility of your DAW. This approach gives you access to both the warmth of analog processing and the recall capabilities of digital plugins.
What Is Hybrid Mixing?
Hybrid mixing integrates both analog outboard gear and digital tools within your production workflow. You work primarily in a DAW but route audio through physical compressors, equalizers, or other processors at strategic points in your signal chain.
The practice combines analog sound processing with electrical signal transformations, combining the precision of digital audio with the warmth of analog. You maintain your project files and automation in the box while selectively using hardware for specific sonic characteristics.
This method differs from fully analog mixing, where you rely entirely on a console and outboard gear. It also differs from purely in-the-box mixing, where all processing happens through plugins. You get to choose which elements benefit from analog processing and which work better with digital tools.

Using Outboard Gear With A DAW
You can integrate hardware into your workflow in two primary ways. The first approach treats outboard gear like a plugin by selecting physical input/output pairs on your audio interface as inserts in your DAW mixer.
The second method involves printing tracks through hardware to new audio files. You route your track to an output, process it through your gear, record the result back into your DAW, then turn off the original track while keeping it for reference.
Your audio interface serves as the bridge between digital and analog domains. You need enough inputs and outputs to accommodate your hardware routing scheme. Patch bays can simplify connections when working with multiple outboard pieces of gear.
Signal flow planning is critical. You must decide whether to process individual tracks, group busses, or your master output through hardware. Each approach produces different results and affects your workflow in different ways.
When Hybrid Makes Sense For Producers
Hybrid setups work well when you want specific analog characteristics that plugins cannot replicate convincingly. Certain vintage compressors, tape machines, and preamps impart qualities that remain difficult to emulate digitally.
Tracking through analog gear captures tonal qualities from the start of your recording process, which can be more effective than adding character later. This front-end approach represents the most common form of hybrid production.
Budget considerations matter. You should invest in hybrid gear when you have specific sonic goals that justify the expense. Starting with one or two quality pieces often yields better results than buying multiple lower-quality units.
Your genre and aesthetic preferences influence whether a hybrid makes sense. Genres that value analog warmth and saturation benefit more from hardware integration than styles focused on clinical precision.
Pros And Cons Of Hybrid Mixing Setups
Advantages:
- Unique tonal character - Hardware adds warmth, harmonic distortion, and depth that enhance your mixes
- Tactile control - Physical knobs and faders provide immediate hands-on adjustment
- Workflow inspiration - The combination of both worlds can inspire creativity and lead to innovative soundscapes
- Greater dynamic range - Analog summing and processing can produce more impactful mixes
Disadvantages:
- Limited recall - You cannot save and instantly recall hardware settings, like plugin parameters
- Latency issues - Round-trip conversion through hardware introduces a delay that requires compensation
- Increased complexity - Signal routing and calibration add technical challenges to your workflow
- Higher costs - Quality outboard gear requires significant financial investment plus ongoing maintenance
Noise floor management becomes important when you introduce analog components. You need high-quality cables, proper grounding, and careful gain staging to minimize unwanted noise. Consistency between analog-processed and digital tracks requires regular calibration of your equipment levels.
8
Key Takeaways For Mixing In The Box Success
Mixing in the box requires understanding fundamental principles that apply whether you work with hardware or software. Your approach to gain staging remains critical, as proper level management ensures your mixes sound full and dynamic rather than thin or distorted.
Essential preparation steps include organizing your session before you start mixing. Remove alternate takes and unused tracks to maintain focus on the elements that matter. This upfront work prevents decision fatigue when you need to concentrate on sonic quality.
You should invest time in thoroughly learning your DAW's capabilities. Modern digital audio workstations offer powerful features at accessible price points, with even budget options providing professional-grade tools. Your familiarity with these tools directly impacts your efficiency and creative output.
Plugin selection matters more than the number of plugins. Choose high-quality processors that serve specific purposes in your workflow. The latest generations of plugins offer exceptional sound quality, with many providing parameter control beyond traditional hardware limitations.
Your monitoring environment deserves the same attention as your software choices. Accurate speakers and a treated room help you make reliable decisions. Without proper monitoring, even the best plugins and techniques won't translate to successful mixes.
Client expectations now favor fast turnaround times and easy revisions, which digital mixing excels at providing. You can recall sessions instantly and implement changes within minutes. This efficiency has become standard practice across the industry, making digital workflow skills essential for modern mixing engineers.
Happy mixing (in the box)!

Frequently Asked Questions
1
What are the primary advantages of mixing music entirely within a digital audio workstation?
Mixing in the box lets you mix using only your computer and software, without external hardware. This approach eliminates the need for expensive analog consoles and outboard gear.
You gain instant recall of all your mix settings. When you save your project, every plugin parameter, automation move, and routing decision is preserved exactly as you left it.
The cost savings are substantial compared to building an analog studio. Instead of purchasing hardware compressors and equalizers that can cost thousands of dollars each, you access software versions at a fraction of the price.
You can work from anywhere with just a laptop and headphones. This flexibility means you're not tied to a specific studio location to complete your mixes.
Modern Grammy-winning mixers value the ability to make quick revisions by simply reopening a session and adjusting settings. This repeatability is essential in today's fast-paced production environment.
2
How does 'in the box' mixing compare to traditional analog mixing in terms of sound quality?
The debate over sound quality between digital and analog mixing has narrowed significantly as plugin technology has advanced. Modern plugins can accurately model the behavior of classic analog hardware.
Mixing out of the box requires all effects to be hardware outboard gear connected to an analog console. This approach involves routing your digital recordings back to the analog domain for processing.
You'll notice that analog gear imparts certain sonic characteristics that some engineers prefer. These include harmonic distortion, transformer coloration, and specific types of compression behavior.
Digital mixing provides cleaner, more transparent processing by default. Your plugins won't add noise or degrade signal quality across multiple processing stages.
In practice, you can achieve professional results with either method. Your mixing skills and decision-making matter more than whether you work in or out of the box.
3
Can you achieve professional results by mixing only with software-based effects and tools?
You can absolutely create professional-quality mixes using only software. Major commercial releases across all genres are regularly mixed entirely in the box.
The key factor is understanding how to use your tools effectively. Software compressors, equalizers, and reverbs function on the same principles as their hardware counterparts.
You need to develop critical listening skills and learn proper gain staging. These fundamentals apply regardless of whether you're working with plugins or hardware.
Professional mixers emphasize that the workflow efficiency of digital mixing allows them to focus more on creative decisions. You spend less time on technical setup and more time actually mixing.
Your plugin selection should include quality equalizers, compressors, reverbs, and delays as your core toolkit. Many free and affordable options perform exceptionally well in professional contexts.
4
What are the best practices for signal routing and bus usage in a digital mix environment?
You should organize your mix using a clear bus structure from the start of your session. Group similar instruments onto dedicated buses, such as drums, bass, guitars, vocals, and effects returns.
This approach gives you better control over your mix balance. Instead of adjusting ten individual drum tracks, you can control the entire drum mix with one fader.
Apply processing to buses strategically to create cohesion. Light compression on your drum bus or vocal bus can glue those elements together naturally.
Use auxiliary sends for reverbs and delays rather than inserting these effects directly on individual tracks. This method saves CPU resources and makes it easier to create a consistent spatial environment.
Your signal flow should follow a logical path from individual tracks to subgroups to your master bus. Keep your routing simple and consistent across projects to speed up your workflow.
5
How do you manage CPU load and latency issues when mixing with multiple plugins?
You can reduce CPU strain by bouncing tracks with heavy processing to audio. Once you're satisfied with a synth sound or guitar tone, render it to a new audio track and deactivate the original.
Freeze or commit tracks that use resource-intensive plugins. Most DAWs offer a freeze function that temporarily renders a track, allowing you to unfreeze and edit later.
Increase your audio buffer size during mixing to reduce CPU load. You won't need the low latency required for tracking, so buffer sizes of 512 or 1024 samples work well for mixing.
Disable plugins you're not actively using rather than leaving them bypassed. Bypassed plugins often still consume some CPU resources.
Consider using lighter alternatives for certain tasks. You don't always need the most demanding emulation plugins, especially on background elements.
6
What techniques can be used to ensure that a mix translates well across different playback systems?
You must reference your mix on multiple playback systems throughout the mixing process. Check your work on headphones, studio monitors, car speakers, and consumer earbuds.
Start by ensuring your low-end translates properly across systems. Bass frequencies that sound perfect on studio monitors often overwhelm smaller speakers or disappear entirely.
Use reference tracks that sound good on all systems. Compare your mix to professionally released songs in your genre at matched volumes.
Pay attention to your overall frequency balance using spectrum analyzers as visual guides. These tools help you identify frequency buildups that might not be obvious on your monitoring system.
Mix at moderate volumes to avoid ear fatigue and make more accurate decisions. Your ears become less reliable at loud volumes, leading to mixes that only sound good at high playback levels.
Test your mix in mono periodically to check for phase issues and ensure clarity. Elements that disappear or change dramatically in mono need attention.