


If you want your music to sound polished and competitive on streaming platforms, learning how to master music is one of the most valuable skills you can develop as an independent artist or producer.
Audio mastering is the final stage of music production, where a stereo mix is processed and optimized. Hence, it translates consistently across different playback systems, meets platform loudness standards, and sounds professional alongside commercially released music. The mastering process typically involves equalization to balance the frequency spectrum, compression to control dynamics, limiting to achieve appropriate loudness, and export in the correct format and resolution.
When you master your track correctly, you close the gap between a raw mix and a release-ready recording. Knowing how to master a song also gives you a clearer understanding of what mixing problems need to be solved earlier in your workflow.
This guide walks you through every major step of the mastering process in practical terms: preparing your mix, building a mastering chain, using reference tracks, targeting streaming loudness standards, choosing between DIY, AI, and human mastering, and exporting your final files correctly.
Whether you are mastering in a DAW at home or evaluating whether to hire a professional, you will find clear and realistic guidance here.
Key Takeaways / TL;DR
- Mastering is the final technical and creative step that makes your mix sound consistent, loud enough, and ready for distribution.
- EQ, compression, limiting, and proper export settings are the core tools of any mastering workflow.
- Knowing when to master yourself, use an AI tool, or hire an engineer saves time and leads to better results.

1
Overview of How to Master Music
Audio mastering sits at the intersection of technical precision and trained listening. It does not rebuild a mix; it refines one. A mastering engineer shapes perceived loudness, tonal balance, stereo width, and dynamic feel so the track works in every listening context, from earbuds to club speakers.
The Goal of a Release-Ready Master
The primary goal of mastering is consistency and competitiveness. Your master should sound balanced on laptop speakers, car stereos, headphones, and studio monitors, without requiring any adjustments from the listener.
A release-ready master also meets platform-specific loudness targets, avoids clipping or distortion, and exists in the correct file format for distribution. It is not necessarily the loudest or most processed version of your track; it is the most reliable one.
What Problems Mastering Can Fix
Mastering can address minor tonal imbalances, such as an overly bright high end or a build-up in the low-mid range. It can tighten perceived loudness, improve stereo cohesion, and reduce harshness that becomes obvious on different playback systems.
What mastering cannot fix is a fundamentally broken mix. If vocals are buried, the kick is distorting, or the mix is out of phase, those problems need to be addressed in the mix session. As noted in iZotope's guide, mastering works best when the mix is already in good shape.
What Should Be Solved in the Mix First
Before you begin the mastering process, your mix should have clean low-end separation, balanced levels across all elements, no unwanted clipping on individual tracks, and a properly functioning stereo image. Panning, reverb tails, and automation should all be finalized.
The mastering stage is for refinement, not repair. The stronger your mix, the more the mastering engineer or mastering service can enhance rather than compensate.

2
Prepare the Best Possible Premaster
A well-prepared premaster file is the foundation on which everything else depends. Getting the format, headroom, and processing decisions right before you export will give the mastering stage more room to work and reduce the chance of introducing problems from the start.
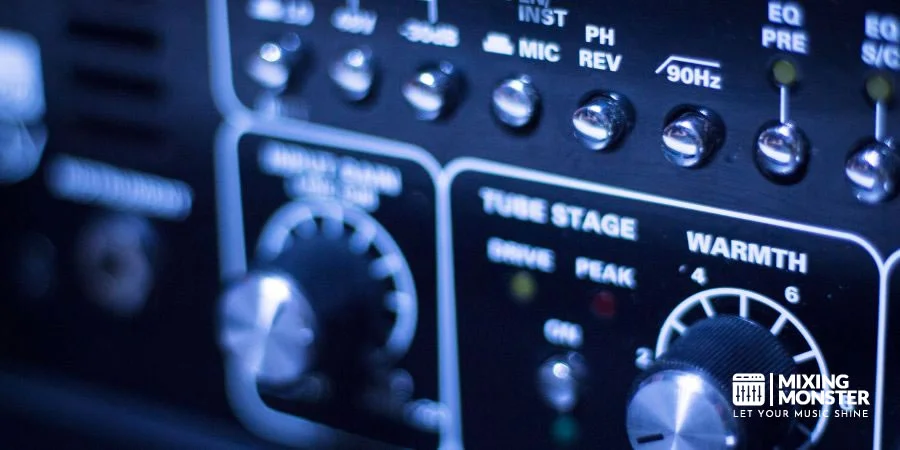
Leave Headroom and Avoid Clipping
Your stereo mix should peak somewhere between -6 dBFS and -3 dBFS before it reaches the mastering stage. This headroom gives the mastering engineer dynamic range to work with and prevents the limiter from being forced into distortion territory right from the start.
Avoid clipping your mix bus. Even brief intersample peaks can cause distortion that compresses poorly and limits what mastering can achieve. Use a true peak meter to check your output level before exporting.
Remove Limiter-Heavy Processing From the Mix Bus
One of the most common premaster mistakes is leaving a heavily pushed limiter or master bus compressor engaged on the mix export. If you have been using those processors to make your rough mix sound louder during production, bypass or remove them before bouncing the final premaster file.
According to premaster delivery guidelines from HF Mastering, the premaster should be a WAV or AIFF file at 24-bit depth and a sample rate of 44.1 kHz or higher, with no limiter squashing the dynamics. The mastering stage needs that dynamic range to do its job.
Discover Best Audio Gear & Equipment


Choose the Right Source Format
Export your premaster as a lossless WAV or AIFF file. Both formats are lossless, meaning no audio data is discarded during export. WAV is the more universally compatible option and works across all platforms and DAWs.
Avoid exporting to MP3 for mastering purposes. MP3 is a lossy format that permanently removes audio information to reduce file size. If you master from an MP3, you are working from a degraded source, and no amount of EQ or limiting will recover what was lost.
3
Build a Simple Mastering Chain
A mastering chain is the ordered sequence of processors applied to your stereo mix during the mastering session. The order matters because each processor affects what the next one receives. A well-structured chain produces consistent, predictable results rather than random stacking of effects.
Start With EQ and Tonal Balance
EQ comes first in a mastering chain because tonal decisions affect how compression and limiting respond downstream. Use a linear-phase or high-quality minimum-phase EQ to make broad, gentle adjustments rather than the surgical cuts you would use in mixing.
Listen for frequency build-ups that create muddiness, typically in the 200-400 Hz range, and for harshness that often lives between 2 kHz and 6 kHz. Small boosts or cuts of 1 to 3 dB are usually sufficient. According to a step-by-step chain guide from Remasterify, getting the tonal balance right at the EQ stage makes it easier to use subsequent processors correctly.
Use Compression Without Killing Dynamics
Mastering compression is subtle. You are not using it to change the sound dramatically; you are using it to glue the track together and add slight density. A slow attack, medium release, and a ratio between 1.5:1 and 2:1 is a reasonable starting point for most material.
Keep the gain reduction to 1-3 dB at most. If you are seeing more reduction than that, either the mix needs attention, or you are over-compressing. Multiband compression can help manage problem frequency ranges independently, but it requires careful use, as aggressive settings can strip the music of its natural character.
Your Song Mixed & Mastered By Mixing Monster


Control Peaks and Final Loudness
A limiter is the last major processor in your mastering chain before export. Its job is to capture transient peaks and raise the overall loudness to a competitive level without introducing audible distortion.
Set your true peak ceiling to -1 dBTP for most streaming distribution, or -0.5 dBTP for an extra safety margin. Target an integrated loudness of around -14 LUFS for streaming platforms, though this varies slightly by platform.
The LANDR Blog's mastering chain overview notes that the limiter's purpose is peak control, not the primary loudness tool; loudness should come from the overall gain structure of the chain, not from pushing the limiter hard.

4
Use Reference Tracks the Right Way
Reference tracks are one of the most practical tools in mastering, giving you an objective comparison point when your ears have adjusted to your own track. Used correctly, they help you identify tonal imbalances, loudness gaps, and stereo width differences between your work and professionally mastered music.
How to Pick a Good Reference Track
Choose a reference track that is professionally mastered, released in the same genre as your track, and recorded in a similar sonic style. Avoid picking tracks that are your favorite songs if they sound very different from your target sound.
Import the reference as a lossless WAV file if possible. As explained by iZotope's reference track guide, the best reference tracks represent the sonic qualities you are trying to achieve, not just a general standard of quality. Using a track from the same era also matters, since mastering trends shift over time.
Level-Match Before You Compare
Perceived loudness is the most deceptive variable in any comparison. If your reference track is louder than your master, it will naturally sound better to your ears even if the tonal balance is identical.
Always level-match before comparing. Reduce the reference track's gain until both tracks hit approximately the same integrated LUFS reading. Then switch between them quickly. Your assessment will be far more accurate because you are comparing tone and dynamics rather than loudness.
Related Articles

When Reference Mastering Helps and When It Misleads
Reference mastering helps most when you are unsure whether your low end is too heavy, your high end is too dull, or your stereo image is too narrow or too wide. It gives you a benchmark grounded in real-world commercial releases.
It becomes misleading when you treat matching the reference as the goal rather than improving your own track. Every song is different. A reference track showing a bright top end does not mean your track needs to match it exactly if your instrumentation or genre calls for a warmer character.

5
Master for Streaming, Download, and Different Playback Systems
Streaming platforms do not play your audio at whatever level you export it. They normalize playback to a target loudness, so your audio must be optimized for streaming to maintain its quality. Over-compressed, excessively loud masters do not gain any advantage and often sound worse than well-balanced ones at the same playback level.
Understand Loudness Standards and LUFS
LUFS stands for Loudness Units relative to Full Scale. It is the measurement standard used by streaming platforms to normalize audio playback. Spotify targets around -14 LUFS integrated, Apple Music targets around -16 LUFS, and YouTube normalizes to approximately -14 LUFS.
These targets exist to create a consistent listening experience across all tracks on each platform. According to a streaming mastering guide from Audio Sorcerer, understanding platform-specific LUFS targets helps you master for the actual listening environment rather than an imaginary loudness competition.
Avoid Chasing Loudness at All Costs
Pushing your master to -7 or -8 LUFS in the hope of sounding louder on streaming platforms will backfire. Platforms will turn your track down to their normalization target, and the overlimiting used to achieve that loudness will permanently reduce your dynamic range and transient detail.
A master at -14 LUFS with a good dynamic feel will sound more energetic and professional at the same playback volume than an overly limited -7 LUFS master that the platform has turned down. Loudness and dynamics are not the same thing.
Check Translation on Headphones, Speakers, and Small Devices
Before finalizing your master, listen to as many playback systems as you can access. Check it on studio monitors, consumer earbuds, headphones, a phone speaker, a Bluetooth speaker, and in a car, if possible.
Pay attention to whether the low end sounds balanced across these systems, whether vocals stay clear and present on small speakers, and whether the stereo width collapses appropriately in mono. Translation problems that were invisible on your studio monitors often become obvious on a phone speaker or earbuds.

6
Choose Between DIY, AI, and Human Mastering
The choice between mastering your own music, using an online mastering engine, or hiring a mastering engineer depends on your budget. Each option has real strengths and limitations based on your release goals.
When DIY Mastering Makes Sense
DIY mastering is a practical option when you release frequently, work with a limited budget, or build the technical skills to eventually handle your own releases confidently. It gives you full control over every decision and forces you to develop a deeper understanding of your own sound.
The limitation is that it requires a properly treated listening environment, good monitoring, and a trained ear. Online mastering is an increasingly popular way to quickly prepare tracks for release. Using an AI mastering tool can provide a solid baseline while you learn how to master music yourself, as outlined in a comparison of mastering approaches from Uygar Duzgun. DIY mastering often plateaus until skills improve.
What an AI Mastering Tool Can and Cannot Do
When to Hire a Mastering Engineer
A professional mastering engineer brings a calibrated listening environment, trained ears that have not heard your track a hundred times, and years of experience making music translate correctly across playback systems. For important releases, including singles intended for radio, album projects, and music submitted to labels or sync licensing, a human mastering engineer is the right choice.
If you are working on music that matters commercially or artistically and your DIY results are not landing, a mastering service with an experienced engineer is the practical next step. Mixing Monster offers online mixing and mastering support for producers who need professional finishing without requiring an in-person session.

7
Export the Final Master Correctly
Exporting your final master correctly is the last technical step before distribution, and it is where format, resolution, and quality checks all converge. Getting this wrong can introduce noise, clipping, or incompatibility issues that affect how your music is heard.
Best Formats for Distribution and Review
For digital distribution, export your master as a 24-bit WAV at 44.1 kHz. This is the standard accepted by all major distribution platforms and mastering services. If the original session was recorded at 48 kHz or higher, you can export at the native rate; most distributors accept both.
AIFF is equally lossless and acceptable, though WAV has wider platform compatibility. Avoid submitting MP3 masters to distribution platforms if a lossless option exists. Some distributors automatically transcode your lossless file to streaming formats, so starting from WAV ensures the cleanest source.
Create Versions for Streaming and Sharing
Prepare multiple versions of your master for different uses:
- Streaming/distribution master: 24-bit WAV, -14 LUFS integrated, -1 dBTP true peak ceiling
- High-resolution download: 24-bit WAV or HD WAV at the session's native sample rate
- Preview or social sharing: 320 kbps MP3 exported from the final lossless master, not from an intermediate file
Keeping organized file versions prevents the common mistake of accidentally distributing a rough mix or an incorrectly normalized file.
Final Quality Checks Before Release
Before uploading anything, do a complete playback of the full master from start to finish. Check for any clicks, dropouts, unwanted noise at the head or tail, or clipping that appeared during the export process.
Verify the integrated LUFS reading, true peak ceiling, and file metadata, including track title, artist name, and ISRC code if applicable. A simple listening pass on headphones at moderate volume will catch most issues that technical meters miss.
8
Common Mastering Mistakes to Avoid
Even with the right tools and intent, certain habits consistently produce poor results in the mastering stage. Most beginner mastering mistakes come from over-processing, treating every track the same, or misunderstanding what loudness actually means in a streaming context.
Overusing Multiband Compression and Stereo Widening
Multiband compression and stereo widening are powerful tools, but they are easy to overuse. Aggressive multiband compression can hollow out the midrange, create unnatural pumping in specific frequency bands, or make different elements of the track feel disconnected.
Excessive stereo widening produces a mix that sounds impressive on headphones but falls apart in mono or on small speakers. iZotope's beginner mastering mistakes guide specifically flags stereo over-widening as one of the most common and damaging errors beginners make.
Relying on One Plugin Chain for Every Song
Using an identical mastering chain for every track regardless of genre, tempo, or tonal character is a reliable way to produce mediocre results across the board. Each song needs its own assessment. A dense electronic track, a sparse acoustic recording, and a hip-hop instrumental each require different EQ decisions, compression approaches, and loudness targets.
Start each session with fresh ears and listen to the track before inserting any processors. Let the music guide the chain rather than forcing the music through a preset.
Mistaking Loud for Better
Perceived loudness and quality are not the same thing. A track that has been over-limited to achieve maximum LUFS will have reduced transient impact, flattened dynamics, and often audible distortion on peaks. On streaming platforms, that track will be normalized to the target, making the overlimiting entirely counterproductive.
Aim for loudness that serves the music rather than loudness for its own sake. A well-balanced, dynamic master at -14 LUFS will outperform a squashed one at -7 LUFS in nearly every real-world listening context.
9
Key Takeaways For Mastering Music
Learning how to master music is a process that rewards patience, honest listening, and incremental decision-making. It is not a single button or a magic plugin; it is a sequence of informed choices applied to a well-prepared mix.
Here is a summary of the most important principles from this guide:
- Prepare a clean premaster: export as 24-bit WAV or AIFF with 3-6 dB of headroom and no heavy limiting on the mix bus.
- Build a purposeful mastering chain: EQ for tonal balance first, then compression for glue and density, then a limiter for peak control and final loudness.
- Use reference tracks with level-matching: Compare your master to professionally released music at the same LUFS level to make accurate tonal and dynamic judgments.
- Target streaming loudness standards: Aim for around -14 LUFS integrated and a -1 dBTP true-peak ceiling across most platforms.
- Check translation across playback systems: Listen on headphones, speakers, earbuds, and small devices before finalizing your master.
- Choose the right mastering approach: DIY mastering works for frequent, lower-stakes releases; AI mastering tools are fast and affordable for demos; a professional mastering engineer is the right call for releases where quality is critical.
- Export correctly: Use a lossless WAV as your distribution master, create separate versions for streaming, downloads, and sharing, and do a final quality check before uploading.
Mastering is learnable. The more you practice critical listening, the faster your decision-making improves. Start with a clean mix, keep your processing decisions conservative, and let the music tell you what it needs.
Happy mastering!

Frequently Asked Questions
1
What are the essential steps in the mastering process for beginners?
When learning how to master a song, the core steps are straightforward. You must export a clean premaster, apply EQ to correct tonal imbalances, use gentle compression for density, and apply a limiter to reach your target LUFS before your final export. Checking translation on multiple playback systems before release is also an important part of the process. Each step builds on the one before it, so the quality of your premaster directly affects how well the other stages work.
2
Is mastering music difficult to learn, and how long does it typically take?
The basic mechanics of mastering are learnable relatively quickly, but developing the critical listening skills to make good decisions consistently takes much longer. Most producers can follow a functional mastering workflow within a few weeks of focused practice, but producing results that rival professional mastering engineers typically takes months to years of experience. Starting with simple, well-mixed tracks and modest processing goals will accelerate your progress.
3
How can I master a song in Logic Pro using built-in tools?
In Logic Pro, create a new session and import your stereo mix onto a single audio track. Use the Channel EQ for tonal adjustments, the Multipressor or built-in compressor for dynamics control, and the Limiter plugin on the master channel to set your peak ceiling. Logic's built-in loudness meter can help you monitor your integrated LUFS level as you work. The stock plugins in Logic are capable of producing release-ready results when used with good technique and an accurate monitoring setup.
4
How can I master a song in FL Studio with stock plugins?
FL Studio's stock plugin set includes Parametric EQ 2 for tonal adjustments, Fruity Peak Controller or the built-in Maximus multiband processor for dynamics, and Fruity Limiter for final peak control and limiting. Place these in order on the master effects chain, with EQ first, compression or Maximus second, and Fruity Limiter last. Use the built-in mixer metering and a loudness measurement plugin like Youlean Loudness Meter, which is available as a free VST, to monitor your LUFS target throughout the session.
5
What are the best ways to master a song for free without sacrificing quality?
Free options include using the stock plugins in your existing DAW, downloading free VST plugins such as TDR Nova for EQ, MJUC Jr. for compression, and Limiter No6 for limiting, and using free loudness metering tools like Youlean Loudness Meter to hit accurate LUFS targets. The quality of the result depends far more on your listening skills and the quality of your mix than on whether your tools cost money. A modest chain of well-used free plugins will consistently outperform an expensive chain used without proper technique.
6
What is the recommended approach for mastering an entire album consistently?
Master all tracks in the same session or across closely timed sessions using the same monitoring conditions and the same reference tracks. Start by identifying the loudest and most energetic track on the album and use it as the loudness anchor; master the remaining tracks to match that perceived energy level rather than forcing all tracks to identical LUFS readings. Leave subtle tonal differences between tracks intact so the album feels like a cohesive body of work rather than a set of identical-sounding masters. Sequencing and track spacing should be finalized after individual mastering decisions are made.